
That secondhand dresser sitting in your garage is not broken. It just looks tired, and tired is fixable. Most people scroll past a scratched up nightstand or a boxy old chest because they assume changing it means real carpentry skills, a garage full of tools, and a free weekend they do not have. That assumption is wrong more often than not.
The truth is most furniture renovation projects come down to paint, hardware, paper, and fabric. You do not need to strip a table down to bare wood to make it feel new, and you do not need a table saw to make a flat drawer front look custom. A lot of the pieces getting reshared right now started as something plain from a yard sale or a parent’s basement.
This list is built for beginners. Some ideas take an hour. A few take a weekend. None of them require you to already know what you are doing before you start.
1. Decoupage a Plain Drawer Front With Leftover Wallpaper Scraps
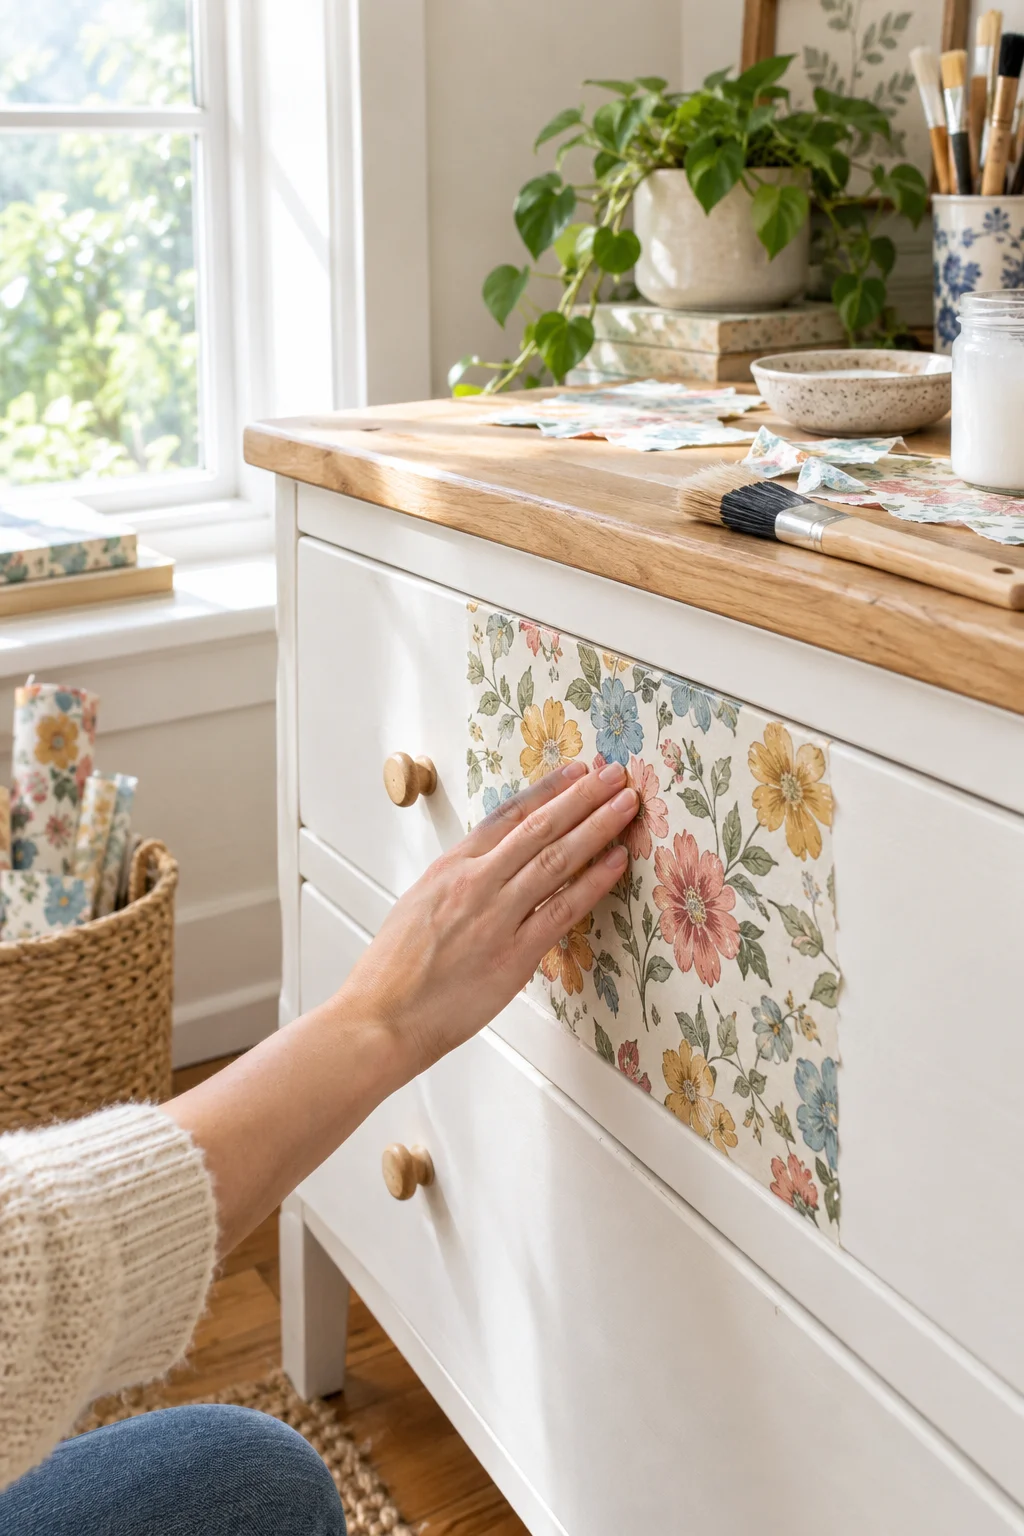
Plain flat drawer fronts are the easiest place to start, and they hide almost anything you glue down a little crooked. Grab leftover wallpaper, gift wrap, or a printed napkin you like the look of.
Here is the order that keeps it from bubbling:
- Cut the paper slightly larger than the drawer front
- Brush on a thin layer of decoupage glue and smooth outward from the center
- Trim the edges with a craft knife once it is fully dry
- Seal with two light coats of matte varnish
A busy floral print on the drawers next to a plain painted body looks planned, not thrown together, once the hardware goes back on.
2. Wrap a Wood Chair Frame in Mismatched Fabric Scraps
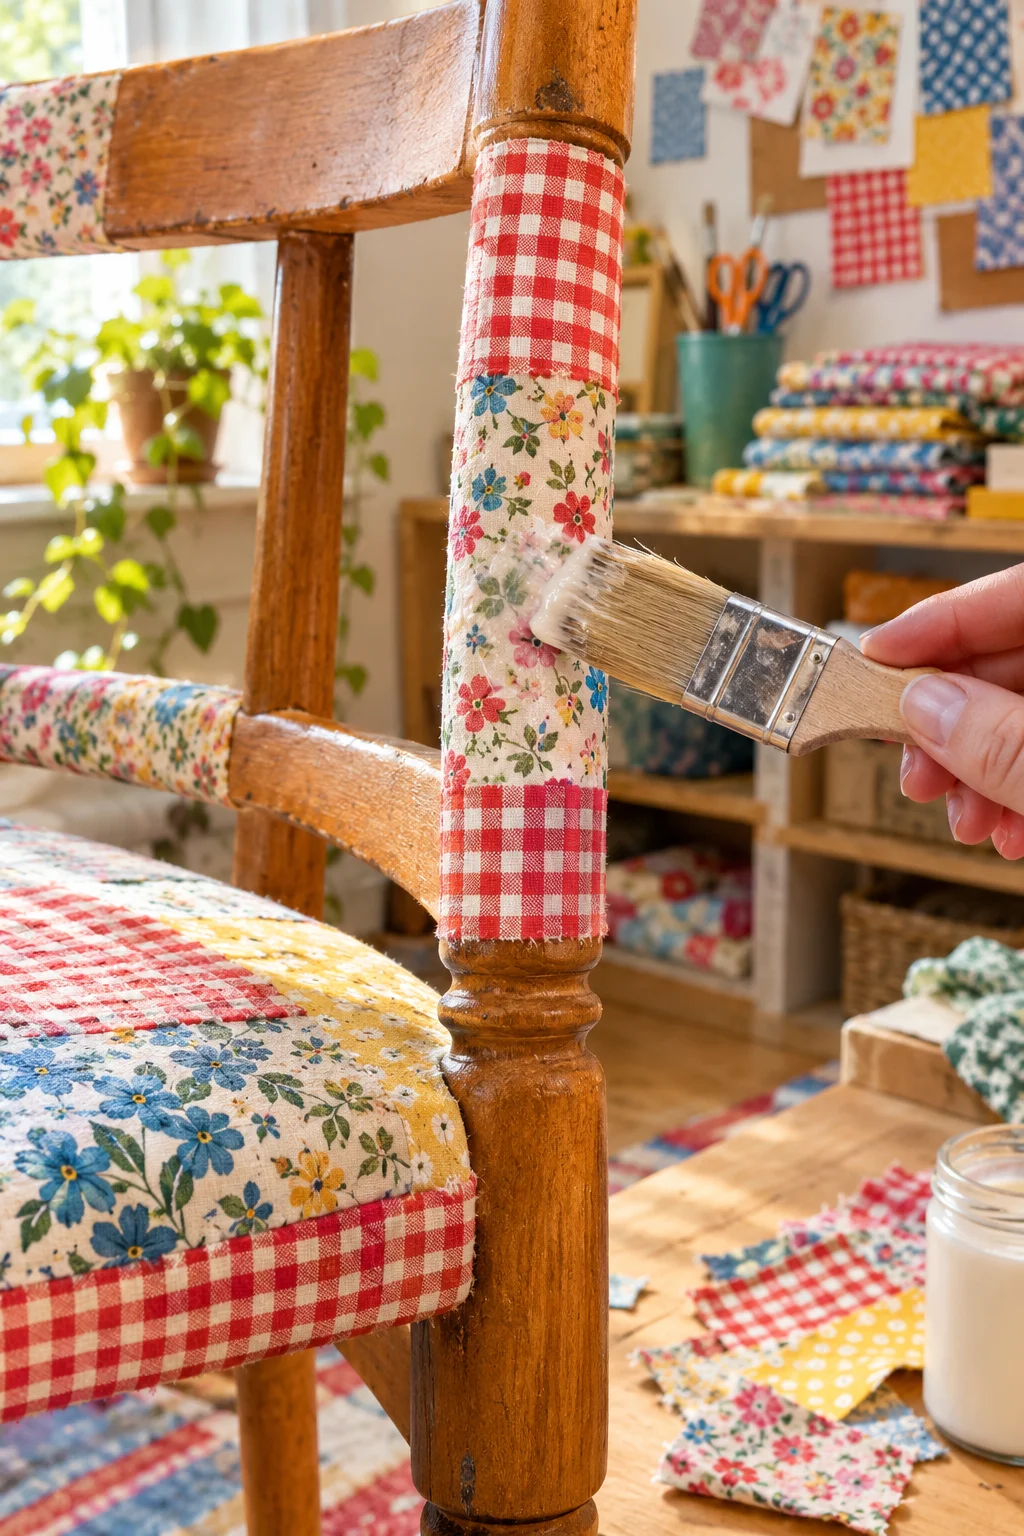
That one chair that never matches the rest of your dining set is a perfect fabric wrapping project. Instead of one uniform fabric, use two or three scraps, the way a check print seat and a floral crossbar play off each other.
Wrap fabric around the spindles and legs like a bandage, overlapping each layer by about half an inch, then brush on fabric decoupage medium to seal it. Let each section dry before moving to the next spindle so the wrap does not slip.
One pattern per section is the rule that keeps the whole thing readable instead of looking like a costume.
What to grab before you start wrapping
3. Swap the Knobs for Oversized Brass Cup Pulls
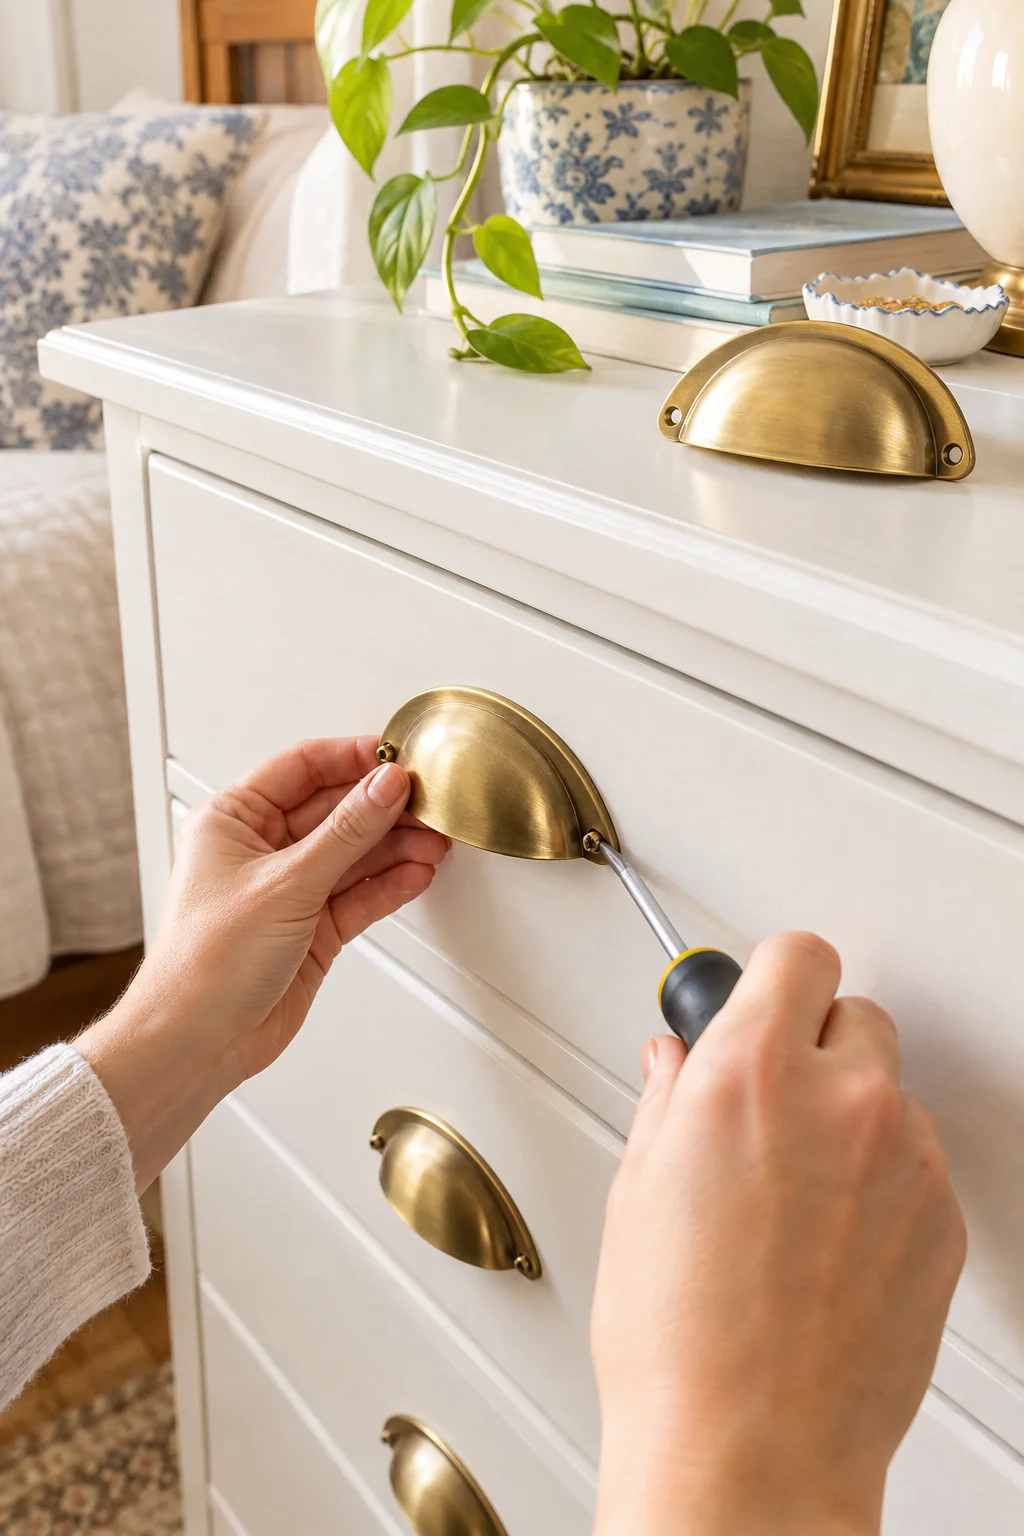
New hardware is the fastest way to make an old dresser look bought new. The rule is simple: go one size up from what came off. Small brass circles swapped for cup pulls in a warm gold finish read as an upgrade instead of a mismatch.
Before ordering anything:
- Measure the distance between the two existing screw holes, called bolt spacing
- Match new pulls to that spacing, or fill and redrill if you are switching styles
- Order one extra pull in case one gets scratched during install
Skipping that measurement is the most common mistake people make, and it usually means patching holes that did not need patching.
💡 Quick Tip
If your new pulls do not match the old bolt spacing, fill the extra holes with wood filler and matching paint before you drill new ones. Do this before your final coat, not after.
4. Chalk Paint a Dark Wood Dresser Into a Soft Greige Finish

Most people think a dark wood dresser needs to be stripped and sanded down to bare wood before paint will stick. Chalk paint does not work that way. It is made to grip over varnish, stain, and old finish without any of that.
The warm greige look with a natural wood top left exposed comes from two coats of chalk paint over the drawers and sides, a matte topcoat, and hand sanded edges to let a little of the original wood peek through.
Skip the primer. That is the whole point of chalk paint.
Heavy dark wood finish with worn knobs and a scratched top.
Soft greige drawers, a natural wood top, and warm brass pulls.
5. Pair a Natural Wood Top With a Bold Painted Base
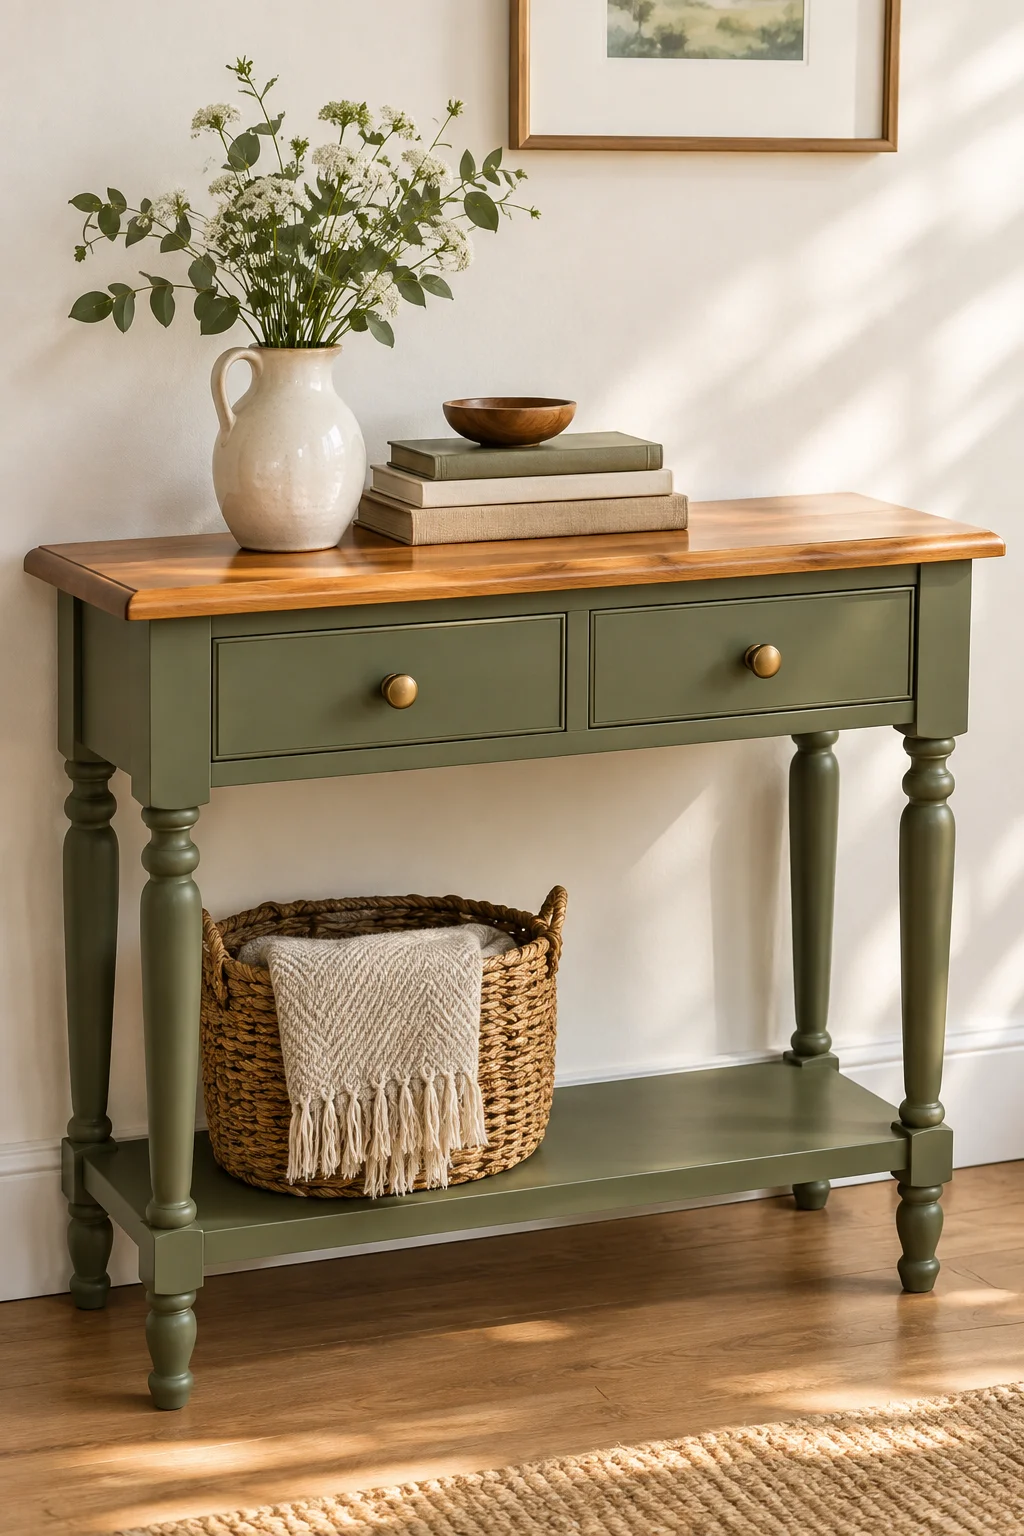
Paint the base, keep the top bare, and let the wood grain do the contrast work. This works especially well on dressers, sideboards, and console tables where the top already has decent grain hiding under old wax or polyurethane.
Tape off the top edge right where the wood meets the drawers. Paint the base in a saturated color like olive, clay, or deep navy, two coats minimum. Once dry, sand the top lightly and refresh it with oil or matte polyurethane so it stays a shade lighter than the base.
The contrast is what sells it. A muted base and a glossy top look unfinished sitting side by side without each other.
Tape off the top edge where the wood meets the drawers.
Paint the base in two even coats of a saturated color.
Sand and reseal the top with oil or matte poly, a shade lighter than the base.
6. Turn the Dead Center Gap Into Open Basket Storage
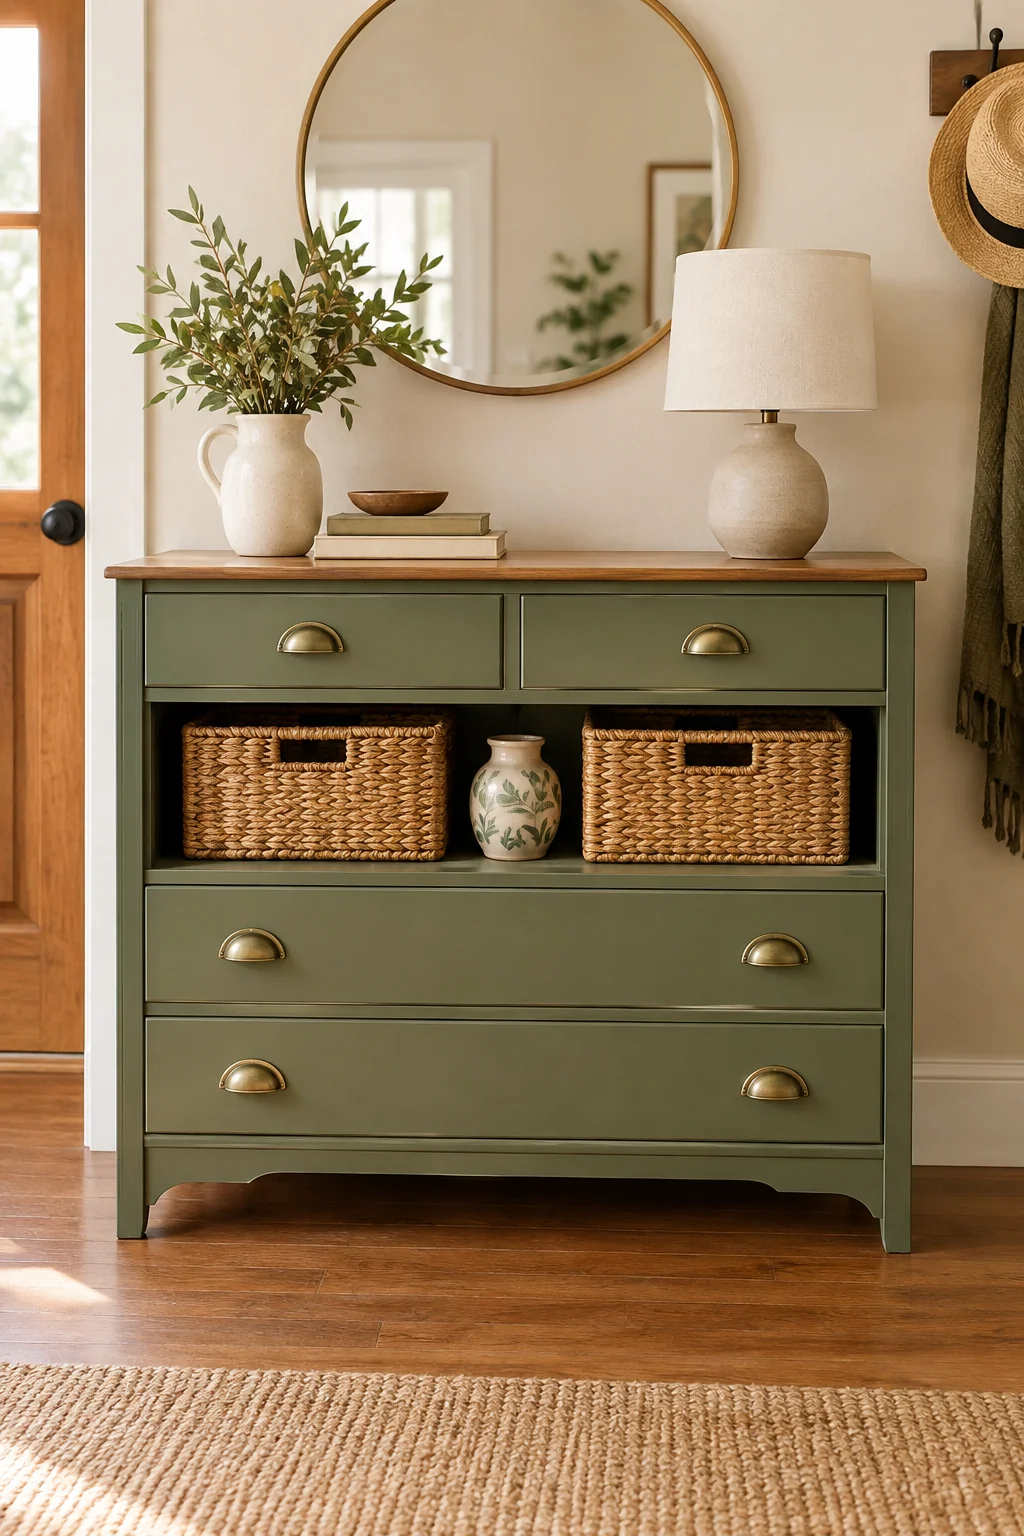
Old dressers from the 60s and 70s often have a strange middle section, a slot with a small drawer or nothing at all, wedged between the two stacks of real drawers. It usually sticks, and most people just leave it empty and stop using it.
Pull that center drawer out entirely if it is shallow and awkward, sand the opening smooth, and slide in two woven baskets sized to fit. A small vase or a stack of books in the very center keeps it from looking like a hole.
This is one of the few upgrades where removing something makes the piece more useful, not less.
7. Add Picture-Frame Trim to Flat Slab Drawers for a Shaker Look
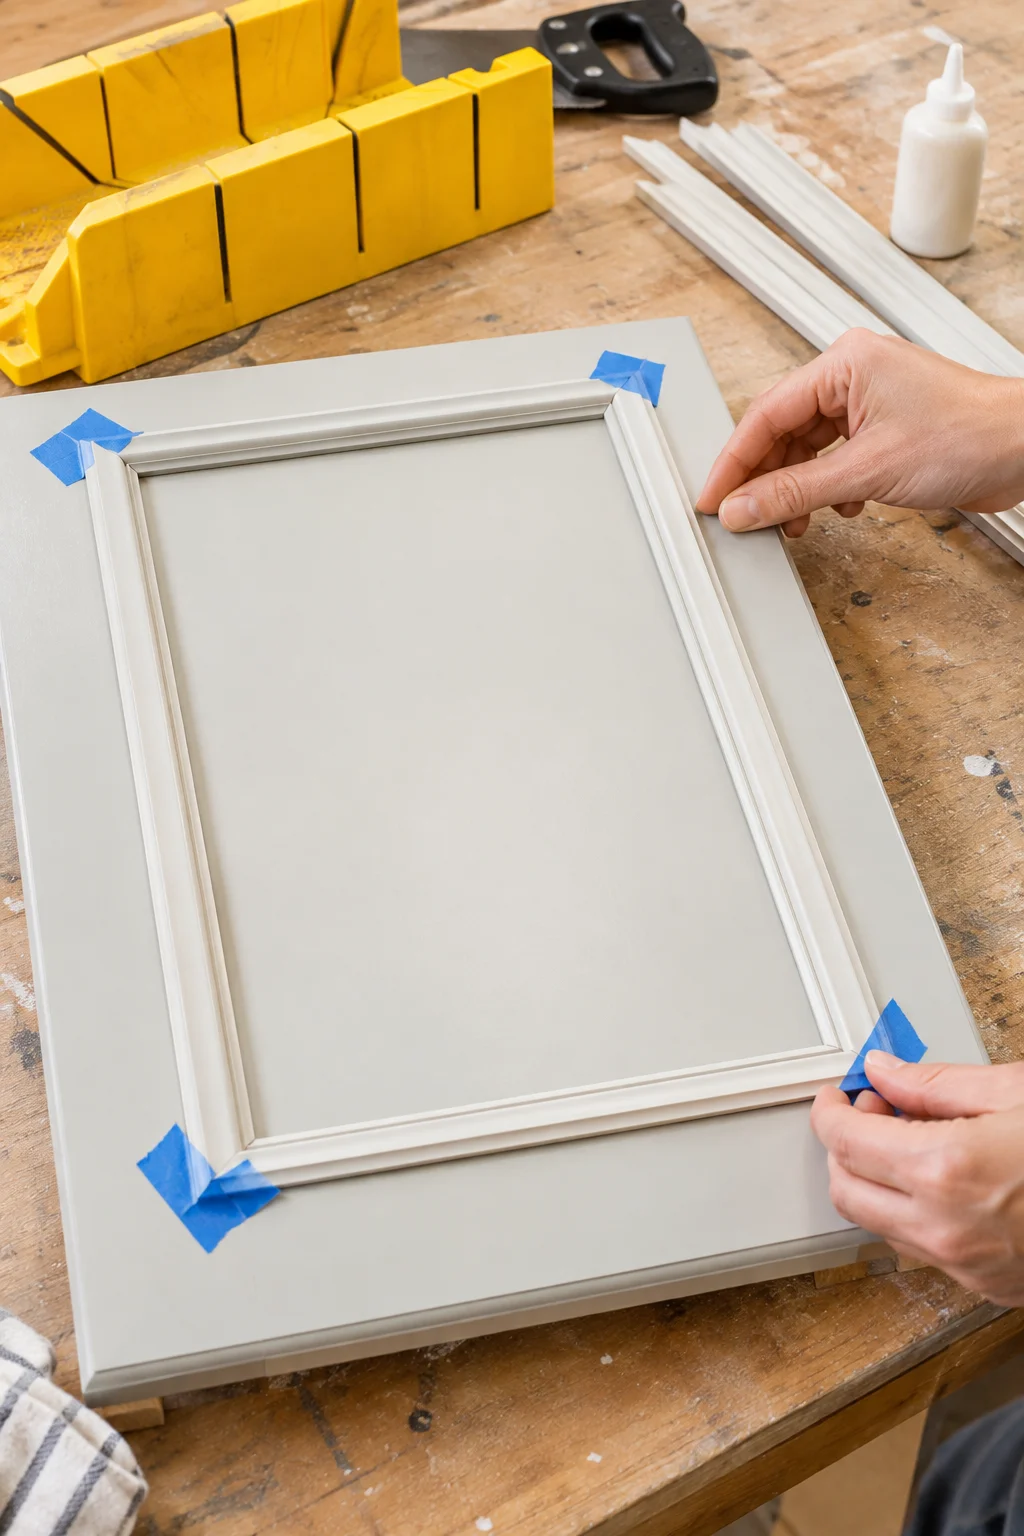
Glue thin picture frame molding onto a flat drawer front, about an inch in from each edge, and it stops looking like builder grade furniture almost overnight. Miter the corners at 45 degrees, glue, tape in place, and let it set overnight before you fill the seams and paint.
You have two ways to get there, and they land pretty differently:
| Peel and Stick Trim Kit | Cut Your Own Molding |
|---|---|
| No miter saw needed, precut corners | Costs less per drawer, more setup |
| Fixed sizes only, may need trimming | Fits any drawer size exactly |
Either way, prime the seams twice. Trim always shows the joint line if you skip that step.
8. Limewash a Heavy Wood Tabletop Instead of Stripping It
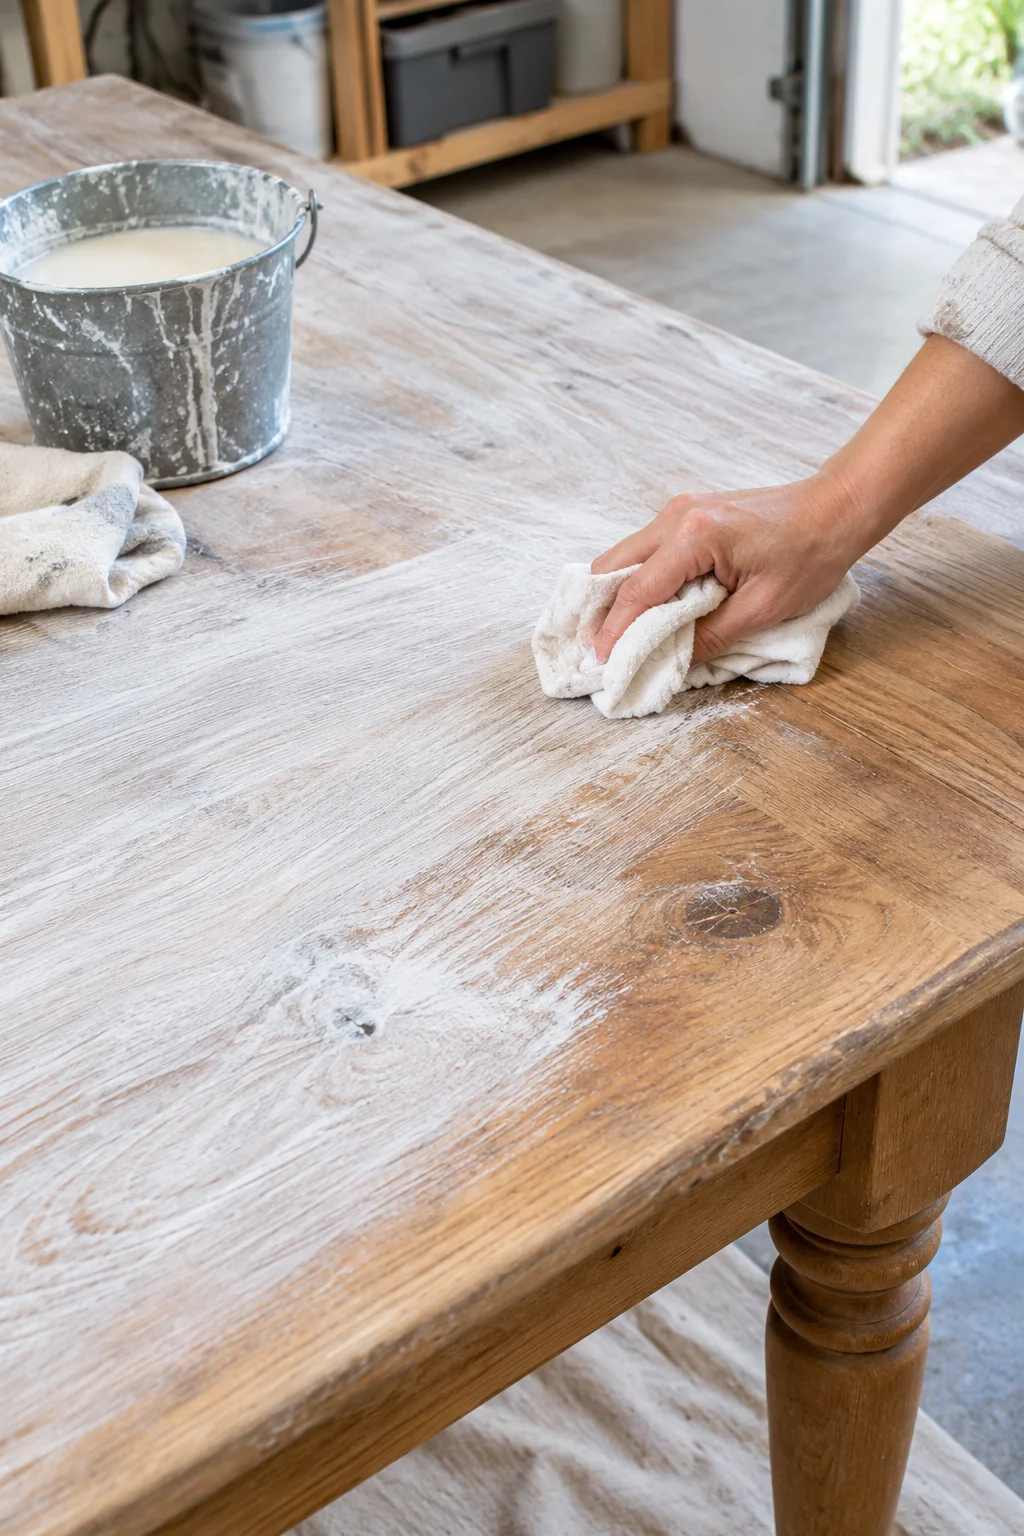
People assume a heavy, orange toned wood tabletop needs a full strip and sand before it can look updated. Limewash skips all of that. It is a thin, chalky wash that sits on top of the wood and lets the grain show through instead of covering it completely.
Water the limewash down until it is closer to milk than paint, brush it on in the direction of the grain, then wipe most of it back off with a rag before it dries. Build up thin layers instead of one thick one.
Test the wash on the underside of the table first.
Wipe with the grain, not across it.
Applying it thick in one coat, it goes on chalky and uneven.
Sealing before it is fully dry.
9. Color-Drench the Drawer Interiors to Match the Outside
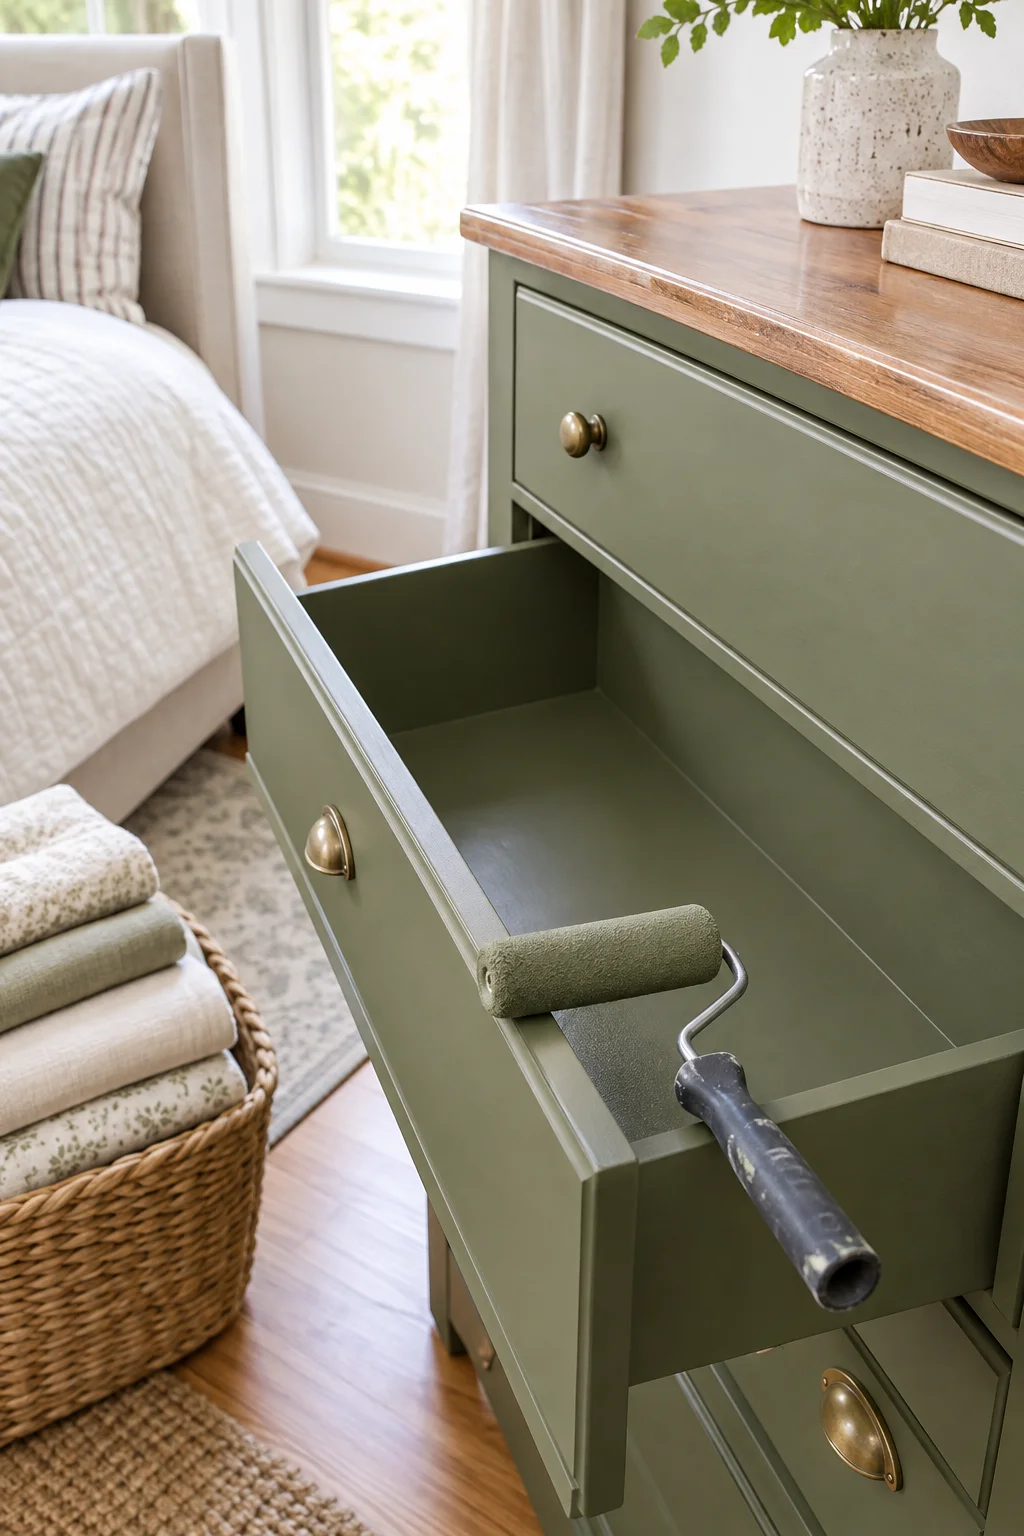
Painting the inside of each drawer the same color as the outside is a small move that most people never think to do, and it is the kind of detail that shows up the second a drawer gets pulled open in front of a guest. Sand lightly, wipe the dust out with a damp cloth, and use a foam roller so the finish stays smooth instead of streaky.
A painted drawer interior takes maybe twenty extra minutes total and it is the detail people actually comment on.
Use a paint that dries hard, like an enamel, since interiors get more scuffing from folded clothes than the outside ever will.
10. Stencil a Botanical Pattern on Just the Top Drawer
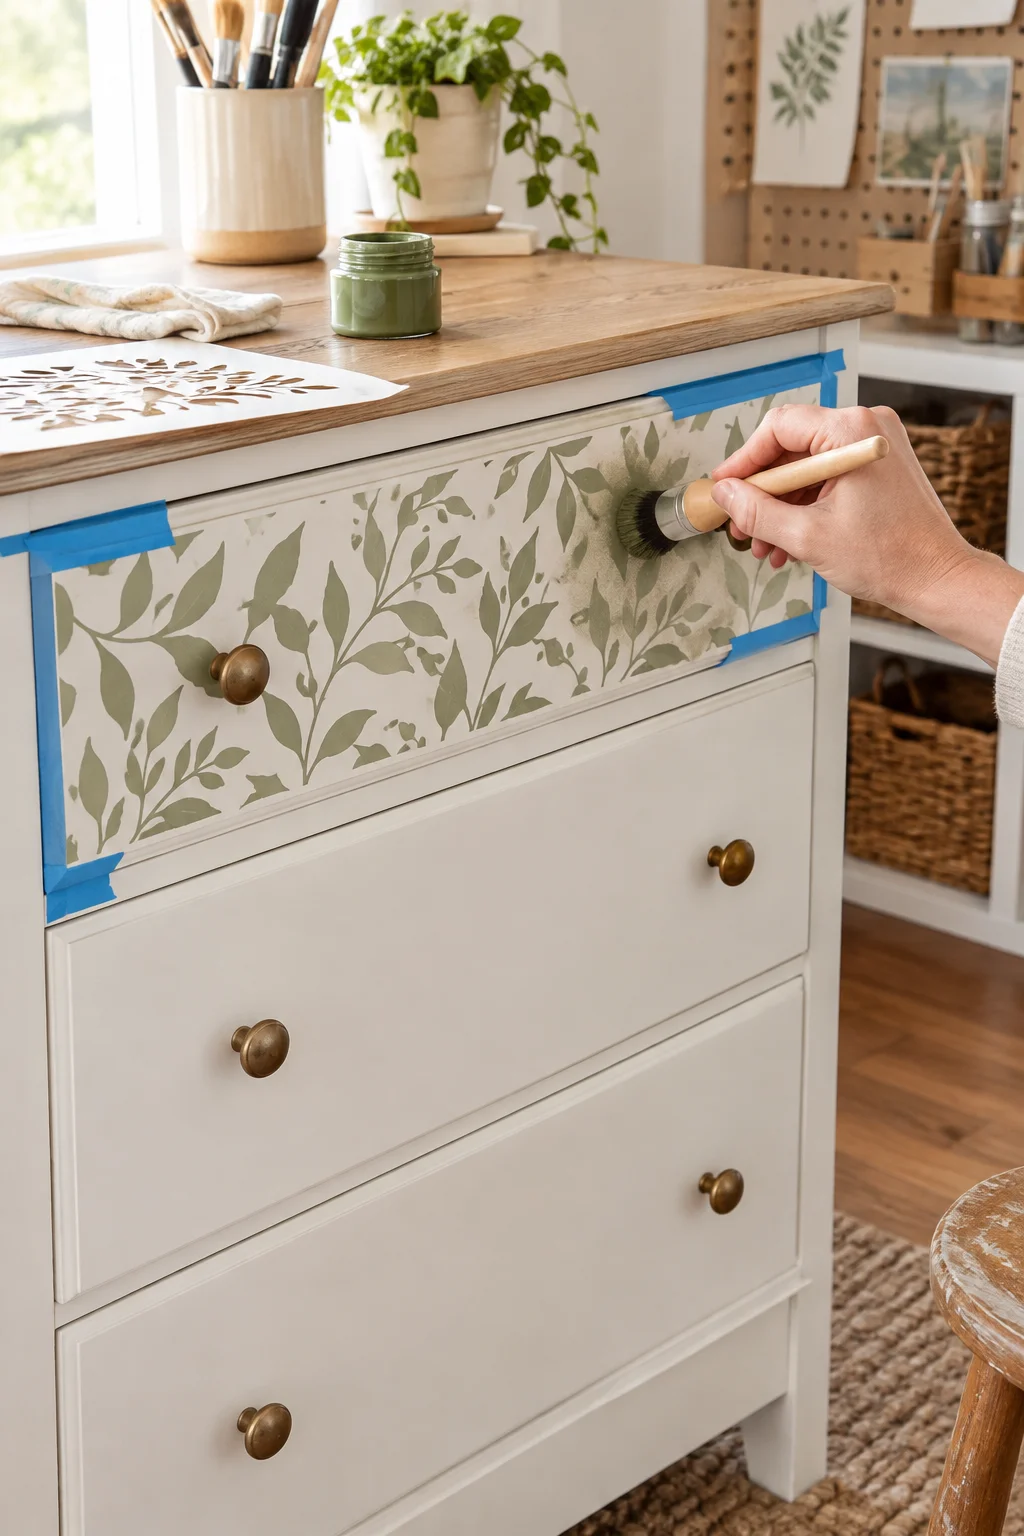
One drawer is plenty. Stenciling every drawer front on a dresser usually ends up looking busier than planned, but limiting the pattern to just the top drawer keeps it as an accent instead of the whole personality of the piece.
The order that keeps stencils crisp instead of smudged:
- Tape the stencil down at all four corners, not just two
- Load the brush, then blot most of the paint off on scrap paper before it touches the drawer
- Dab straight down in small circles instead of dragging the brush sideways
Too much paint on the brush is the single biggest reason stencils bleed under the edges.
Tape the stencil down at all four corners.
Blot most of the paint off the brush before touching the drawer.
Dab in small circles instead of dragging sideways.
11. Reupholster a Hard Wood Seat With No Sewing Required
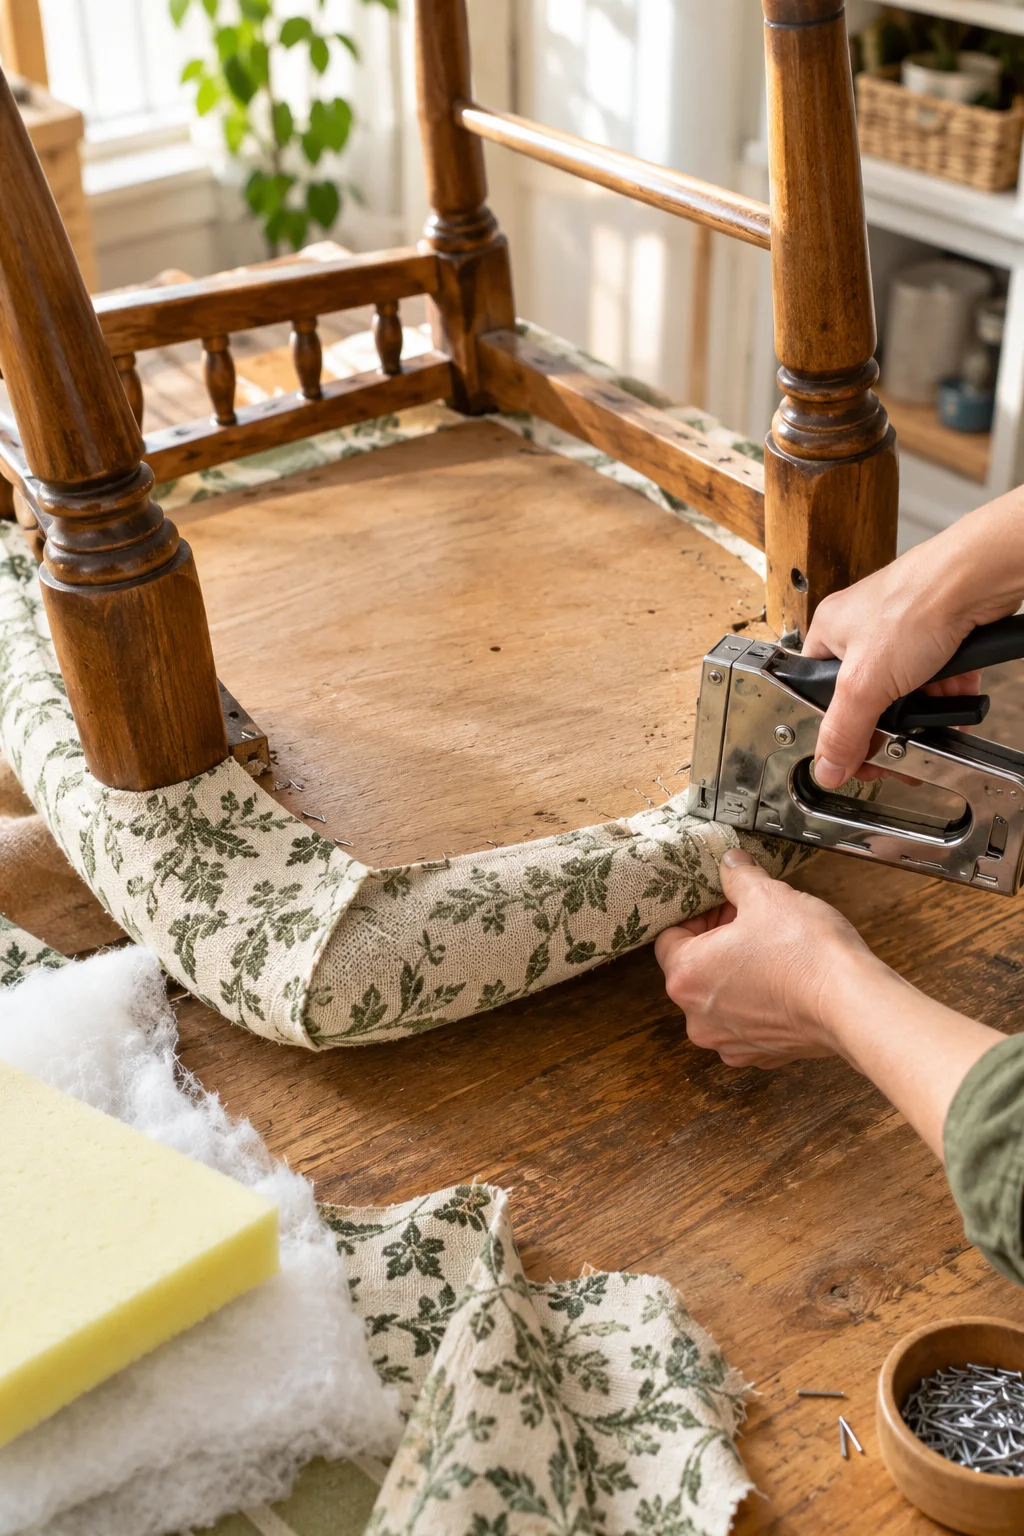
A staple gun does the work a sewing machine usually gets credit for. If you have a wood chair with a flat, hard seat, the kind that makes guests shift around after ten minutes, you can pad and cover it in under an hour without threading a needle once.
Cut a piece of foam to match the seat shape, wrap it in batting for softness, then pull your fabric taut over the top and staple it to the underside, working from the center of each side outward toward the corners.
What to grab before you start
Working corner to corner instead of side to side is what causes puckering, so stick to the center out method even when it feels slower.
12. Add Furniture Risers to Lighten a Boxy Low Dresser
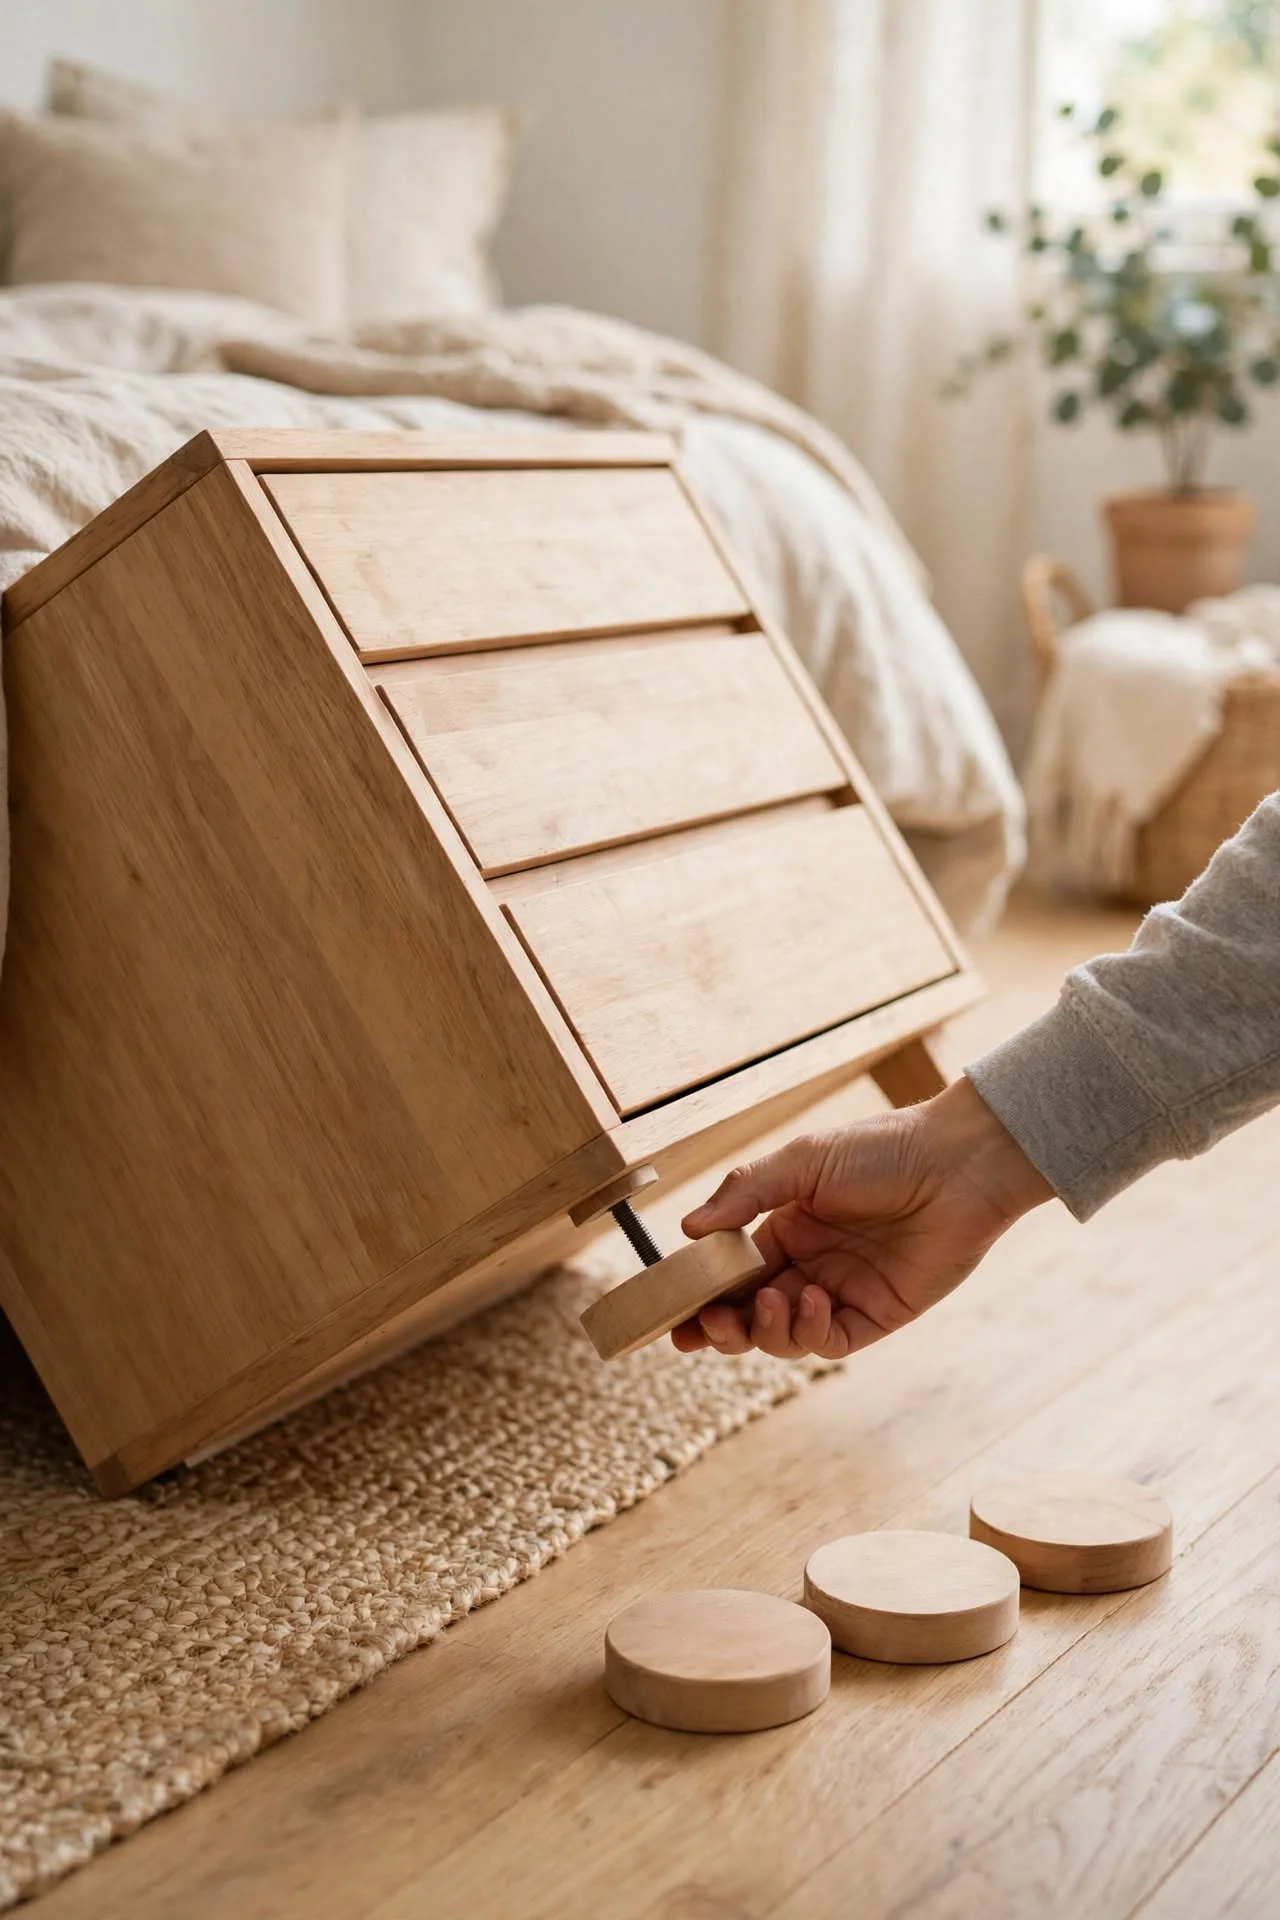
Some dressers sit so low to the floor that no paint job will fix how heavy they feel in a room. That is a proportion problem, not a finish problem, and the fix is a set of risers, either simple round wood pucks or a set of angled tapered legs screwed straight into the existing feet.
Even two extra inches off the floor changes the whole silhouette, and you can see under the piece to vacuum, which the low version never allowed.
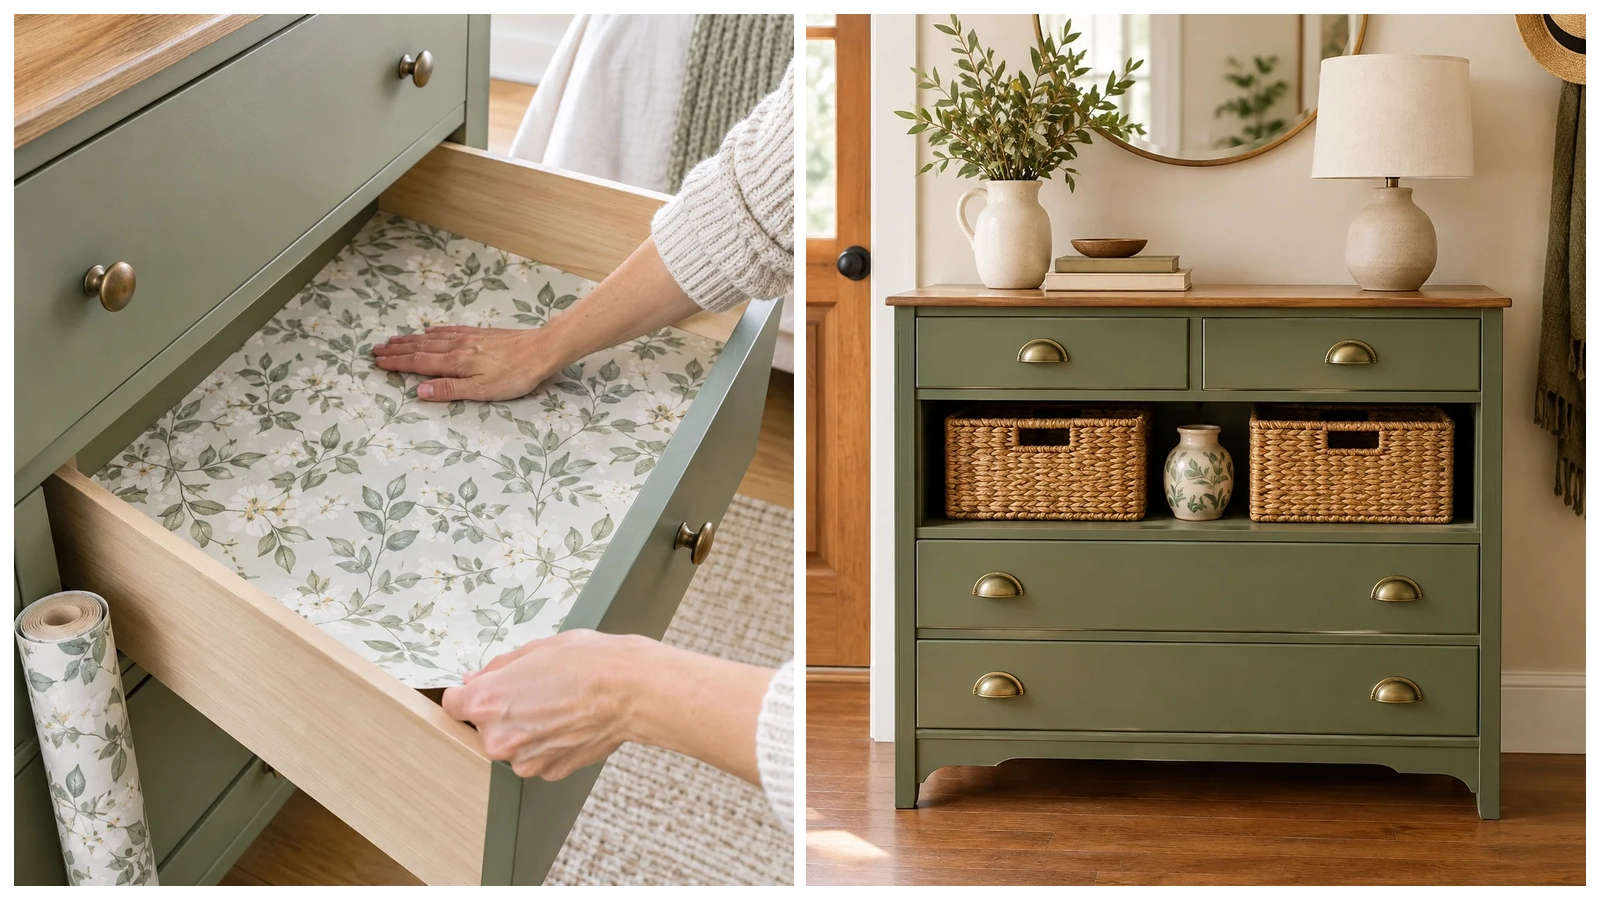
13. Line the Drawer Interiors With Peel-and-Stick Wallpaper
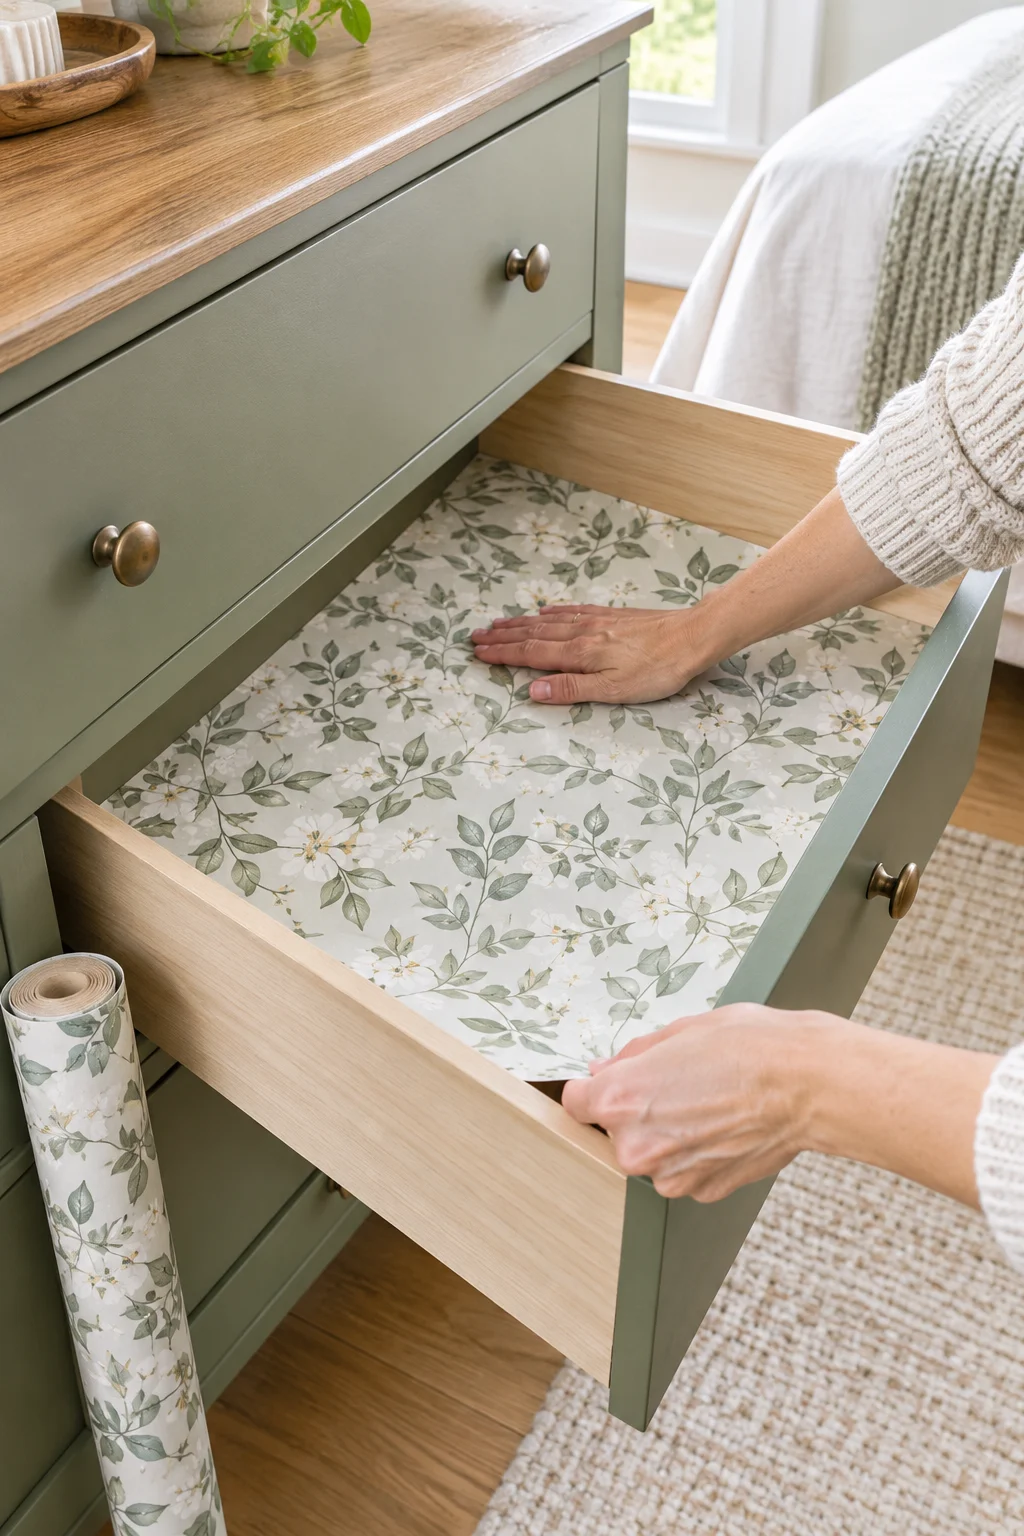
Bare, splintery drawer bottoms are one of the fastest tells that a piece is old and unloved. Peel and stick wallpaper solves it without any glue, brushes, or dry time, and it also stops sweaters from snagging on rough wood.
Measure each drawer bottom, cut the wallpaper about a quarter inch smaller on every side so it does not curl at the edges, and press it down starting from one corner and working diagonally out.
Rough, splintery wood bottoms that catch on fabric.
Smooth, patterned drawers that look finished the moment they open.
Works best on drawers holding clothes rather than tools, since sharp edges will eventually lift the paper.
14. Fade an Ombre Paint Effect Down the Drawer Stack
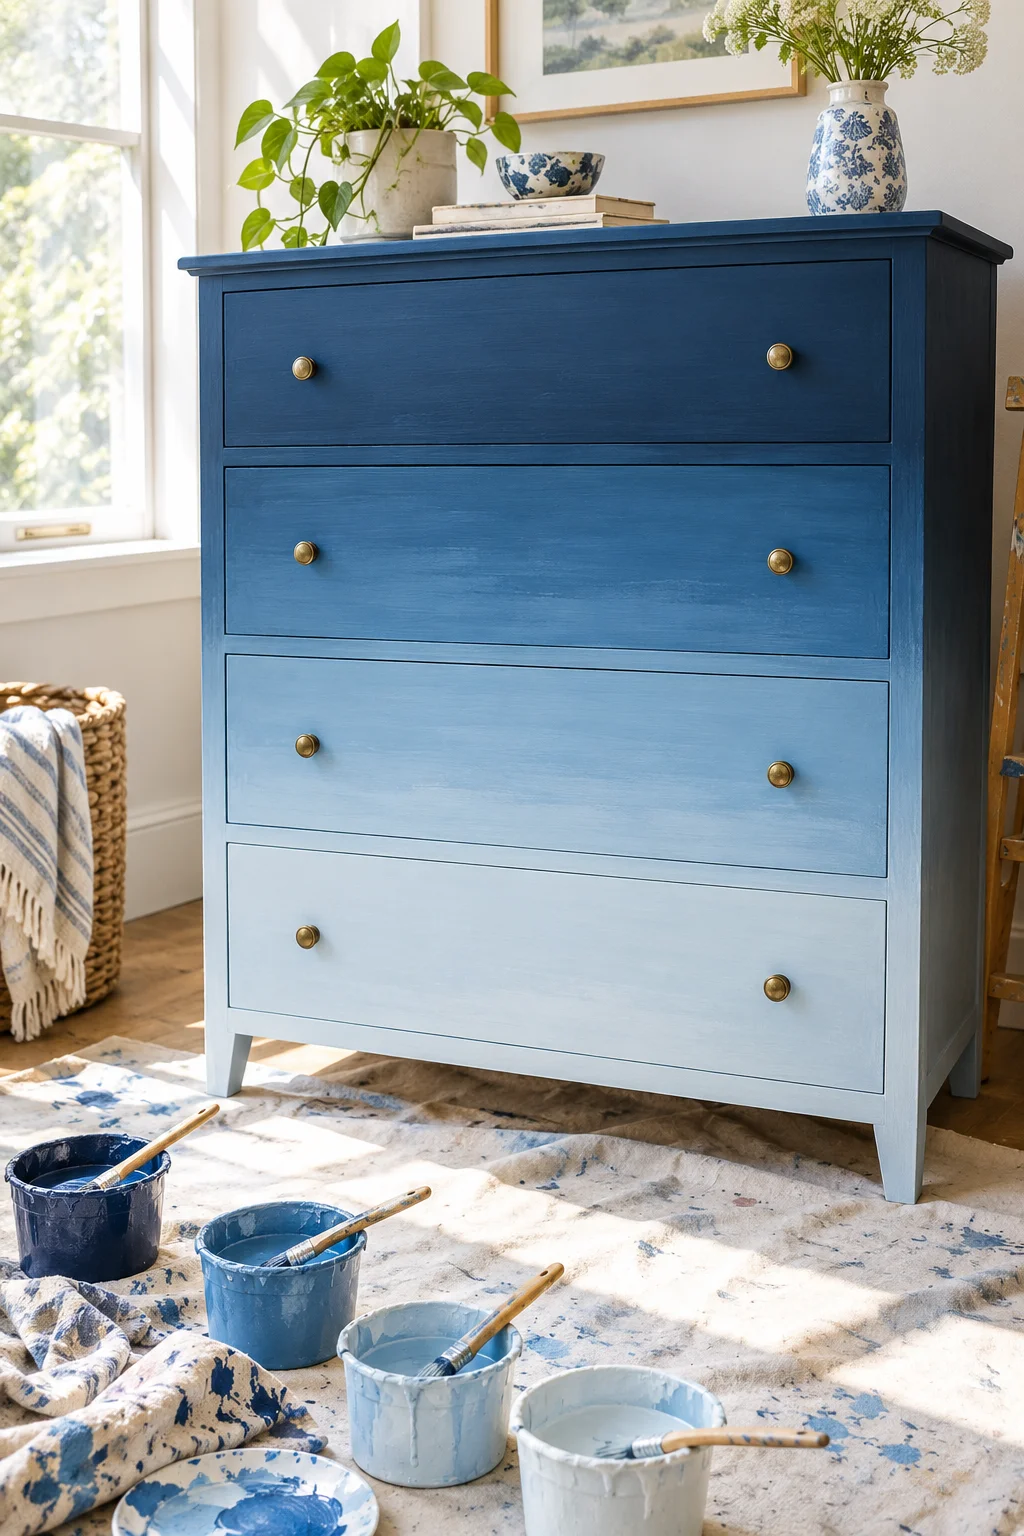
An ombre finish is basically five drawers mixed from the same paint can. Mix your base color with white in small increments for each drawer down the stack, keeping one drawer’s worth of paint in a separate cup so you can go back and touch up without guessing the ratio again.
Blend the transition where two shades meet using a dry brush in a light X pattern before the paint fully sets, rather than trying to get a hard line between drawers.
💡 Quick Tip
Write down how many pumps or spoonfuls of white you add to each cup. It is the only way to redo a drawer later if the finish gets scratched.
15. Cut a New Wood Counter Top for an Old Dresser

A warped or badly stained top is the reason a lot of otherwise solid dressers get left at the curb, but the top is also the one piece you can replace entirely without touching the rest of the piece. A cut-to-size butcher block or pine board from a hardware store will do the job.
Have the board cut to size at the store if you do not own a saw.
Attach with L-brackets from underneath so no screws show.
Skipping a sealant coat, raw wood stains fast from cups and plants.
Buying a board without checking it fits your drawer opening width.
Wrapping This Up
None of these fifteen ideas need a workshop, and most of them need less time than a trip to the furniture store. That is really the point of diy furniture renovation projects like these. The piece you already own, scratched top, dated hardware, dark wood or not, has more life left in it than it gets credit for.
Start with whichever project matches what is bothering you most about the piece. A knob swap fixes a tired look in an afternoon. A full paint and top job takes longer but changes the whole room around it. Either way, you are working with what you have instead of replacing it.
Save this list for the next time a secondhand dresser or a wobbly old chair crosses your path. It will still be here when you are ready to start.