
A lot of first aprons end up on a hook, unworn. The pattern looked good in the photo. Then the neck strap dug in halfway through chopping onions, or the skirt was too short to catch a single splatter.
That rarely comes down to sewing skill. The apron just didn’t match how that person cooks, or the kitchen it would live in. A farmhouse kitchen with open shelves wants a different apron than a narrow galley where everything is one step away. A weekend baker needs big pockets. A weeknight cook may never touch them.
These apron sewing pattern ideas are matched to real kitchen styles, including farmhouse, vintage, coastal, modern, and cottagecore. Some take one sitting. Others are better for a slow weekend. Each one comes with a practical detail, like where a pocket should sit or which fabric hides splatter, so the apron you sew is the one you actually reach for.
Start with the kitchen you have, then pick the shape that fits it.
1. Classic Bib Apron With An Adjustable Neck Strap
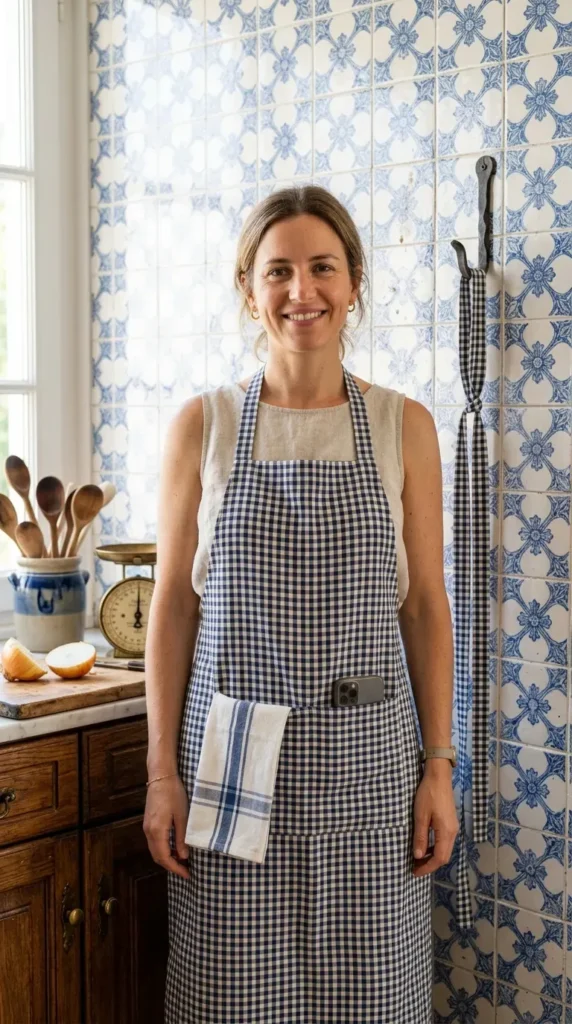
Three choices shape how it wears:
- Neck strap: cut it as two long ties, one on each top corner, and knot them behind your neck. Tying higher or lower changes the fit.
- Bib height: hold the fabric against your body and mark the top edge, usually between the collarbone and mid chest.
- Fabric: medium weight cotton or cotton twill holds its shape and washes well.
In a traditional kitchen with wood cabinets and patterned tile, a solid navy or a small check keeps the apron calm. Sew one wide pocket across the skirt for the phone or towel you keep losing.
2. Cross Back Apron Sewing Pattern That Takes The Pull Off Your Neck

A neck loop feels fine for ten minutes. After an hour of kneading dough or stirring a big pot, it feels like a rope.
A cross back apron shifts that weight onto both shoulders. The straps cross behind you and rest across your upper back instead of circling your neck.
Farmhouse kitchens suit it well. Linen, ticking stripe, or heavy cream cotton all look at home next to a scrubbed wooden table.
Cut the straps long, then trim after you try it on. A strap that’s too short makes the apron ride up every time you reach for the top shelf.
Attach the crossed straps
Sew a long strap to each top corner of the bib, then press the seams flat.
Put the apron on and cross the straps behind you. Pin each one where it lands on the waistband.
Stitch each strap to the waistband at your pin marks. For a fit you can change later, sew a button at each spot and add a buttonhole to the strap ends.
3. Bistro Waist Apron With A Side Slit And Towel Loop

Straight lines, a hem that stops near the knee, and one wide pocket across the front. That’s the shape of a bistro apron, the kind café staff wear through a whole shift without adjusting it.
It’s a waist apron, so there’s no bib and no neck strap to fuss with. Long ties wrap around once and knot in front.
Linen, cotton twill, or a navy and white stripe fits a French country kitchen with cream cabinets and a wooden counter.
Press the hem well, because a crisp hem is what makes a plain apron look finished.
4. Tea Towel Apron You Can Sew In One Sitting

Start with one large tea towel with hemmed edges. That skips the hemming completely.
- Press the towel flat, then fold the top edge down about an inch and a half.
- Stitch the loose edge of the flap down to make a channel, and leave both ends open.
- Pull a long tie through the channel with a safety pin.
Tie it around your waist and gather the towel to fit. Small kitchens suit this one, since it folds flat enough to live in a drawer.
What to grab first
5. Retro Hostess Apron With A Gathered Skirt And Ruffle Hem
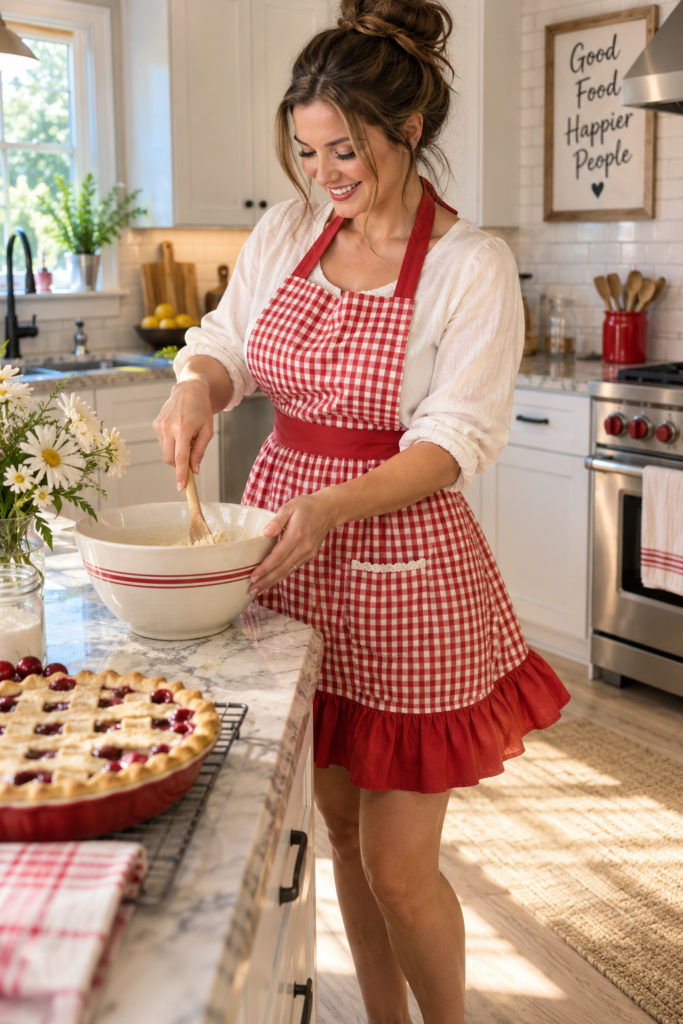
Ruffles look like advanced sewing, and they aren’t.
A ruffle is a long strip of fabric with two rows of long stitches. Pull the bobbin threads and the strip bunches into even gathers. Cut it about twice as long as the hem it will sit on, so the gathers look full instead of flat.
Gingham, small florals, and polka dots all suit a vintage kitchen with pastel cabinets or a checkerboard floor. A solid waistband keeps a busy print from taking over.
Pin every few inches, and the gathers stay where you put them.
A plain half apron with a straight hem, one fabric, and one flat pocket.
The same apron with a gathered ruffle on the hem, a solid waistband, and a pocket cut from the ruffle fabric.
6. Reversible Apron With A Weekday Side And A Guest Side
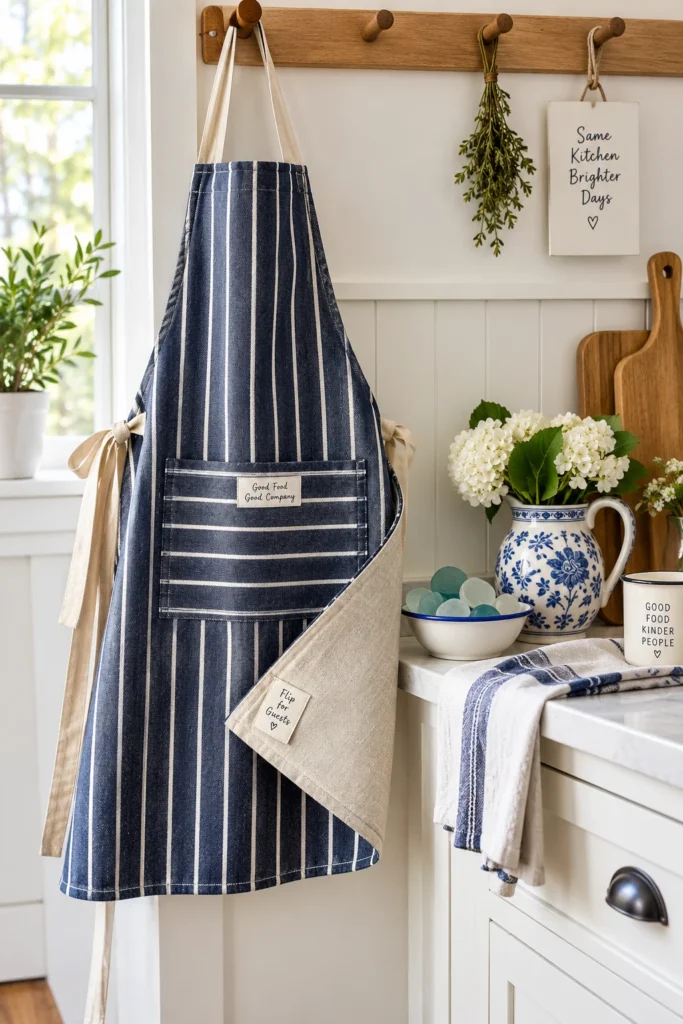
Guests are ten minutes away and your apron is still wearing Tuesday’s tomato sauce. Flip it.
A reversible apron is really two aprons sewn into one. Cut the apron body twice, once in each fabric. Place the layers right sides together, tuck the ties between them, and sew around the edge with a gap left in the hem. Turn it right side out and topstitch all around.
In a coastal kitchen, pair a navy stripe with a plain sand or sea glass solid. Match the fabric weights, because a stiff canvas against a thin cotton can ripple along the seams.
Flip it back after dinner, and Tuesday’s stain stays your secret.
| Weekday side | Guest side |
|---|---|
| Striped or checked cotton that hides splatter | A solid linen blend or a soft print |
| One deep pocket for a towel and your phone | A small pocket, or none, for a clean front |
| Flip to this side for chopping and cleanup | Flip to this side for plating and greeting |
7. Adjustable D Ring Apron That Fits Every Cook In The House
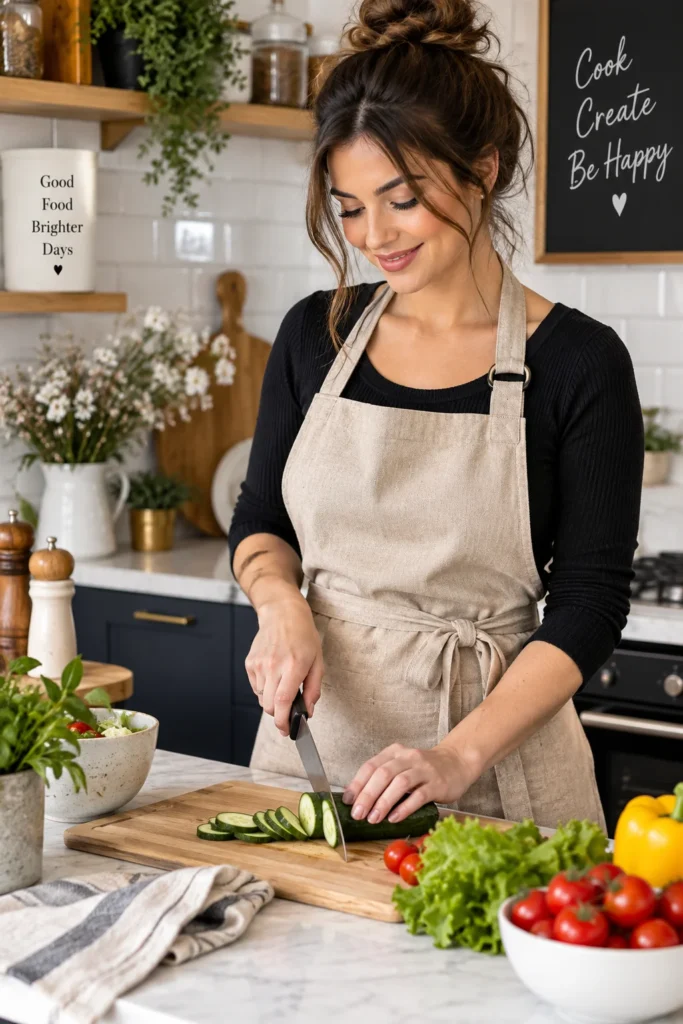
Never sew a neck strap to a fixed length if more than one person will wear the apron.
Two cooks sharing a kitchen are rarely the same height. A fixed apron rides up on the tall one and hangs too low on the short one.
A pair of D rings solves it. Loop a short fabric tab through both rings and stitch it to one top corner of the bib. Sew the long strap to the other corner, then thread the free end through the rings and pull to size.
In a modern kitchen, oatmeal or charcoal twill with black metal rings looks clean.
Reinforce the ring end with a box stitch, because that corner takes all the pulling.
Buy rings the same width as your strap.
Have the tallest and shortest cook try it on before you trim.
Hem the loose strap end so it doesn’t fray.
Cutting the strap to one fixed length.
Thin plastic rings that can crack under strain.
Short waist ties that run out on a wider waist.
8. Matching Kids Apron Sewing Pattern For Your Youngest Kitchen Helper
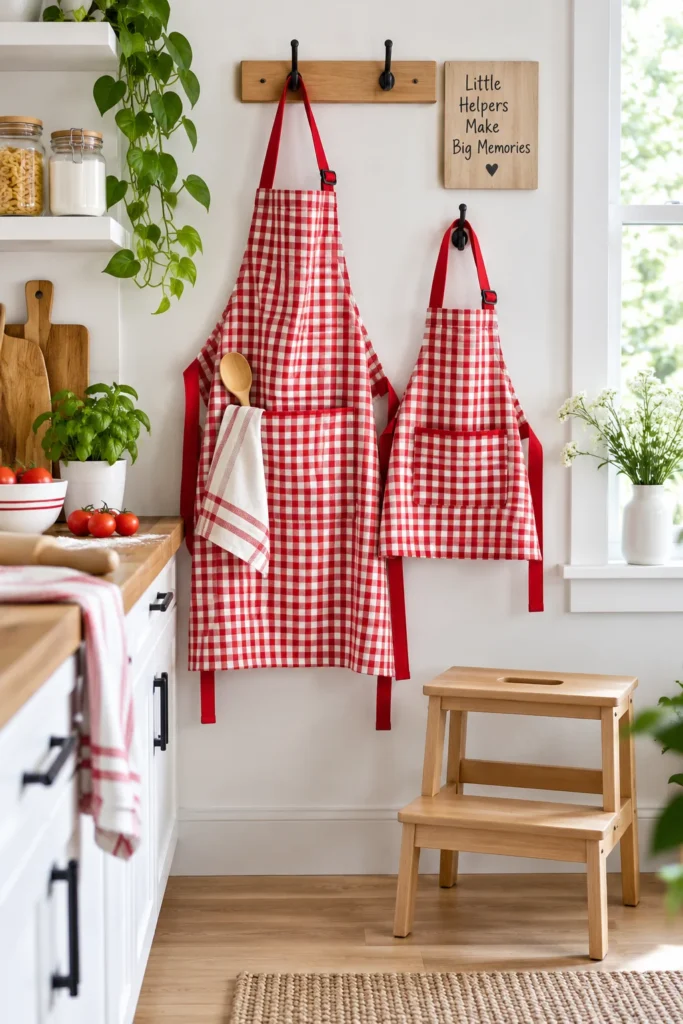
Kids notice matching. In a family kitchen, an apron that mirrors yours makes a first cooking job feel official.
Shrinking the adult pattern takes three changes:
- Measure from the collarbone to the knee, then cut the bib and skirt to that length.
- Cut the pocket smaller so little hands reach the bottom.
- Pick the same fabric as yours, or a busy coordinating print that hides fruit stains.
Sew a deep hem so it can be let down as they grow. Add a ribbon loop at the top of the bib so it hangs on a low hook they can reach themselves.
⚠️ Watch Out
Swap the knotted neck loop for a hook and loop closure so the apron comes off easily if it catches on something. Keep waist ties short, since long ones can snag on handles. Stay close whenever a child is near heat or sharp tools.
9. Wipe Clean Apron Sewn From Laminated Cotton
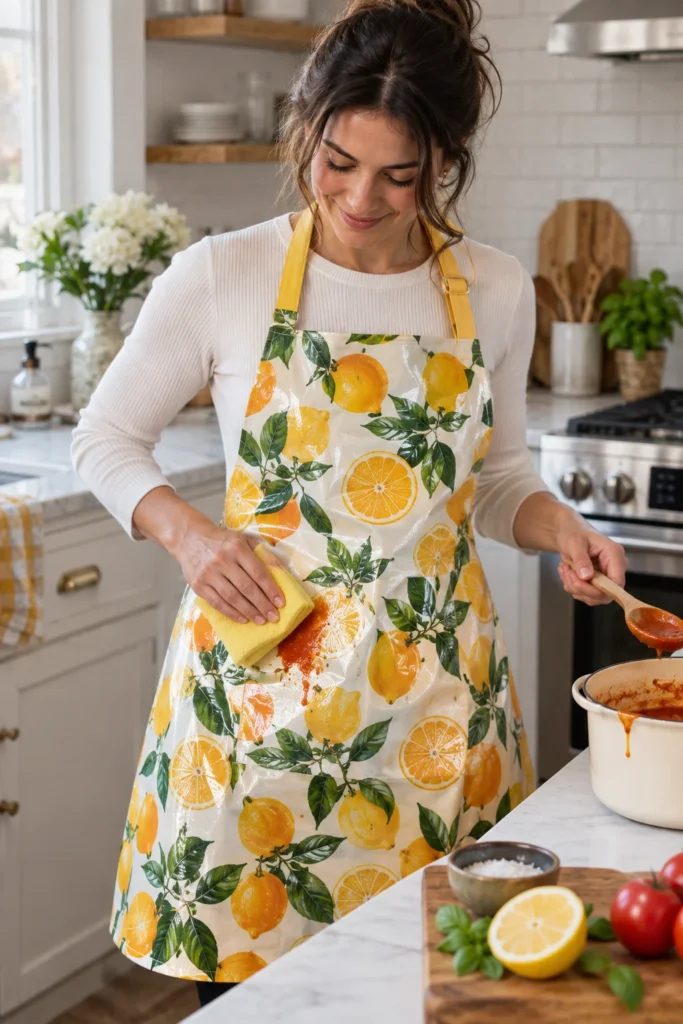
Regular cotton soaks up a spill. Laminated cotton lets it sit on the surface until you wipe it away, which makes it the apron for messy jobs like frying, saucing, and washing up.
It also comes in bold prints, which suits a kitchen with painted cabinets or bright tile. A big citrus print or a loud floral holds its own against a strong color.
Two changes help at the machine:
- Lengthen your stitch, since every needle hole stays visible.
- Use a walking foot or a strip of tissue paper so the coated side glides instead of sticking.
Some laminated cottons are wipe only, so check the care label on the bolt.
Use clips, not pins. Pin holes and unpicked stitches stay visible in laminated cotton, so plan each seam before you sew.
10. Grill Apron With Tool Loops Cut From Heavy Canvas
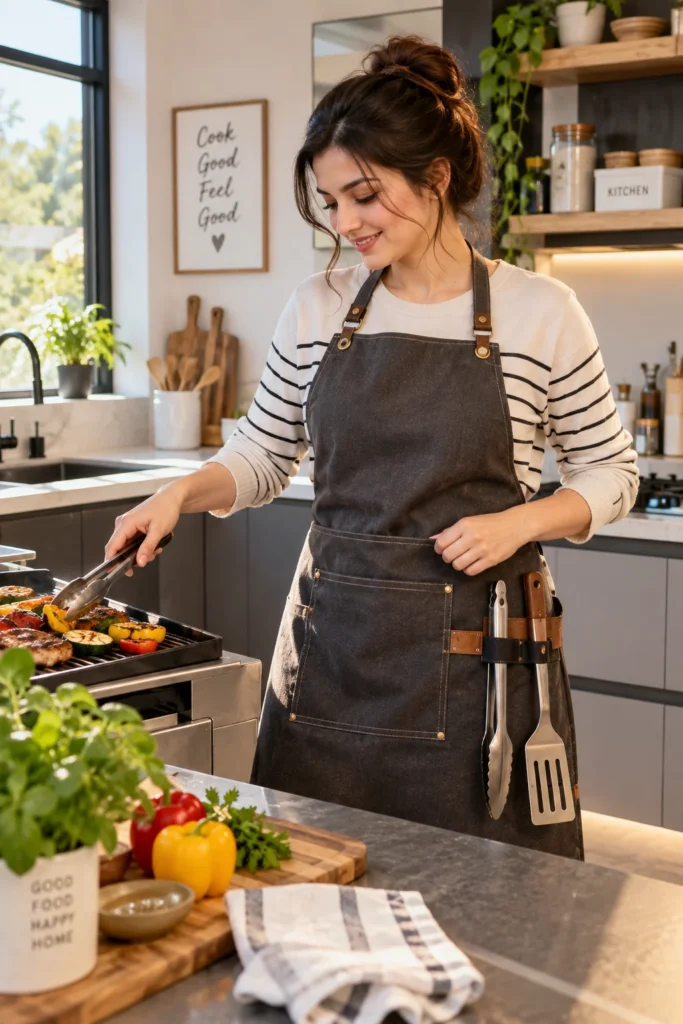
The usual mistake is treating a grill apron like a kitchen apron.
Thin cotton wears through where the tongs rub, and tool pockets sag once they hold anything heavy. Heavy cotton canvas fixes most of that, but it is not flame proof, so keep it away from open flame.
Sew two or three loops of cotton webbing to the waistband for tongs and a spatula, and stitch each end twice. Charcoal, olive, or tan canvas suits an industrial or outdoor kitchen with dark counters and steel shelving.
Once the tongs have their own loop, they stop getting lost on the side table.
Hardware and notions to gather
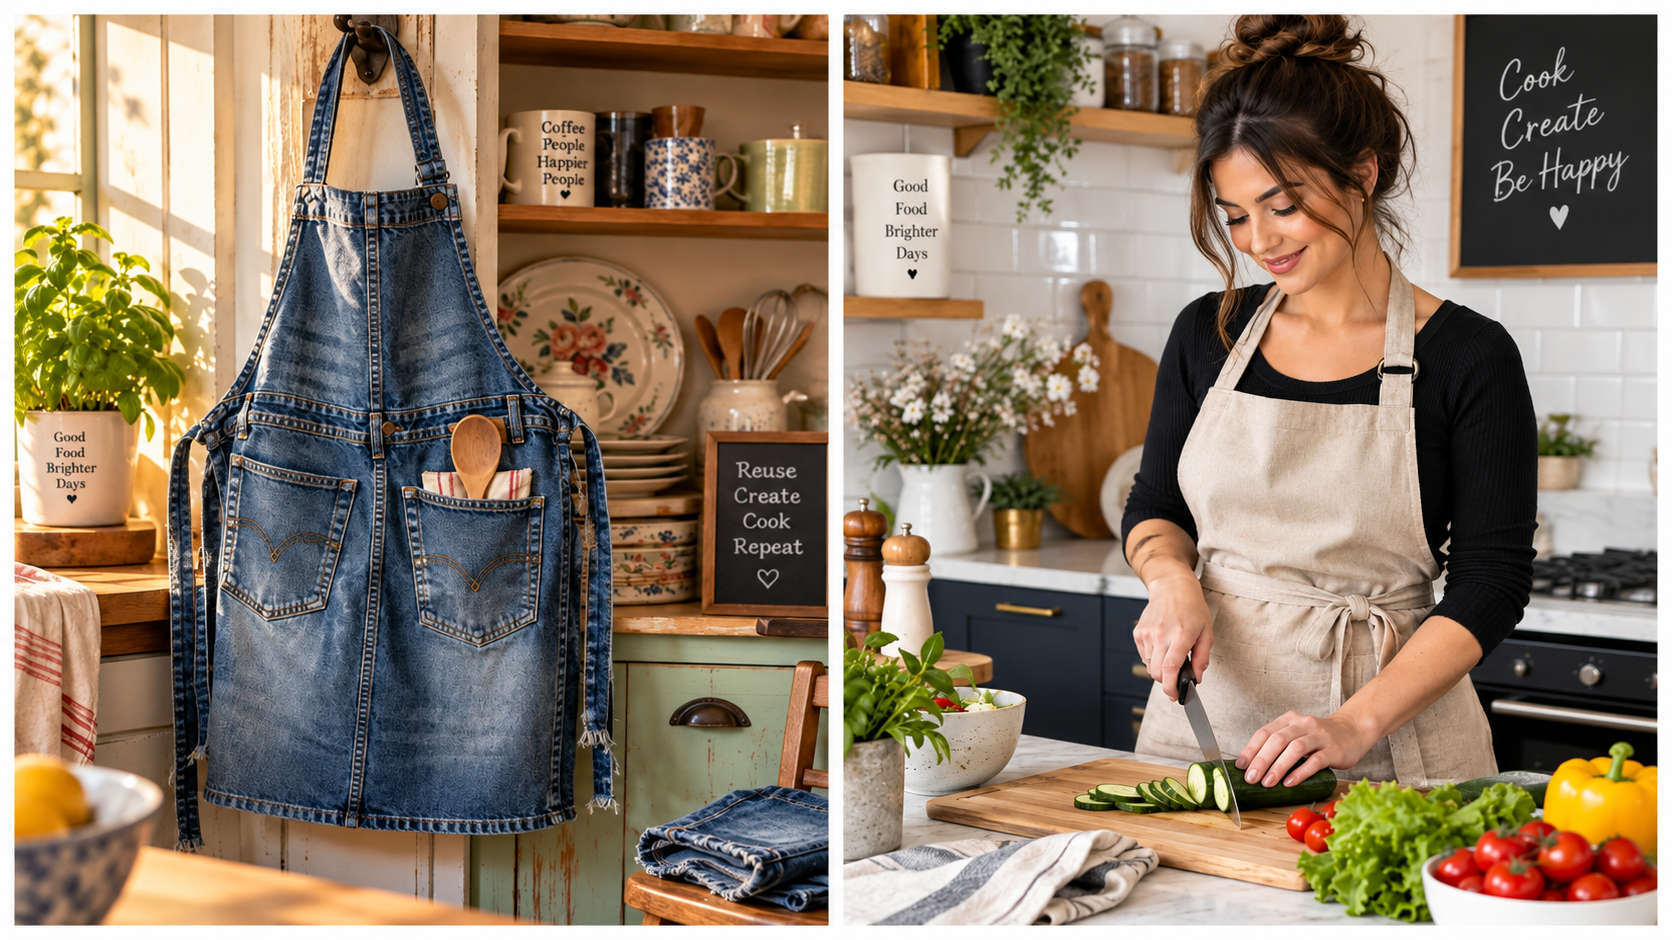
11. Upcycled Jeans Apron That Keeps The Back Pockets
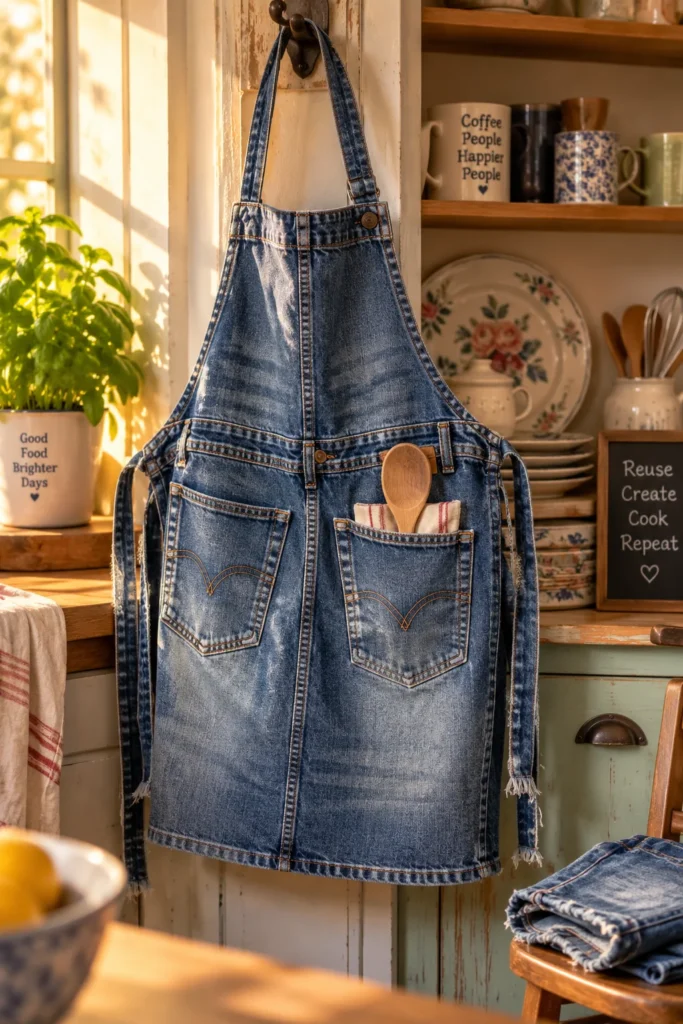
Most closets hold a pair of jeans nobody wears anymore. Cut them up and they become an apron with half the work already done.
The back pockets are the best part. Worn facing forward, they become sturdy front pockets. The waistband gives you a firm top edge with no extra pieces to cut.
To make it:
- Cut the legs off just below the pockets.
- Open the side seams so the back panel lies flat.
- Sew a long tie to each end of the waistband and hem the raw edges.
Faded denim fits an eclectic kitchen with mismatched mugs and thrifted plates. Before you cut, check each pocket corner for thin spots. A worn pocket will tear the first time it holds a wooden spoon.
A worn pair of jeans with two legs, a zipper front, and two back pockets. The knee is torn and the waistband no longer fits.
One sturdy panel with the waistband and both back pockets, plus a long tie at each side. The legs go in the scrap bin for later.
12. Scrappy Patchwork Apron Made From Leftover Fabric

Sort scraps by weight first, then by color.
A thin cotton sewn to a stiff twill puckers along the seam, so keep similar fabrics together.
Pick one color story:
- Three or four shades from one family look planned, even when every print is different.
- Small florals plus a few solid squares give the eye somewhere to rest, which suits a cottagecore or boho kitchen with open shelves and hanging herbs.
Back the patchwork front with one plain piece of cotton so the seams stay hidden and the apron holds its shape in the wash.
Mismatched is the point.
Piece the front
Choose one square size and cut every scrap to match. A cardboard template keeps the cuts even.
Lay the squares out in rows and shuffle until no two matching prints touch. Then sew each row together.
Join the rows with the seams lined up and press well. Cut the apron shape from the patchwork and back it with a plain piece of cotton.
13. Smock Style Apron With Sleeves For Messy Bakers
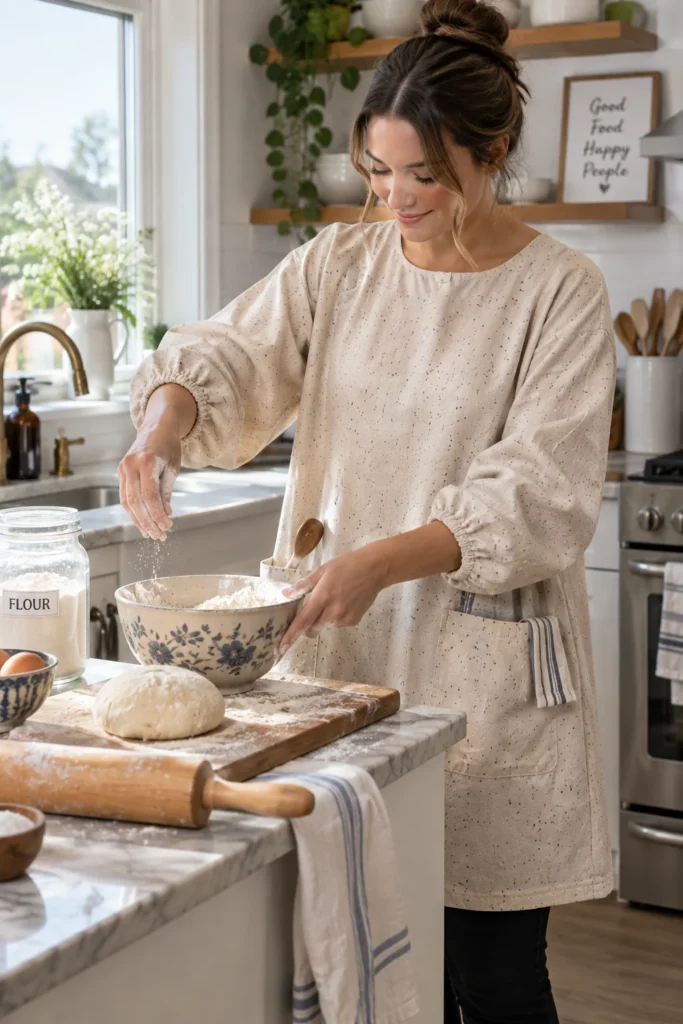
Flour lands on your forearms first.
A smock style apron fixes that by adding sleeves. It goes on like a light jacket and protects the front and the arms in one layer.
- Fabric: a pale or speckled cotton, since flour shows like chalk on dark colors.
- Fit: in a baker’s kitchen, cut the body a little loose so you can reach across a marble slab without the seams pulling.
- Pockets: a big patch pocket on each side for a bench scraper and a dish towel.
14. Wrap Around Cobbler Apron That Covers Your Sides Too
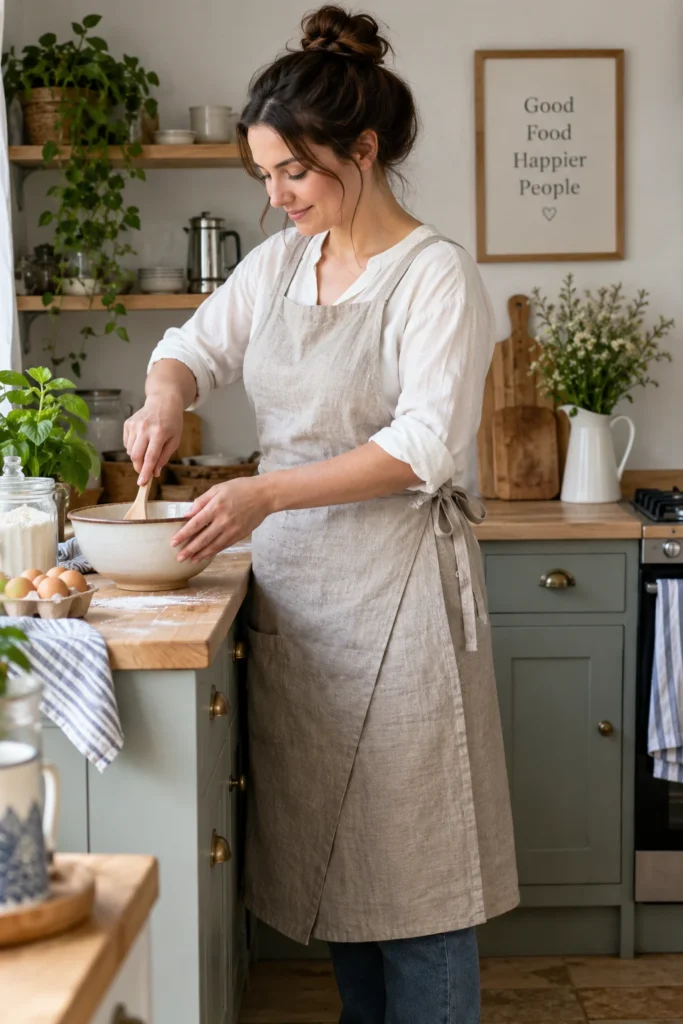
Splatter doesn’t stay in front of you.
Hot oil and tomato sauce can land on your hips, right past the edge of a bib apron. A wrap around cobbler apron closes that gap. One front panel overlaps the other, and the ties fasten at the back or side.
For a minimalist or Scandinavian kitchen, keep the fabric quiet:
- Oatmeal or natural linen
- Dusty blue or soft grey cotton
- One clean seam line and no trim
Cut the overlap wide, because a wrap that gaps when you bend defeats the point.
| Bib apron | Wrap around cobbler apron |
|---|---|
| Covers the front of your body | Covers the front and both sides |
| Uses less fabric and sews up faster | Uses more fabric because of the overlap |
| Fine for quick prep and light cooking | Better for frying, roasting, and other messy jobs |
15. Holiday Hosting Apron With Appliqué And A Hidden Pocket
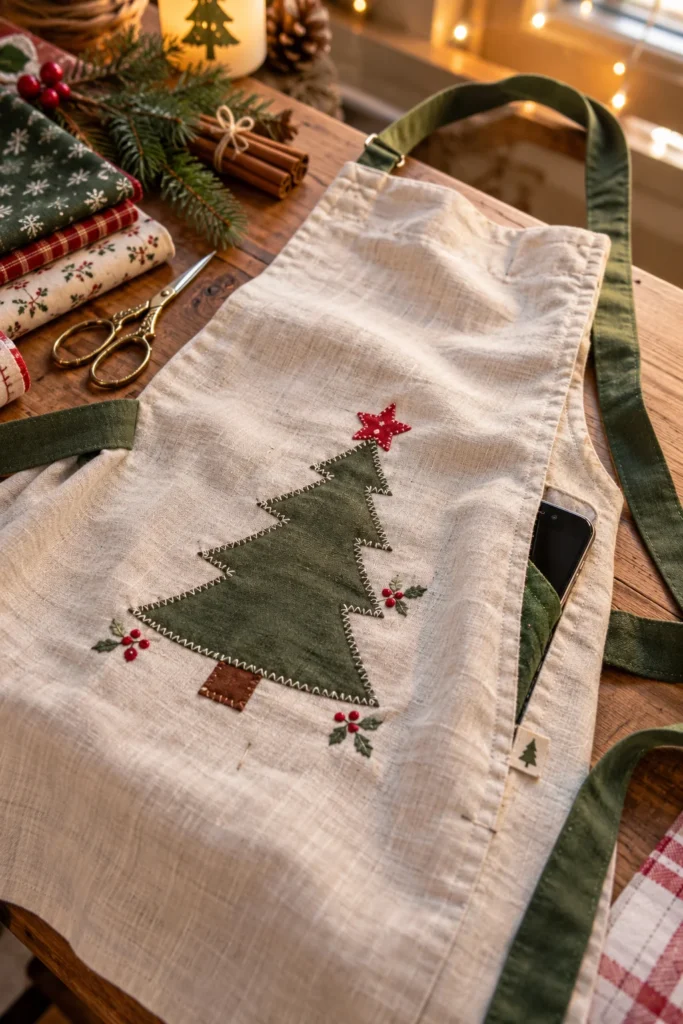
Start with one simple shape.
A pine tree, star, or pumpkin cut from contrasting fabric reads clearly from across the room. Fuse it to the apron front with fusible web, then stitch around the edge so it survives the wash.
- Put the appliqué on the lower skirt or the bib, not both, so the front stays uncrowded.
- Sew a hidden pocket into one side seam so a phone or timer sits against your hip.
In a kitchen already dressed for the holidays, a cream or natural linen base lets the appliqué stand out.
Trace the shape onto the paper side of the fusible web before you cut.
Press with a cloth over the top so the iron doesn’t scorch the fabric.
Stitch around the edge with a tight zigzag to seal it.
Letters or lopsided shapes traced without flipping the pattern. They come out backwards.
Stretchy knit fabric with no stabilizer behind it. The shape warps.
Trusting the glue alone. Edges lift in the wash.
16. Long Bistro Apron With Pleats For A French Country Kitchen
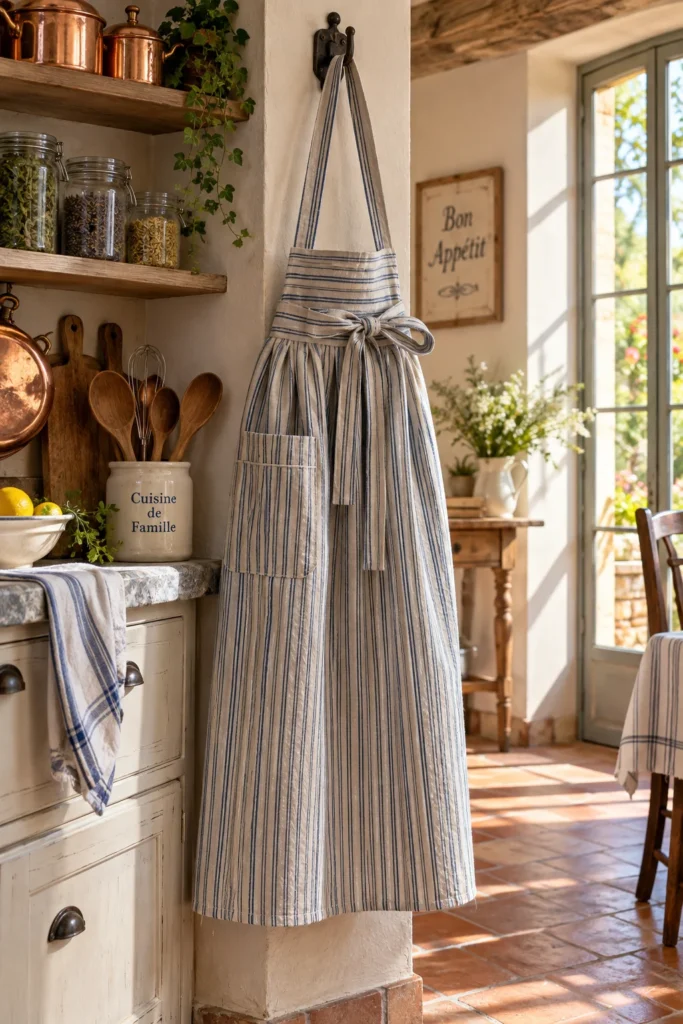
A bistro apron has no bib, no neck strap, and no curves to cut.
It’s a long rectangle with a waistband, so it sews up faster than a bib apron. A fine ticking stripe, a small floral, or plain cream linen suits a French country kitchen with copper pots and open shelves. Fold a few wide pleats into the top edge so the front hangs flat.
- Length: hold the fabric against you and mark the hem between the knee and mid calf.
- Ties: cut them long enough to wrap around and tie in front, so you can undo the bow with sticky hands.
- Pocket: one wide patch pocket, split by one line of stitching so a pen and a thermometer each get a slot.
💡 Quick Tip
Press each pleat flat, then sew one row of long stitches across the top edge, inside the seam allowance. The pleats can’t spread while you pin on the waistband, and the waistband hides the stitches for good.
Which Apron Will You Sew First?
An apron only works if you actually reach for it. That’s the real benefit of sewing your own. You choose the length, the pockets, and the fabric that fits how you cook, so it ends up on the hook by the stove instead of the back of a drawer.
Sew one this weekend, and after a week of real use you’ll know what to change on the next one. There’s an apron sewing pattern here for every kitchen style, and the second one usually goes faster than the first.
Before you cut any of these
Save this list for the next time you’re ready to sew a new apron.