
Most dollar store crafts look cheap for one simple reason. They still look like the thing that came off the shelf.
A plain glass vase is a plain glass vase. A plastic basket is a plastic basket. Guests never see the price tag. They see the finish. The fix is rarely more money. It is one finish, one texture, or one change in scale that makes a piece look like it came from a nicer shop.
That is the idea behind every project here. You will see paint that copies old pottery, ribbon that looks store bought, and lettering that turns plain white dishes into a proper kitchen shelf. Most take an afternoon or less, and none need special skills. Every project also has one small trick that keeps it from looking homemade.
Here are 16 dollar store DIY projects that look way more expensive than what you paid, plus the small details that make the difference. Start with the ones that use things already in your craft drawer.
Dot a Cheap Glass Vase With Puffy Paint for a Hobnail Look
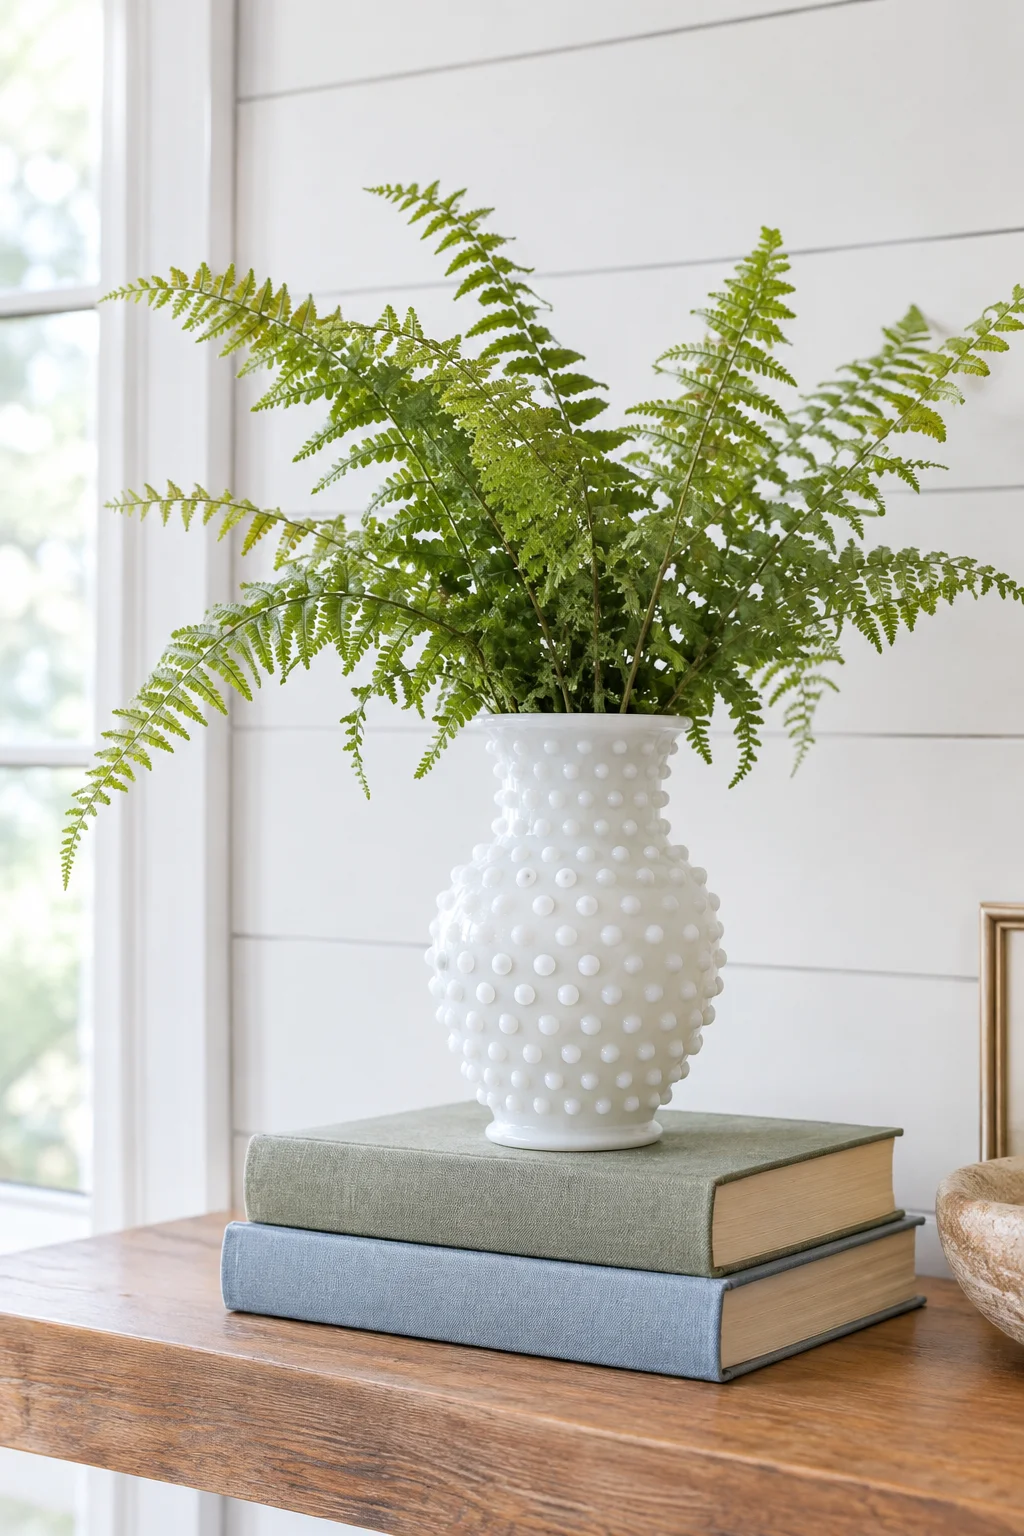
Raised dots are what make hobnail glass look like an antique.
You can fake them on any plain, round vase. Wash it well, then press dots of dimensional paint or hot glue in loose rows. Stagger each row so the dots land between the ones above.
What you need:
- A round vase with a wide belly, so the pattern has room to show.
- White dimensional paint or a hot glue gun.
- White spray paint made for glass, to cover the whole thing once the dots are dry.
Let the dots dry all the way before you spray, or they can sag.
html
Smooth clear glass. You see straight through it, and it looks like every other vase on the shelf.
White, dotted, and solid. It reads as vintage milk glass, and the wide top holds a loose bunch of faux ferns.
Stamp Air Dry Clay With Cookie Stamps and Hang It on Gingham Ribbon
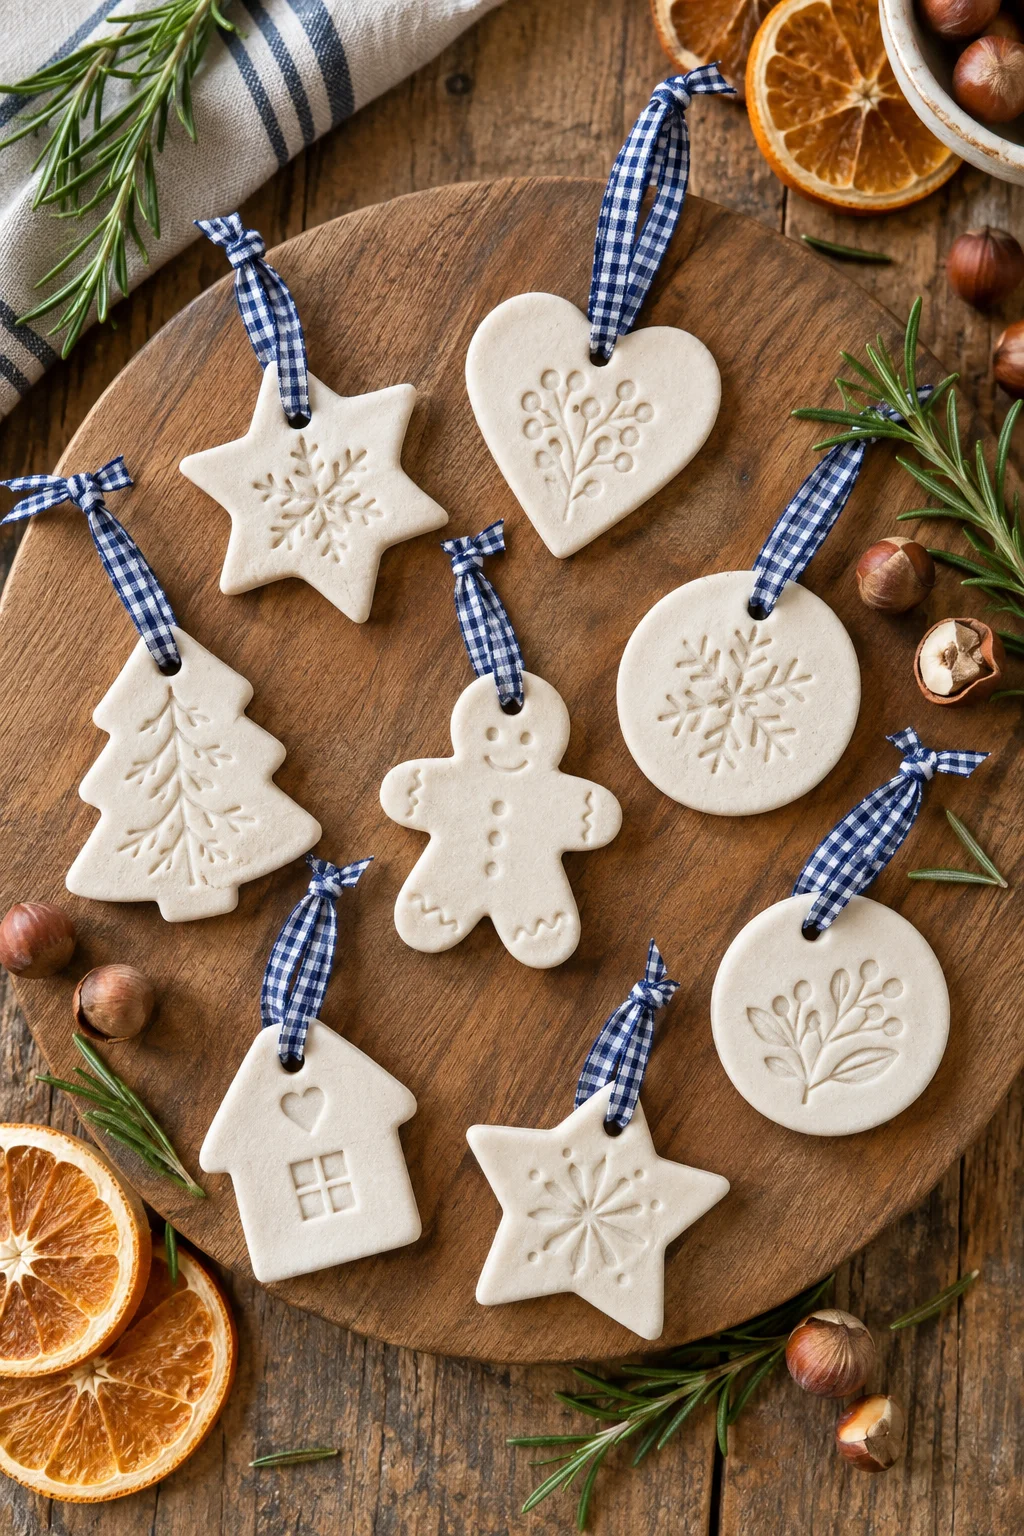
Cream clay with a crisp pressed pattern looks like something from a pricey kitchen shop.
The pattern does the work, so choose a stamp with deep cuts. Cookie stamps are the easiest. A carved wooden spoon back or a textured button leaves a lighter print that still reads well. Skip the paint and leave the clay plain cream.
Thread each piece with navy and white gingham ribbon. The check gives the plain clay something to push against, and it makes a mix of shapes look planned.
html
Roll the clay to about a quarter inch thick. Dust the stamp with a little cornstarch so it lifts off clean.
Press the stamp straight down and lift it straight up. Trim around the print, then poke a hole near the top.
Dry the pieces flat, turning them once. Sand any rough edges lightly, then tie on the ribbon.
Give a Chunky Yarn Basket Handles Cut From a Dollar Store Belt
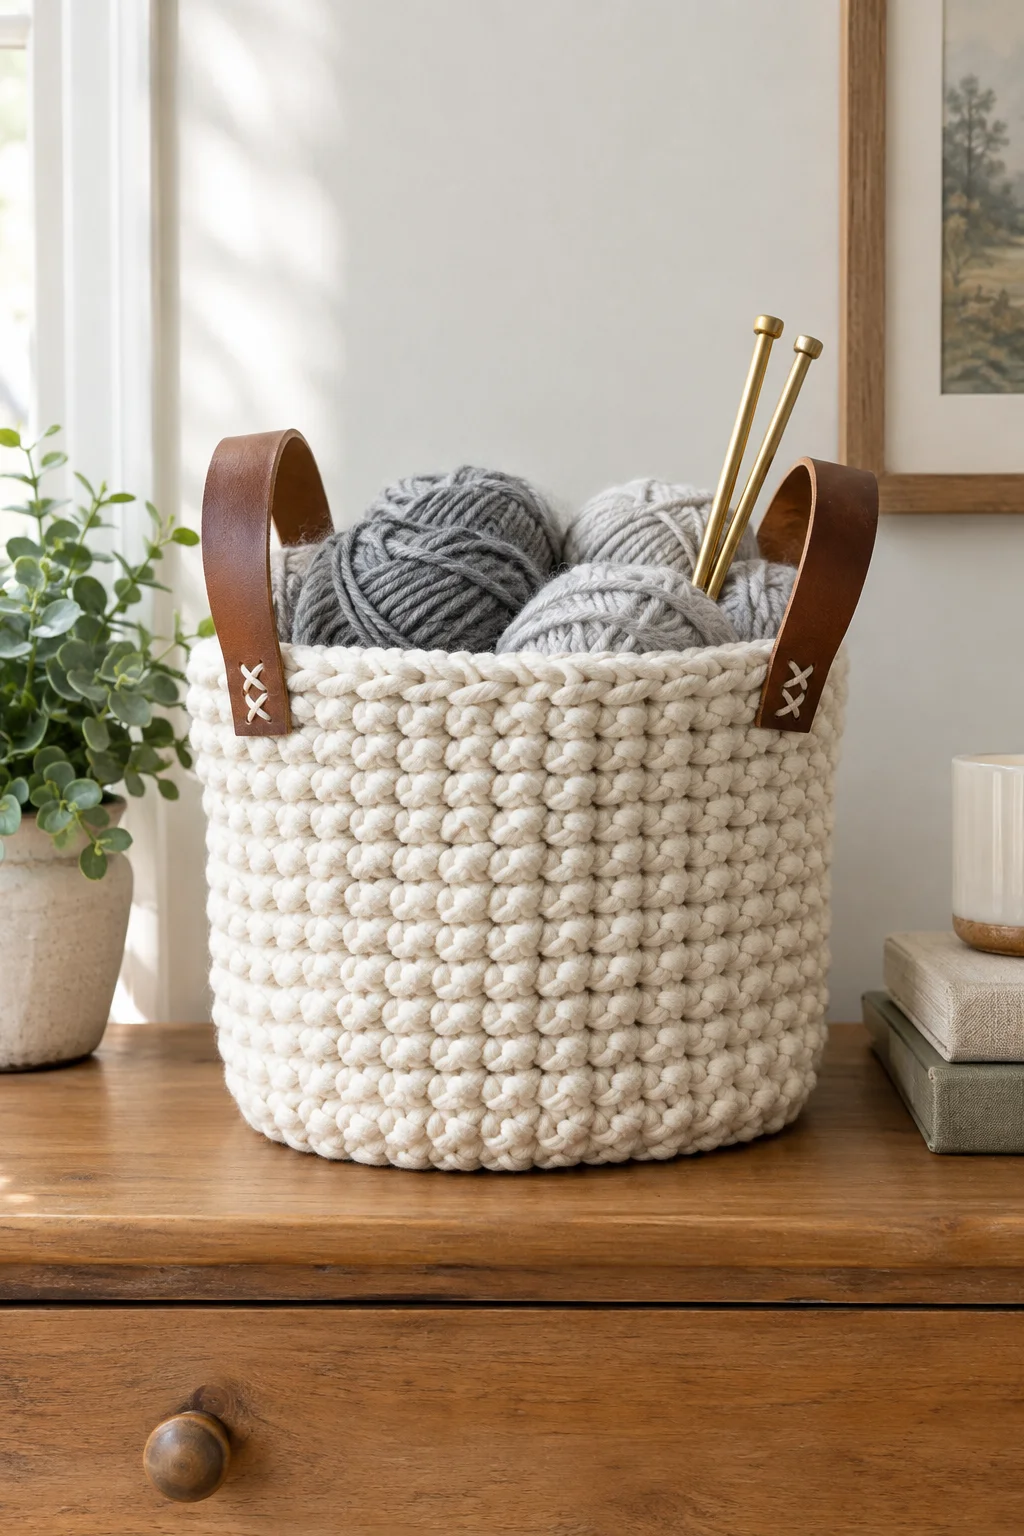
Baskets with real leather handles cost a lot more than the same basket without them.
Copy the look with a chunky yarn basket. Crochet one, or wrap a plain wire basket tightly in thick yarn if you do not crochet. Then check the accessories aisle for a faux leather belt. One belt gives you two handles.
- Cut the belt in half and trim off the buckle end.
- Punch two small holes at each handle end.
- Sew each end to the basket rim with a thick needle and cotton thread, using small crossed stitches.
Keep the yarn in soft greys and creams so the brown handles stand out.
html
Add Farmhouse Lettering to White Bowls and Mugs With Stick On Vinyl
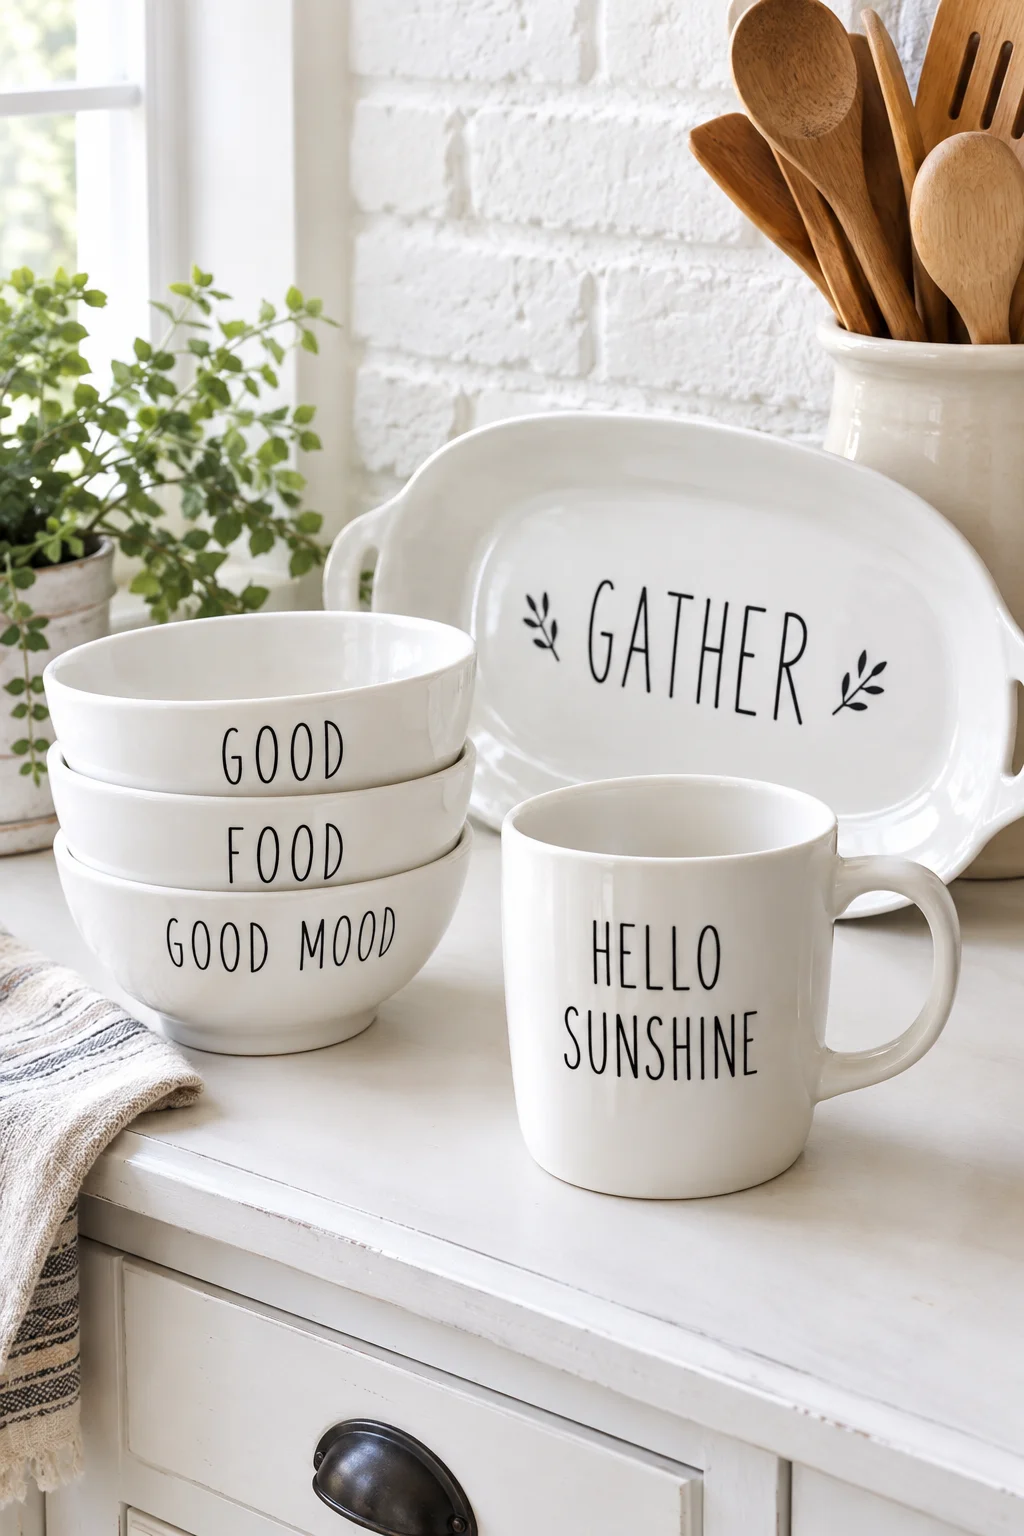
The usual mistake with lettering is putting a word on every dish.
It starts to look like a themed cafe. Pick three to five pieces and leave the rest plain white. A bowl, a mug, and one platter is plenty.
Use thin, tall, all caps letters in black. Mark the center with a strip of painter’s tape and use a ruler so the word sits straight before you press it down. Wide fonts crowd small bowls fast, so scale the letters down.
html
⚠️ Watch Out
Vinyl is not made for food contact. Put lettering on the outside of anything you plan to use, hand wash it gently, or keep the lettered pieces on the shelf for display only. Hot water and the dishwasher can lift the edges.
Group Three Bud Vases on a Wood Tray With a Beaded Edge
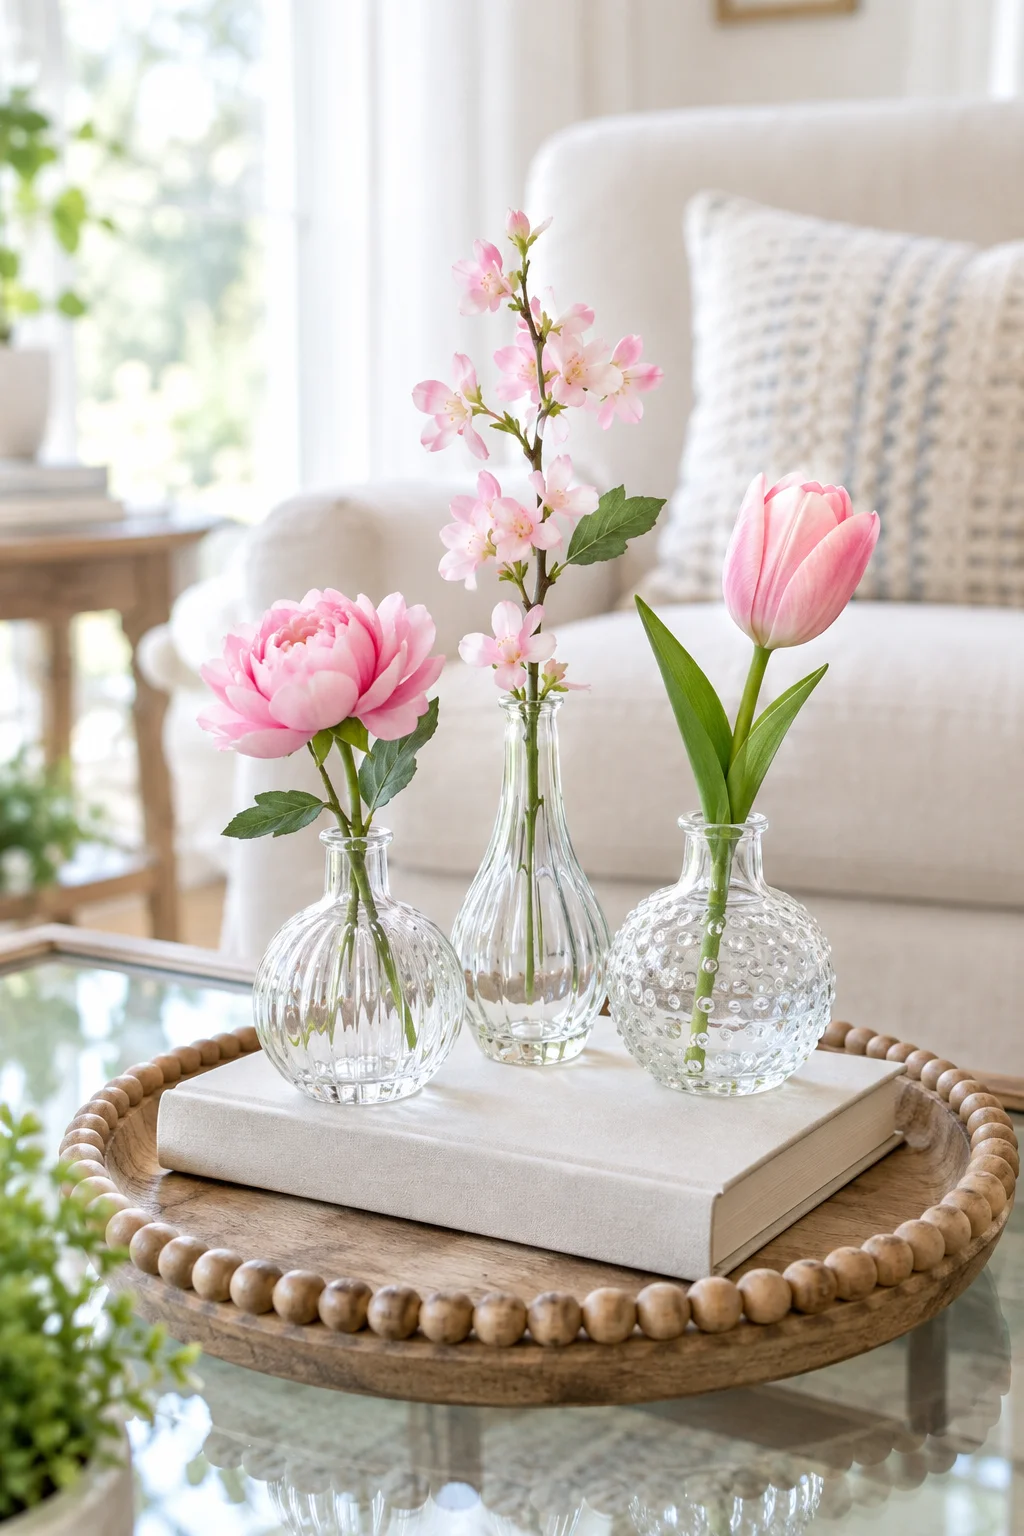
Three is the number to remember.
Pick three vases in different heights and textures, such as one tall, one round, and one bumpy glass. Give each a single stem, like a rose, a sprig of greenery, and a filler flower.
Give a plain wood tray a carved looking edge in two steps:
- Hot glue wooden beads shoulder to shoulder along the rim.
- Brush on thin brown stain or watered down paint so the beads blend in.
Slide a small paperback under the vases if the tray still looks flat.
html
Decoupage a Mason Jar With Napkins and a Kitchen Quote
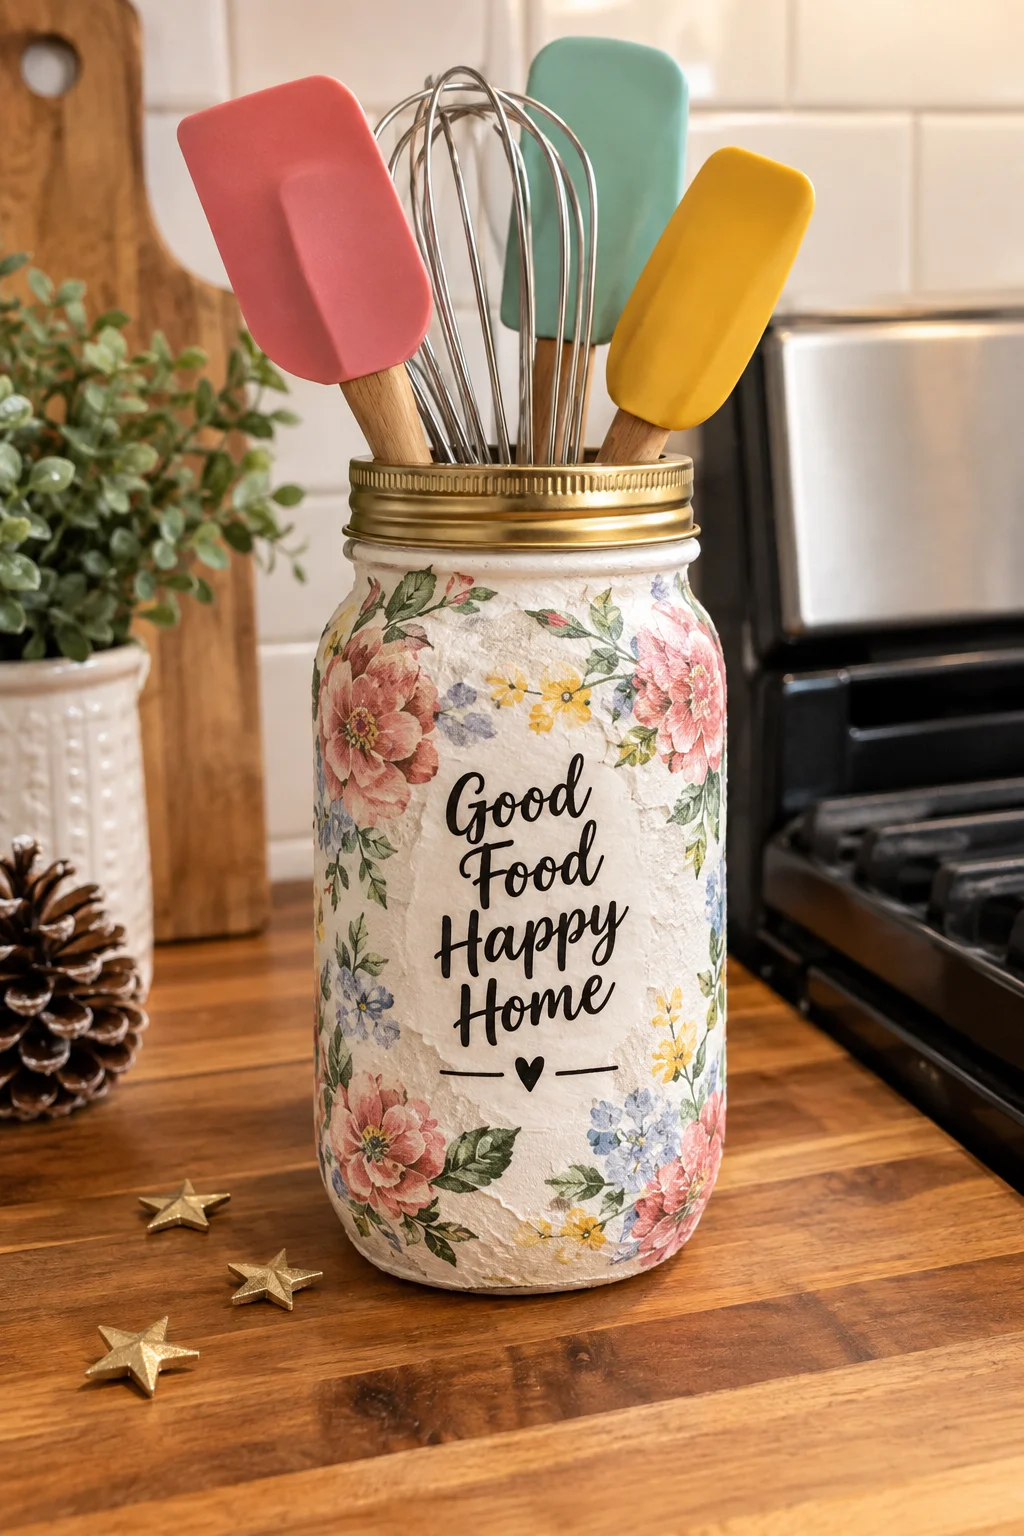
A white jar with a gold lid already looks like a gift shop find, and the napkins finish the job.
Spray the outside of a wide mouth jar with textured white paint. Regular paint with a spoonful of baking soda stirred in gives the same bumpy finish. Cut flowers and teacups from a napkin, peel away the plain white layers, and smooth each motif on with decoupage glue.
Keep the small pieces low and one bigger cluster on the side. Add a short kitchen quote in black vinyl, centered below the flowers, and spray the lid gold last.
Fill it with spoons and a whisk, and keep it beside the stove, not on it.
html
What to grab first
Glue Craft Sticks Around a Glass Vase for a Fluted Look
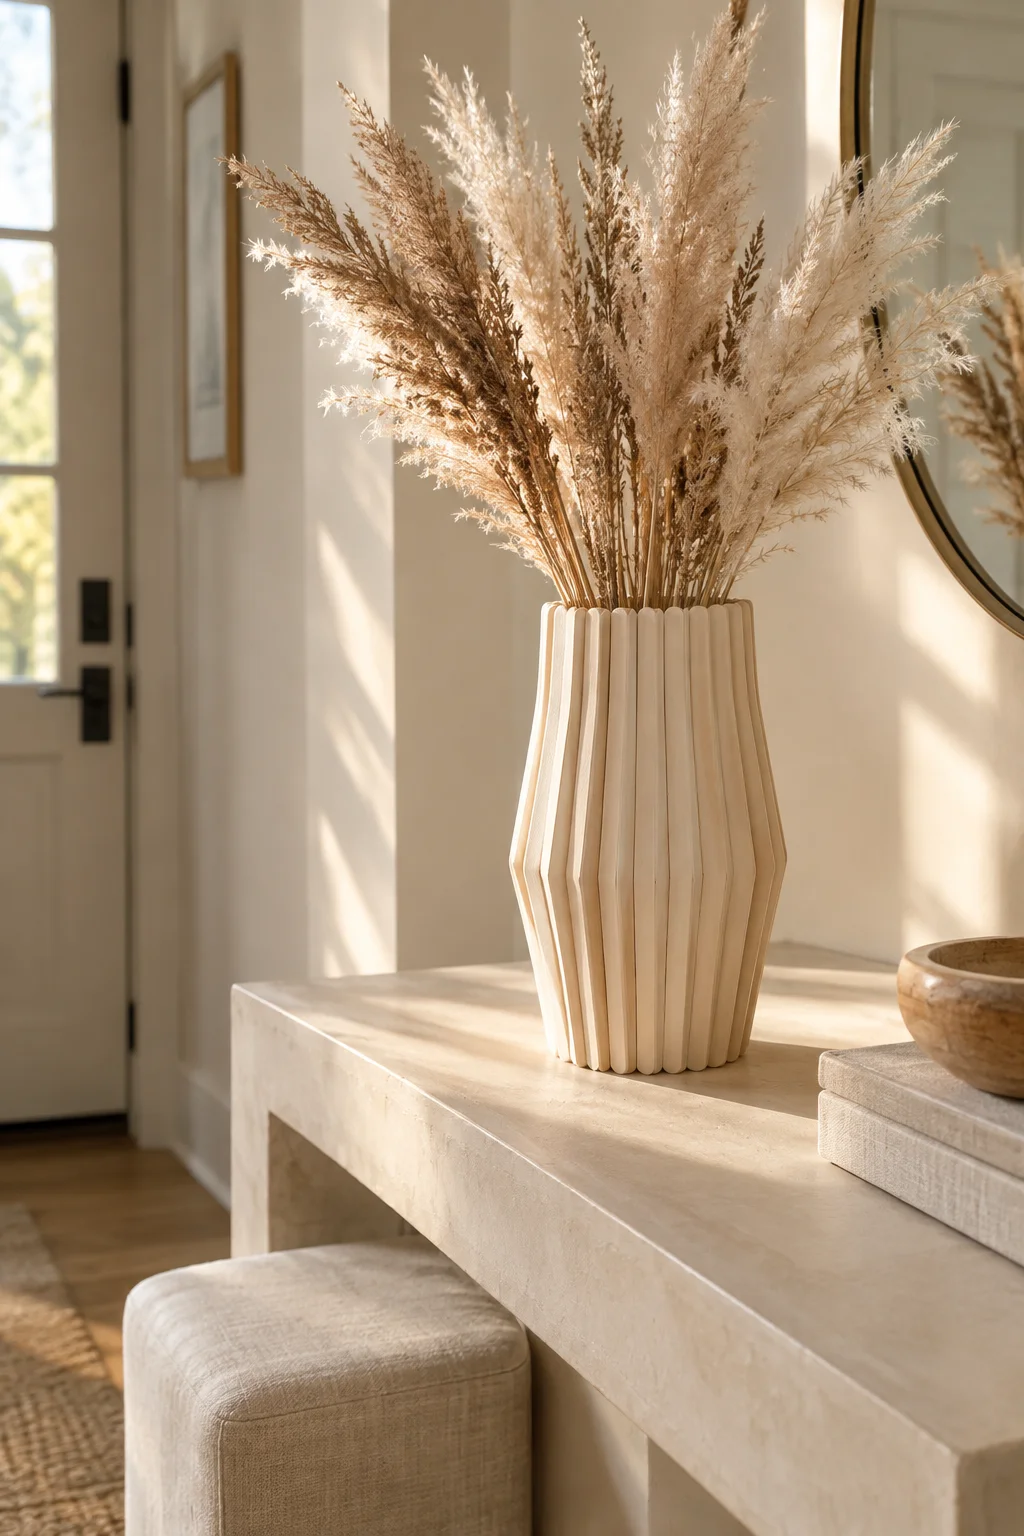
Ribbed pottery looks like it needs a wheel and a kiln. This version needs a hot glue gun.
Start with a straight sided glass cylinder vase. Glue craft sticks upright around it, edge to edge, with the tops even. Check the gaps every few sticks so they do not drift wider as you go around. When the glue sets, paint the whole thing in a matte cream, white, or soft clay color.
Wood and glue do not like water, so use faux stems or slide a small jar inside as a liner.
html
Dry fit a row of sticks before you glue anything.
Sand the cut ends smooth before painting.
Curved vases. The sticks slide and the gaps grow.
Thick glue blobs that show between the sticks.
Swap Plain Jar Lids for Wooden Bead Knobs
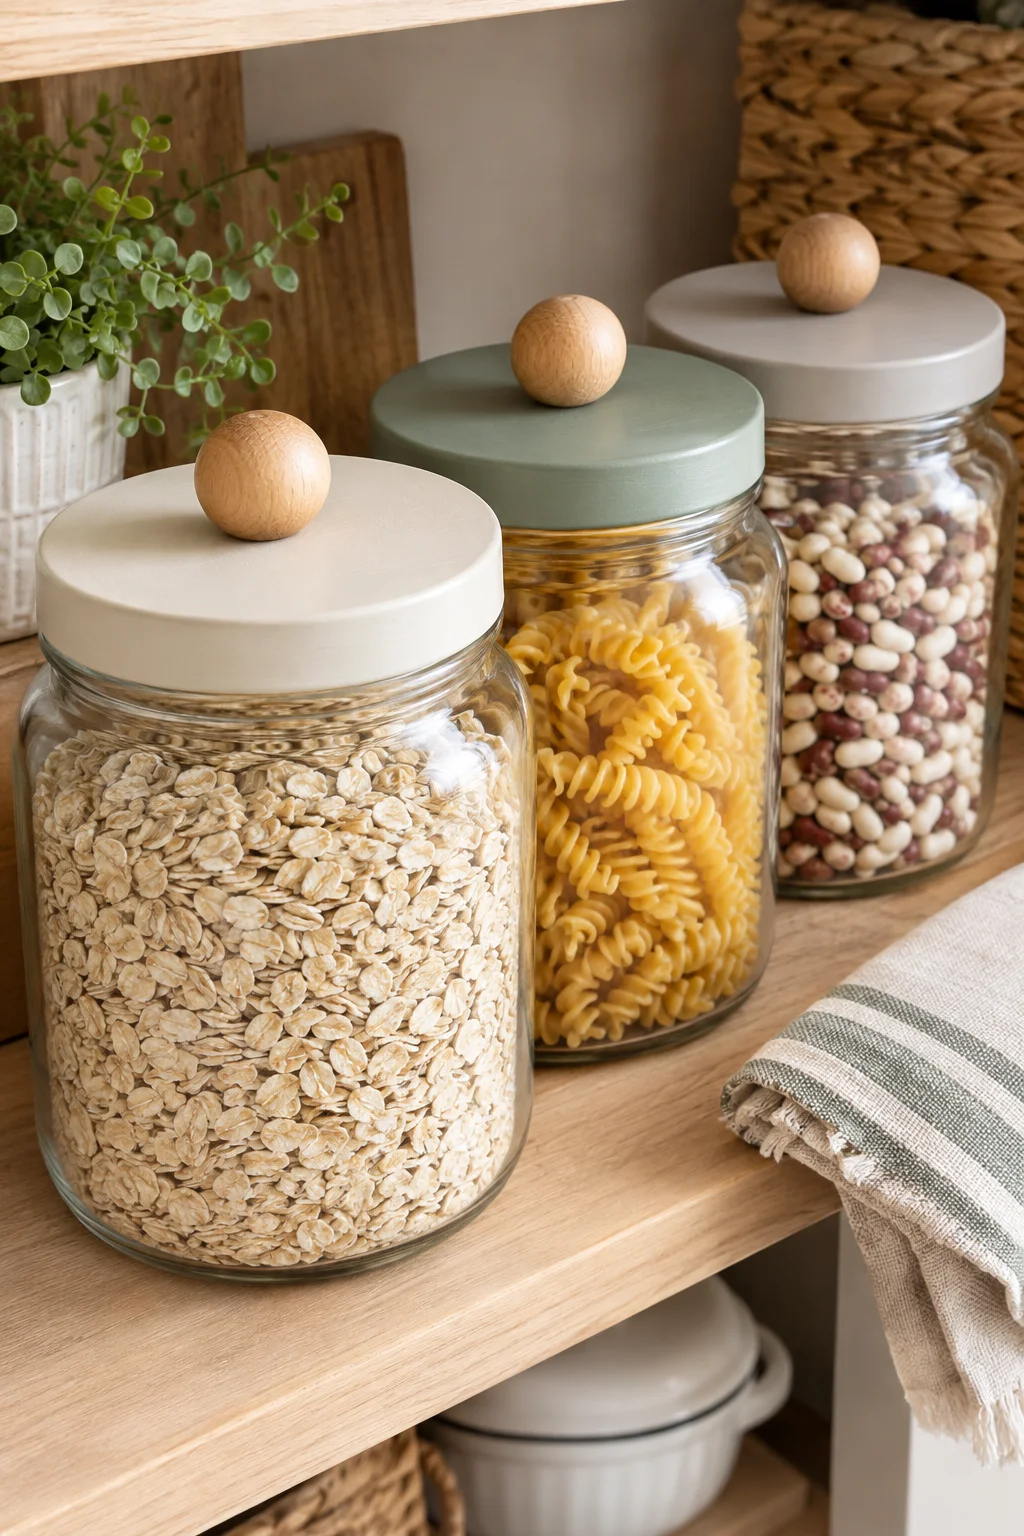
Screw top jars from the dollar store give themselves away with one thing: the lid.
Paint the lid in matte white, black, or a natural wood tone. When it is dry, glue a wooden bead or a small knob to the center. Pick one about the size of a walnut so it is easy to grab with a wet hand.
This works best on flat metal or wooden lids. Domed lids need a different fix.
Three jars with three matching knobs make a shelf look planned.
html
| Wooden bead | Cabinet knob |
|---|---|
| Look: soft, round, handmade. | Look: crisp and store bought. |
| Attach: strong glue on a painted flat lid. | Attach: screw through a drilled hole for a firmer hold. |
| Best on: light pantry jars. | Best on: bigger jars with heavier lids. |
Stack a Plate on a Candlestick to Make a Pedestal Dish
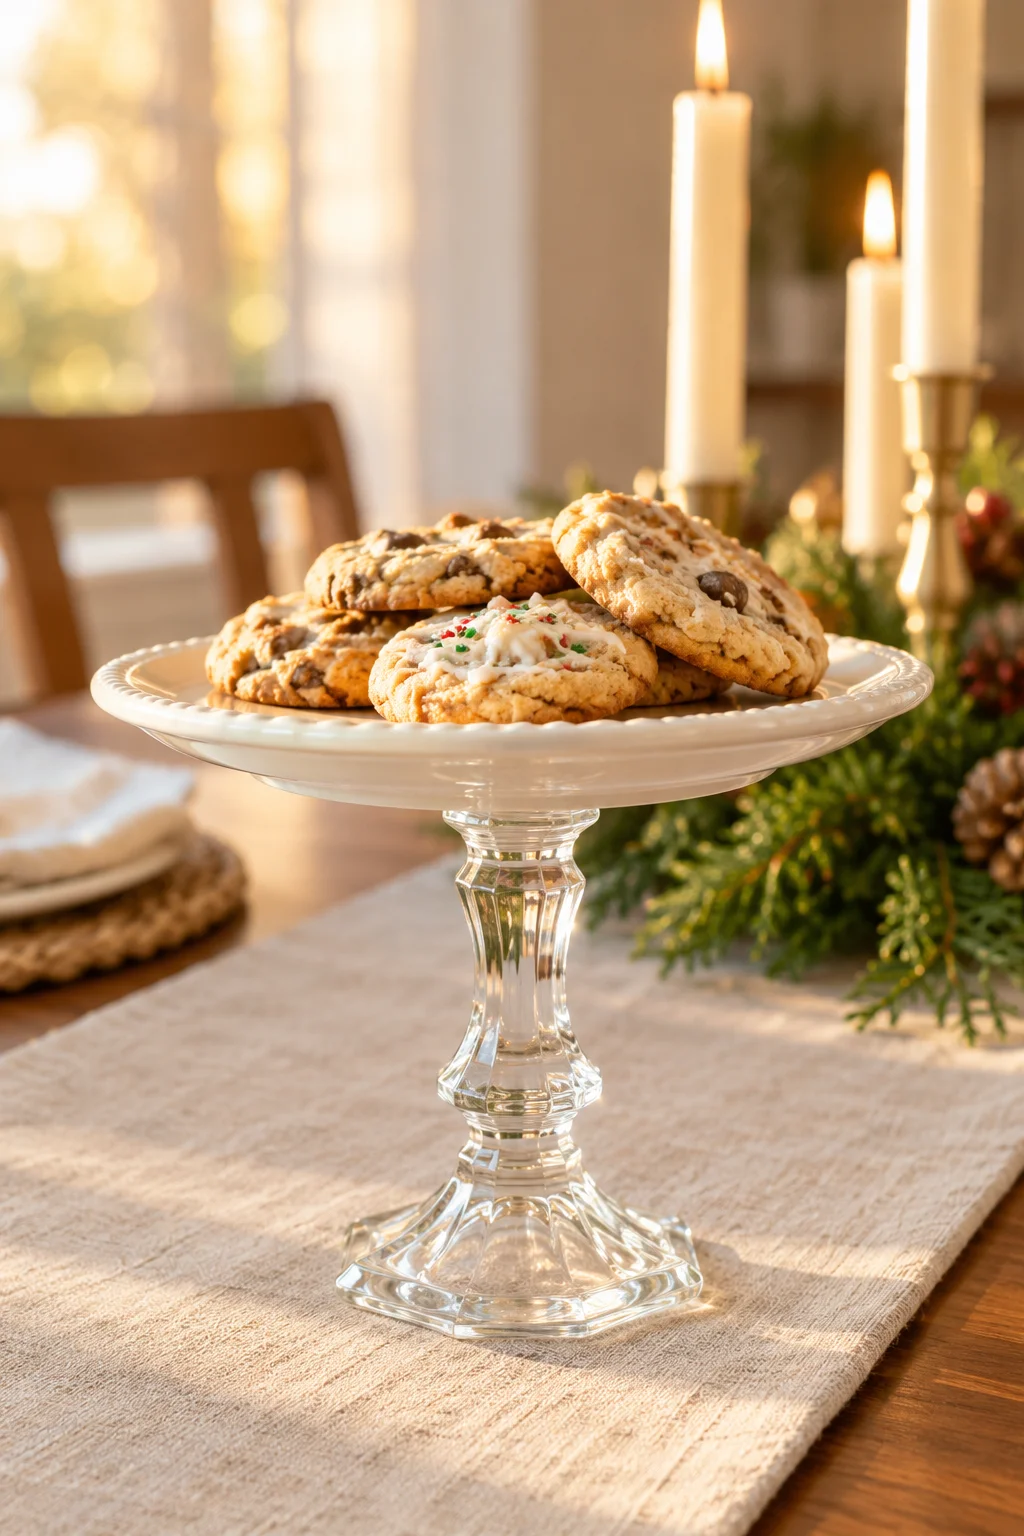
Flat plates get lost on a table. Put the same plate on a stem and it becomes the center of the room.
Glue a small plate or shallow bowl to the top of a glass candlestick with strong clear adhesive. Choose a plate wider than the candlestick base so the whole piece looks balanced instead of top heavy.
- Mark the plate center with a tape cross so the candlestick lands in the right spot.
- Press and hold for a minute, then leave it alone for a full day.
It suits cookies, soaps, or a bowl of keys by the door, but not heavy loads.
html
Center the candlestick before the glue touches anything. A dish that sits off center will lean, and everyone will notice it.
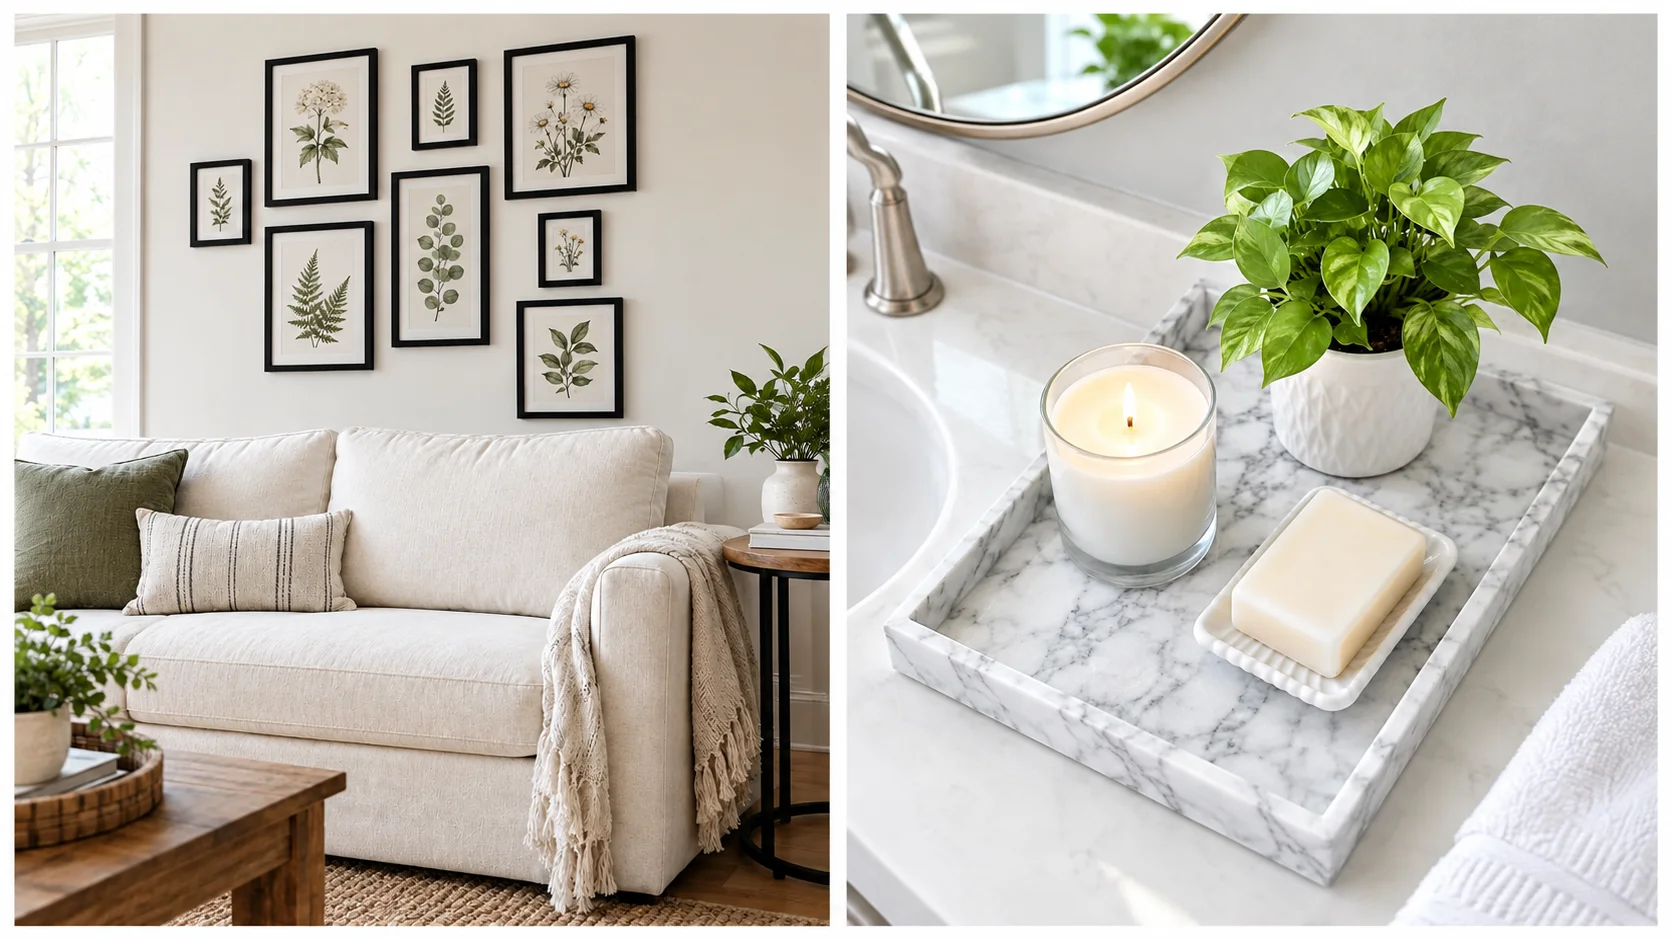
Wrap a Plain Tray in Marble Contact Paper
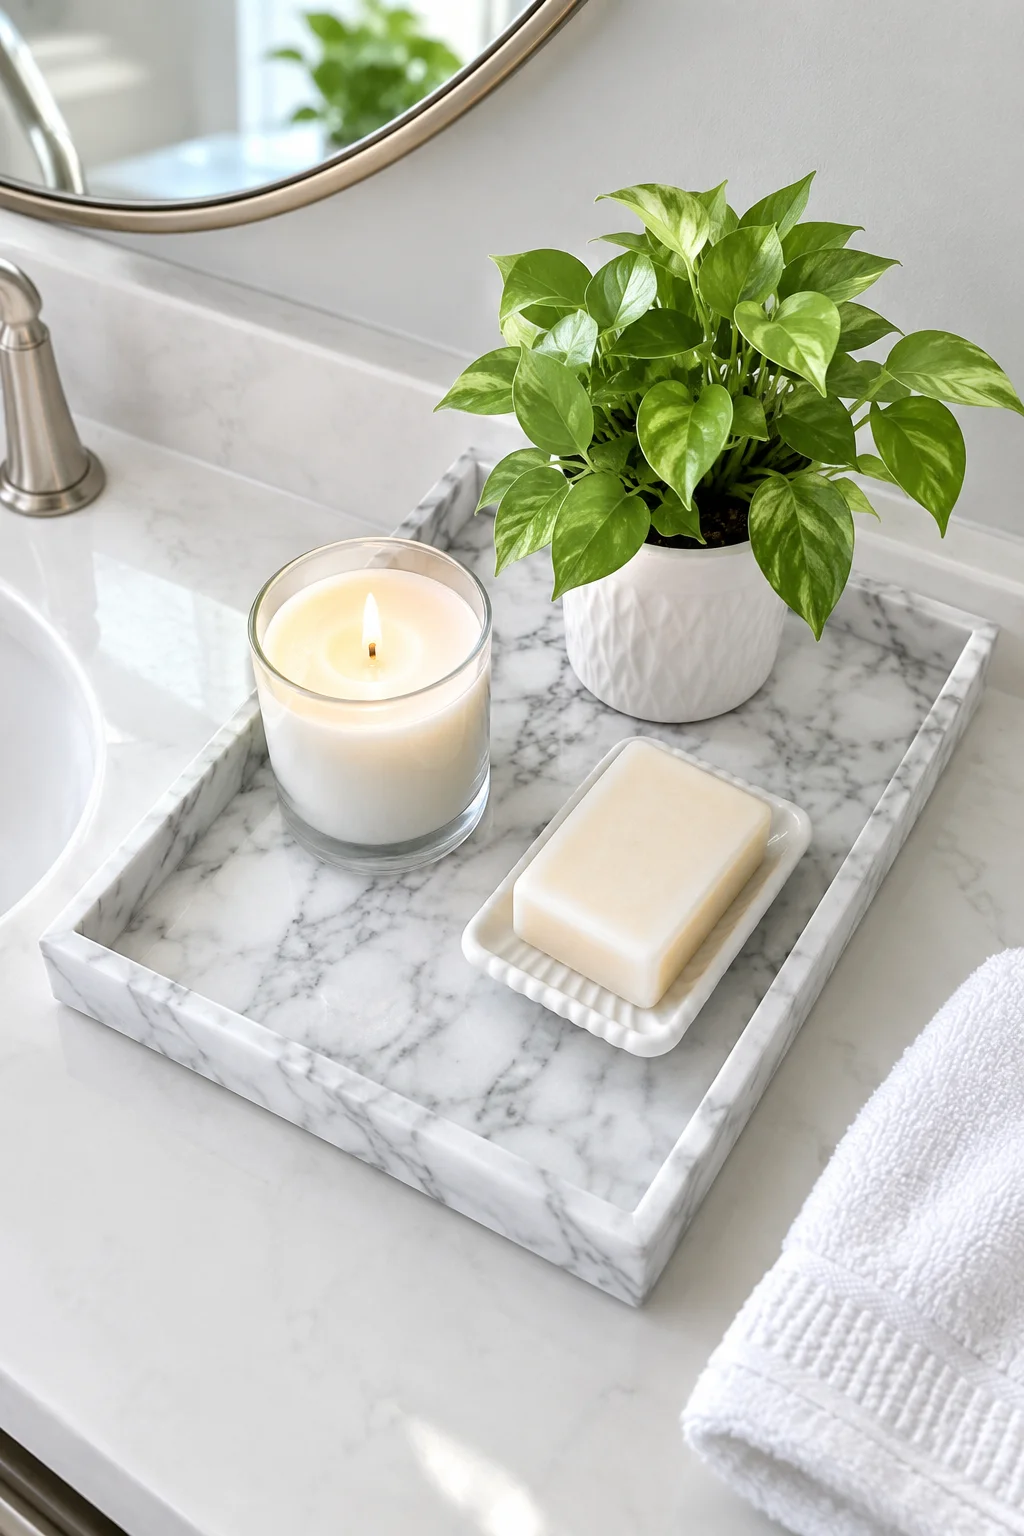
Work from the middle out. That one rule keeps marble contact paper smooth.
Cut the paper an inch larger than the tray, peel back a few inches of the backing, and press the exposed part down in the center. Keep pulling the backing away as you smooth outward with a credit card.
Fold the extra over the edges and trim with a sharp craft knife. If the tray has handles, spray them gold to match.
Use it for candles, soaps, and keys instead of bare food.
html
💡 Quick Tip
Warm stubborn corners with a hair dryer on low so the paper bends without cracking. If a bubble shows up, prick it with a pin and press it flat.
Give a Plastic Planter a Stone Texture With Paint and Baking Soda
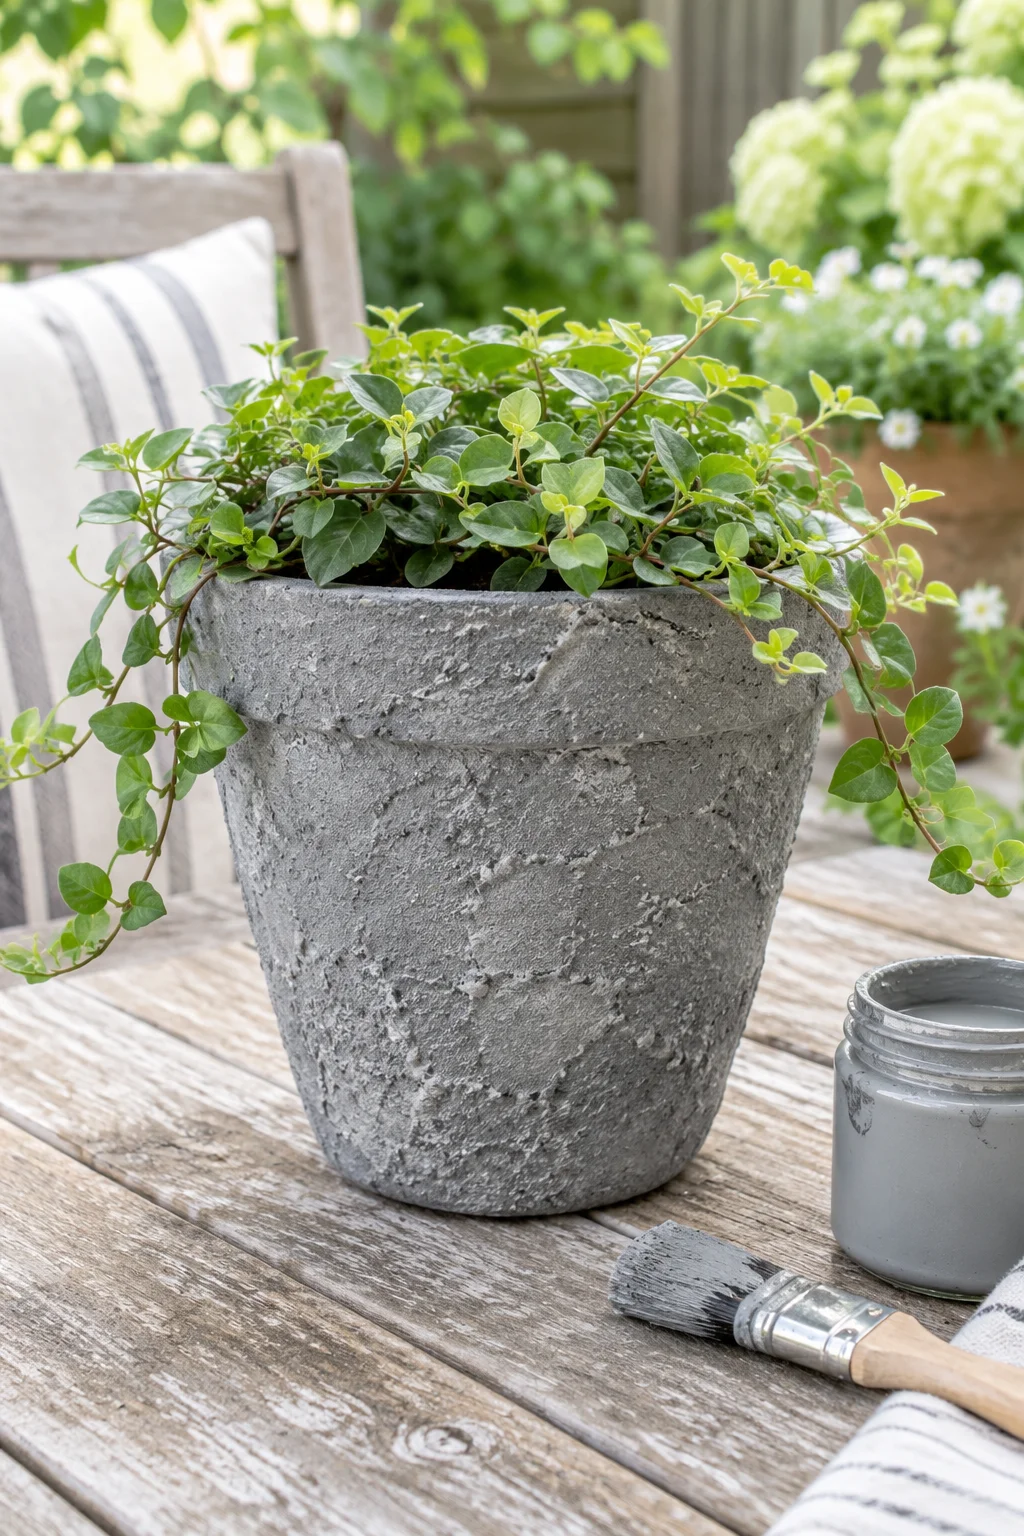
Plastic looks like plastic because of the shine, not the shape.
Take the shine away and the pot changes fast. Stir a couple of spoonfuls of baking soda into matte gray or cream acrylic paint until it thickens like frosting, then dab it on with a stiff brush. Leave the brush marks alone. Real stone is never smooth.
- Pick a pot with a wide lip, since flat sides hide the texture.
- Wipe on a lighter shade over the raised bumps once the first coat dries.
- Finish with a matte spray sealer.
Keep paint out of the drain hole, because it clogs faster than you would think.
html
A glossy plastic pot with a mold line down the side. It catches every light in the room.
A gritty, matte pot that reads as carved stone. The pot looks heavier, and the plant inside looks planned.
Spray Mismatched Candlesticks One Color So They Read as a Set
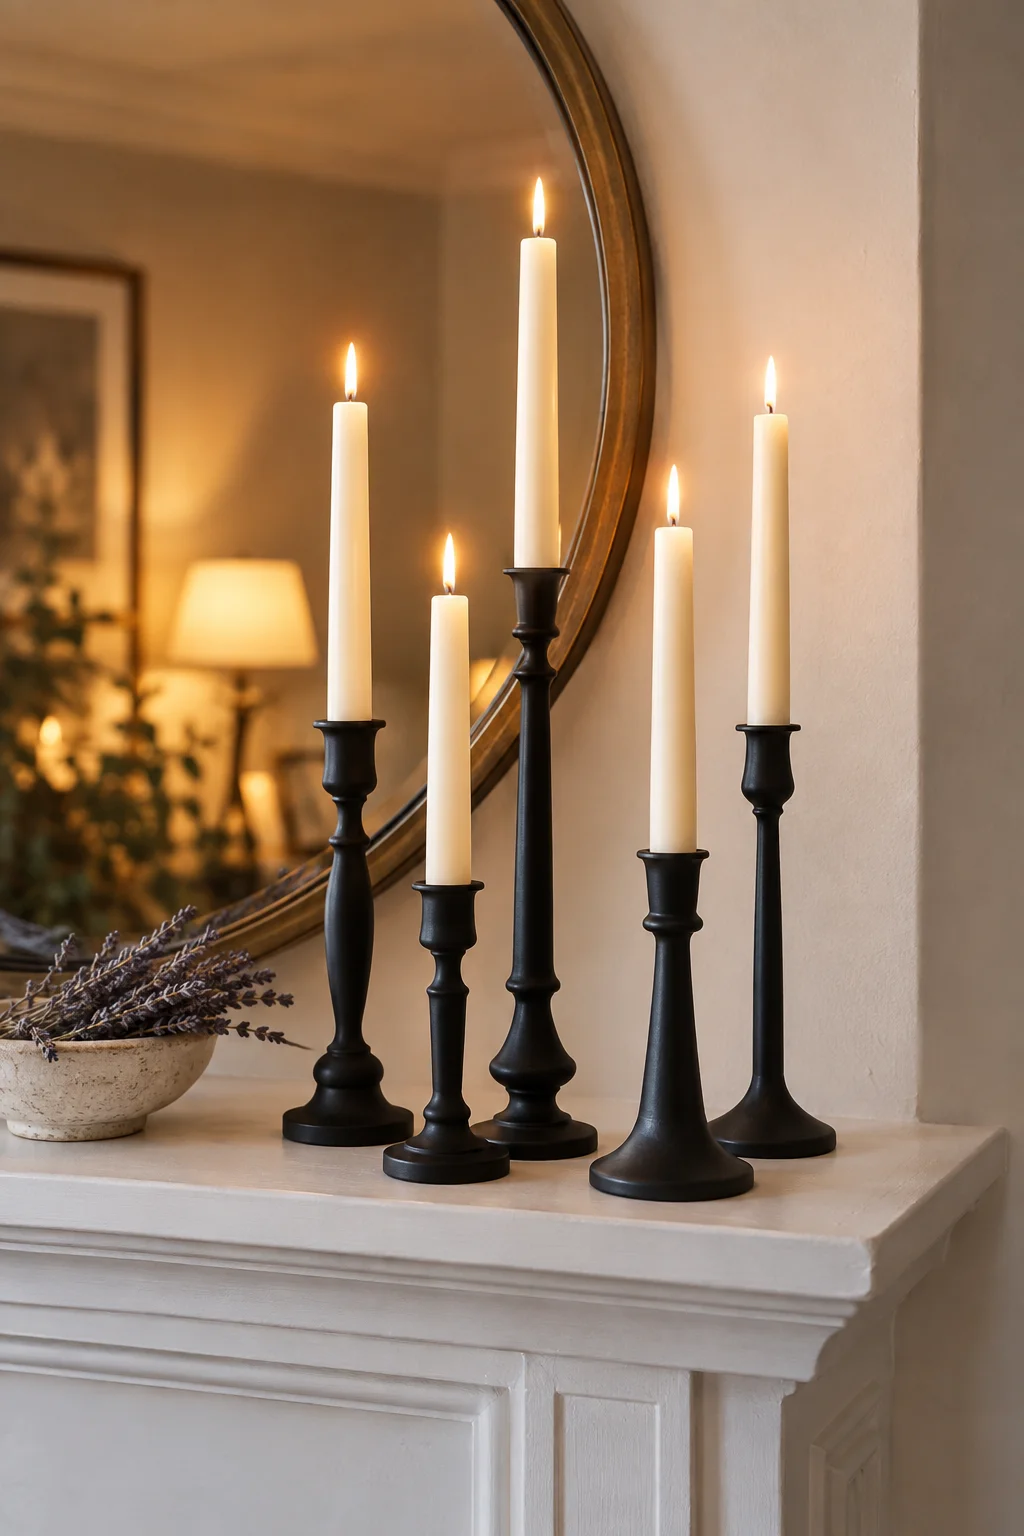
Candlesticks picked up one at a time never match. Painted one color, they do.
Line them up by height and pick a single finish: matte black, warm brass, or soft white. Odd numbers look best, so try three or five in different heights. Set them close together on a mantel or a tray, with one taller piece off center.
Two thin coats beat one thick coat, every time.
html
Before you spray
Paint Dollar Store Frames One Color for a Gallery Wall
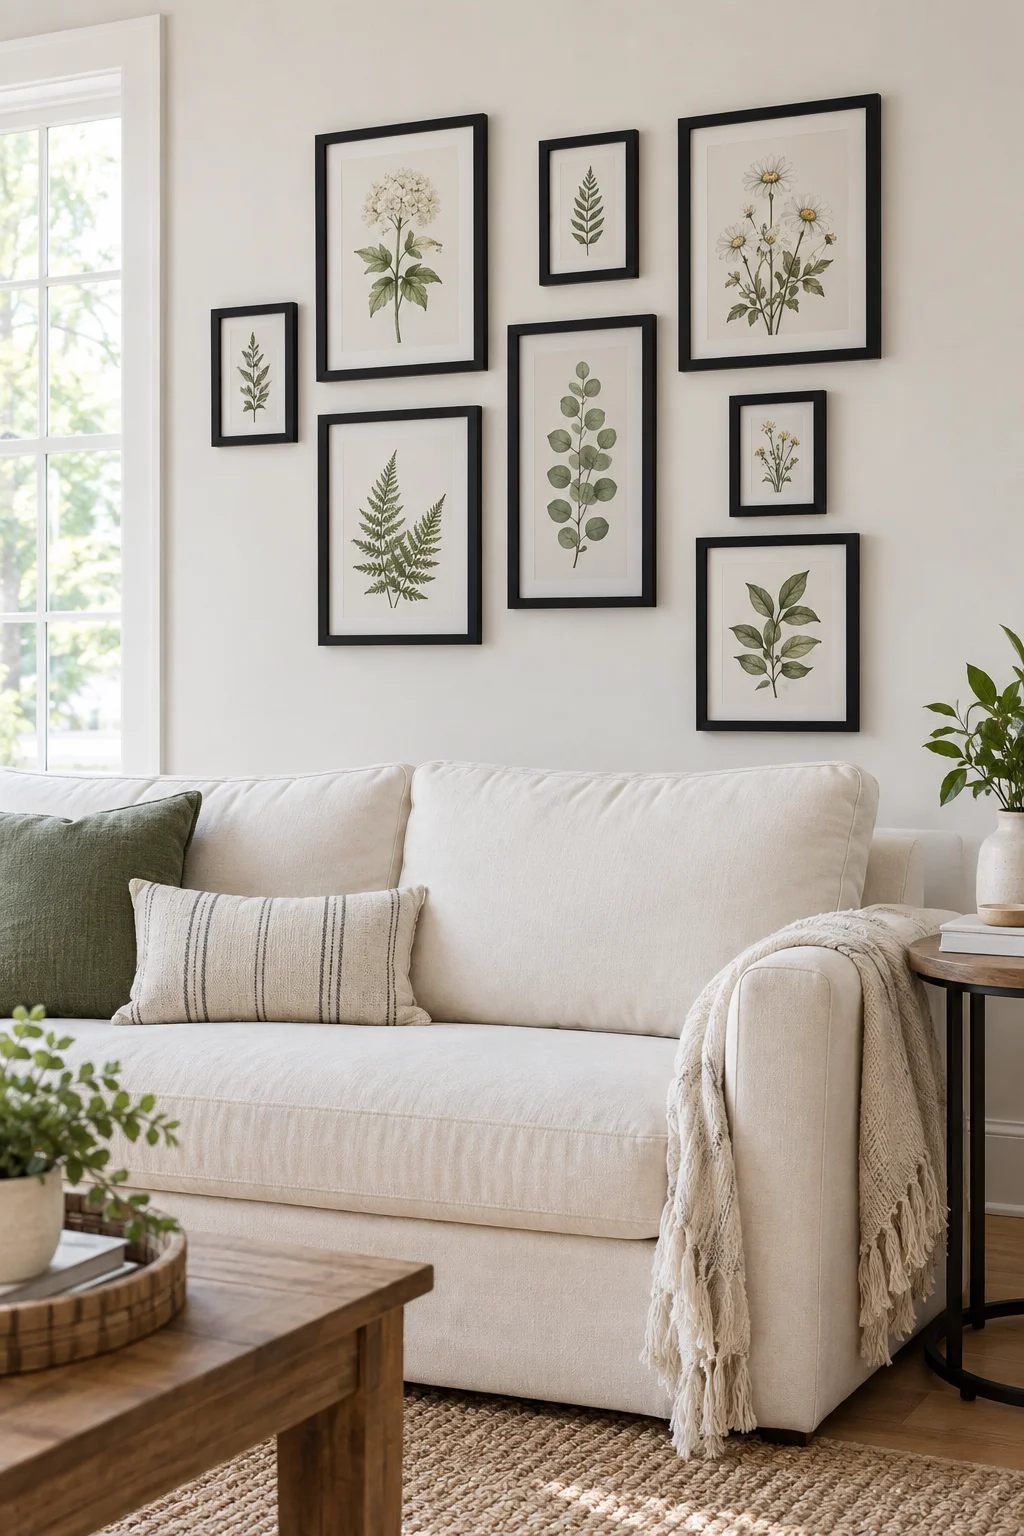
Buy frames in three or four sizes, then give them all the same paint.
Take out the glass and backing before you spray, or the paint will fog the glass. Matte black looks like a gallery. Warm white looks softer and works in small rooms. Mix tall and wide frames so the wall does not look like a grid.
Before you hang anything, lay the frames on the floor and shuffle them until the gaps look even. Take a photo. It is much easier to fix on the floor than on the wall.
html
Hang Rattan Placemats as a Woven Wall Cluster
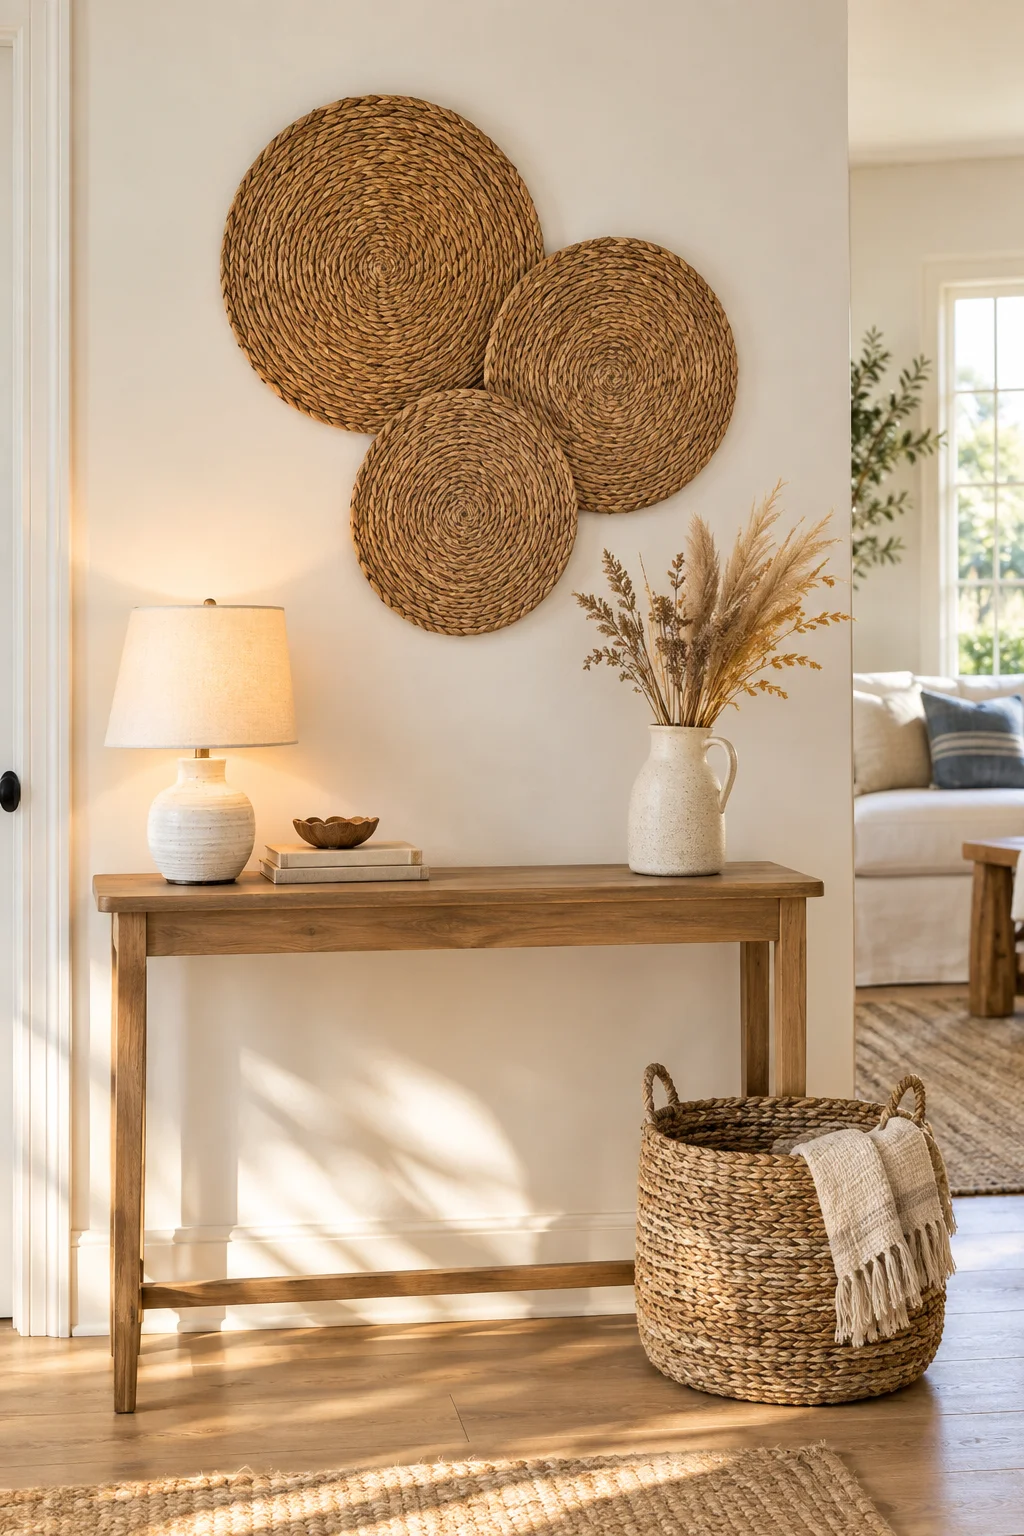
A big empty wall usually calls for a big, pricey piece of art.
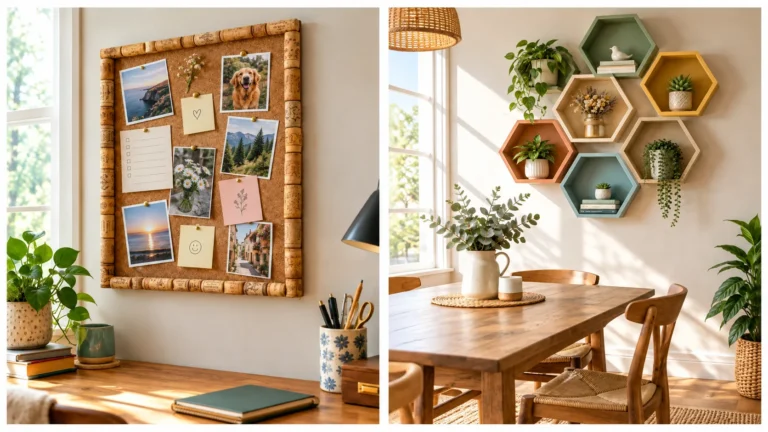
Round woven placemats are a cheap way around it. Three or five hung close together, with the edges overlapping a little, look like a collection of baskets from a shop. Choose different sizes if you can find them, and keep every one in the same natural tone.
The weave makes them easy to hang, so a small nail through a gap is all you need.
html
Lay all the placemats on the floor and overlap them until the shape feels balanced.
Hang the biggest one first, slightly off center, using a small nail or a removable hook.
Add the rest around it, then step back and shift any that look crowded.
String Wooden Beads and Rope Into a Garland
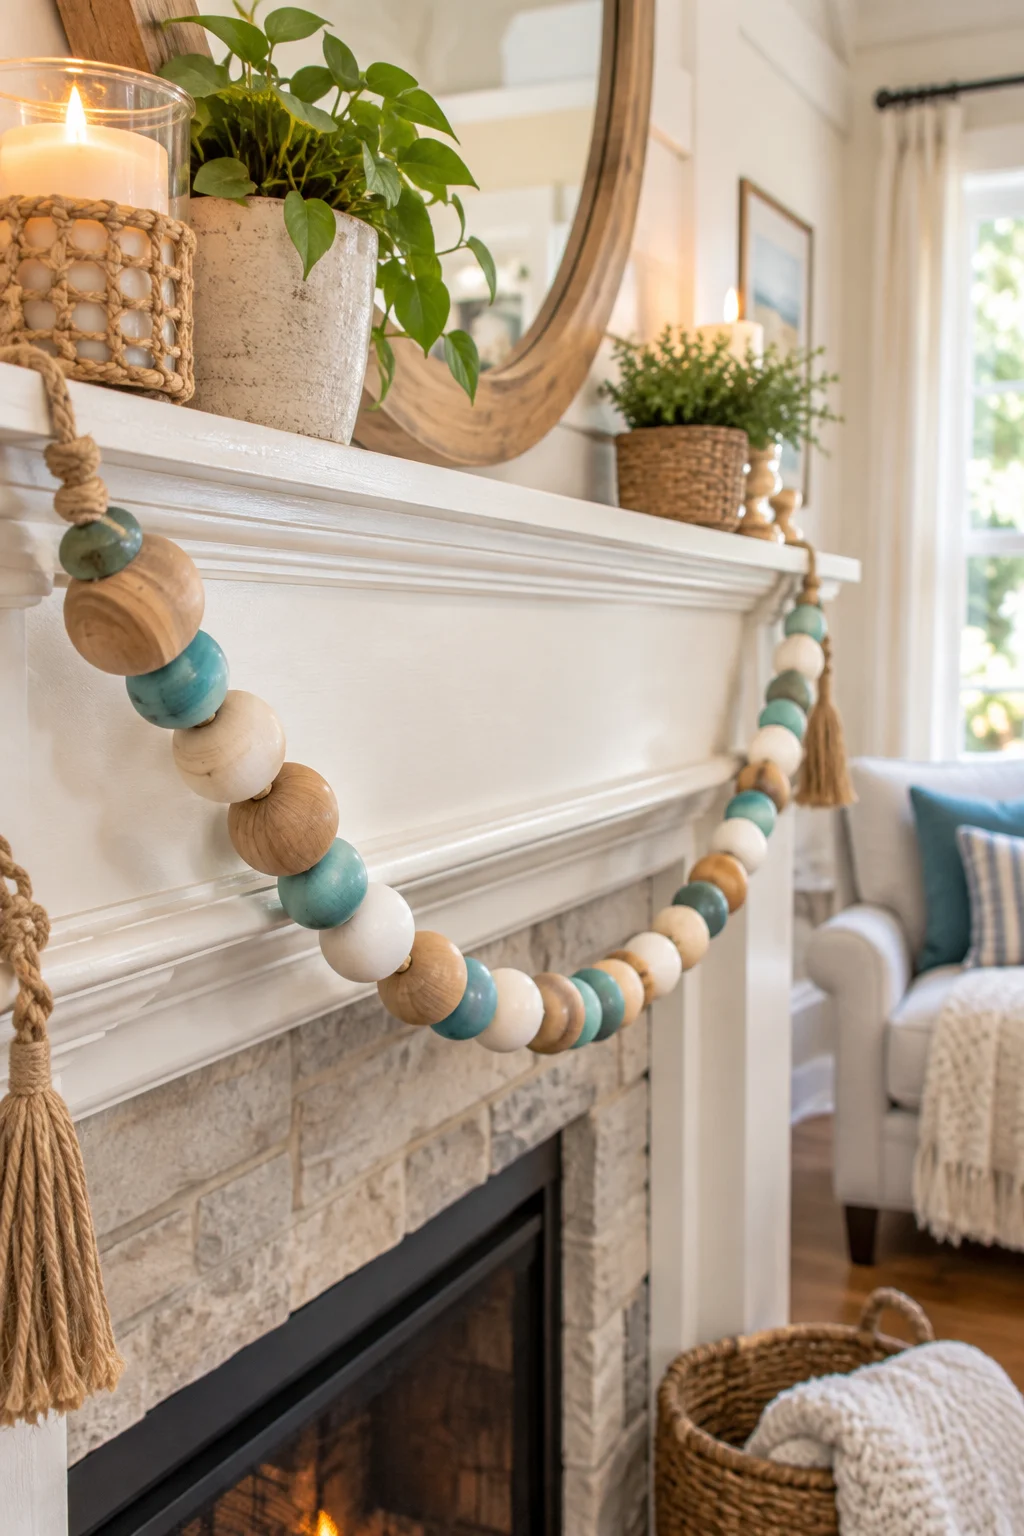
One long garland can fill a mantel, a shelf, or a window, and it costs very little.
Thread big wooden beads onto thick rope or twine, and tie a knot after each one so they stay put. Mix natural wood with cream beads, then add a few painted a soft aqua.
- Plan the pattern on a table before you thread.
- Leave a few inches of bare rope at each end for tying.
- Tie on a tassel or a ribbon bow at one end.
Drape it loosely. A garland pulled tight looks stiff and cheap.
html
Turn a Glass Bowl Upside Down Into a Display Cloche
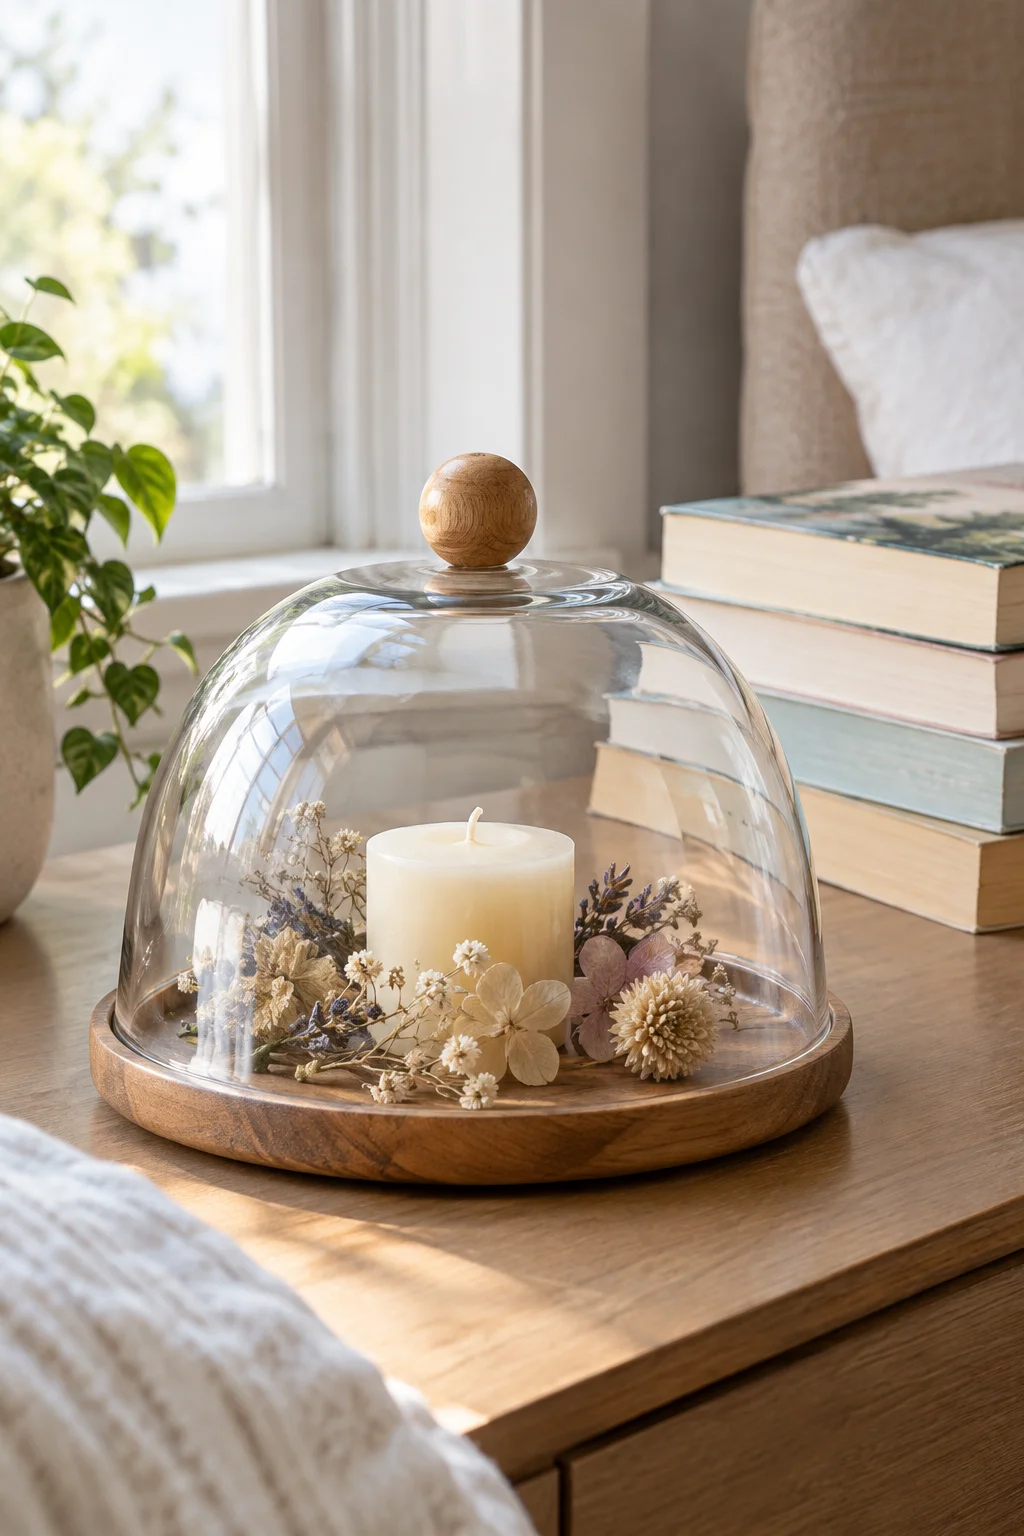
Glass bowl or glass vase? Either one can become a cloche, but they behave differently.
A bowl flipped over a small wooden plate or a slice of wood gives you a classic dome. Glue a wooden bead to the top with clear adhesive so you have a handle to lift it. Then fill the space underneath with something small and interesting, like a candle, a few dried stems, or a handful of shells.
Keep the base a little wider than the glass so the dome sits neatly inside its edge.
| Glass bowl | Glass vase |
|---|---|
| Shape: low and round, like a classic dome. | Shape: tall and narrow, like a lantern. |
| Best over: a candle, shells, or a single book. | Best over: dried stems or a tall taper. |
| Handle: a wooden bead glued to the base. | Handle: none needed, since it lifts by the narrow neck. |
Small Finishes, Big Difference
Cheap supplies were never the problem. The finish was.
Every project on this list works for the same few reasons. Matte paint hides the shine, texture gives a plain thing some weight, and one repeated color makes a mismatched pile look like a set.
If you only have time for one afternoon, make the pedestal dish or the fluted vase. Both are simple, both hold up to a close look, and both make a shelf feel finished. That is the whole trick behind dollar store DIY projects that look way more expensive: small changes, done carefully.
Save this list for the next time you want to refresh a room on a small budget.