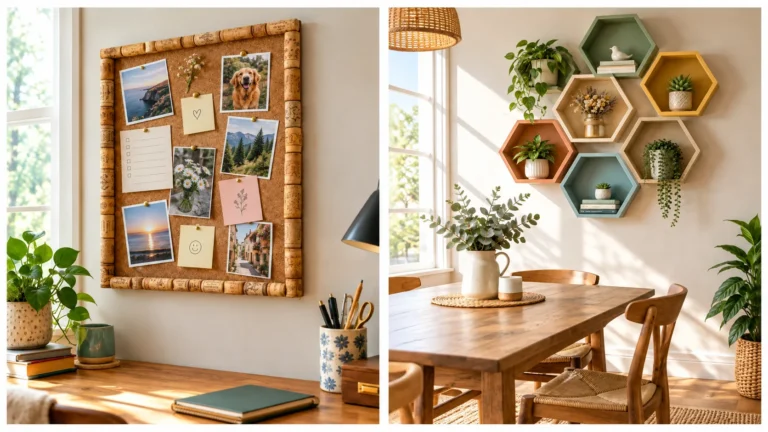

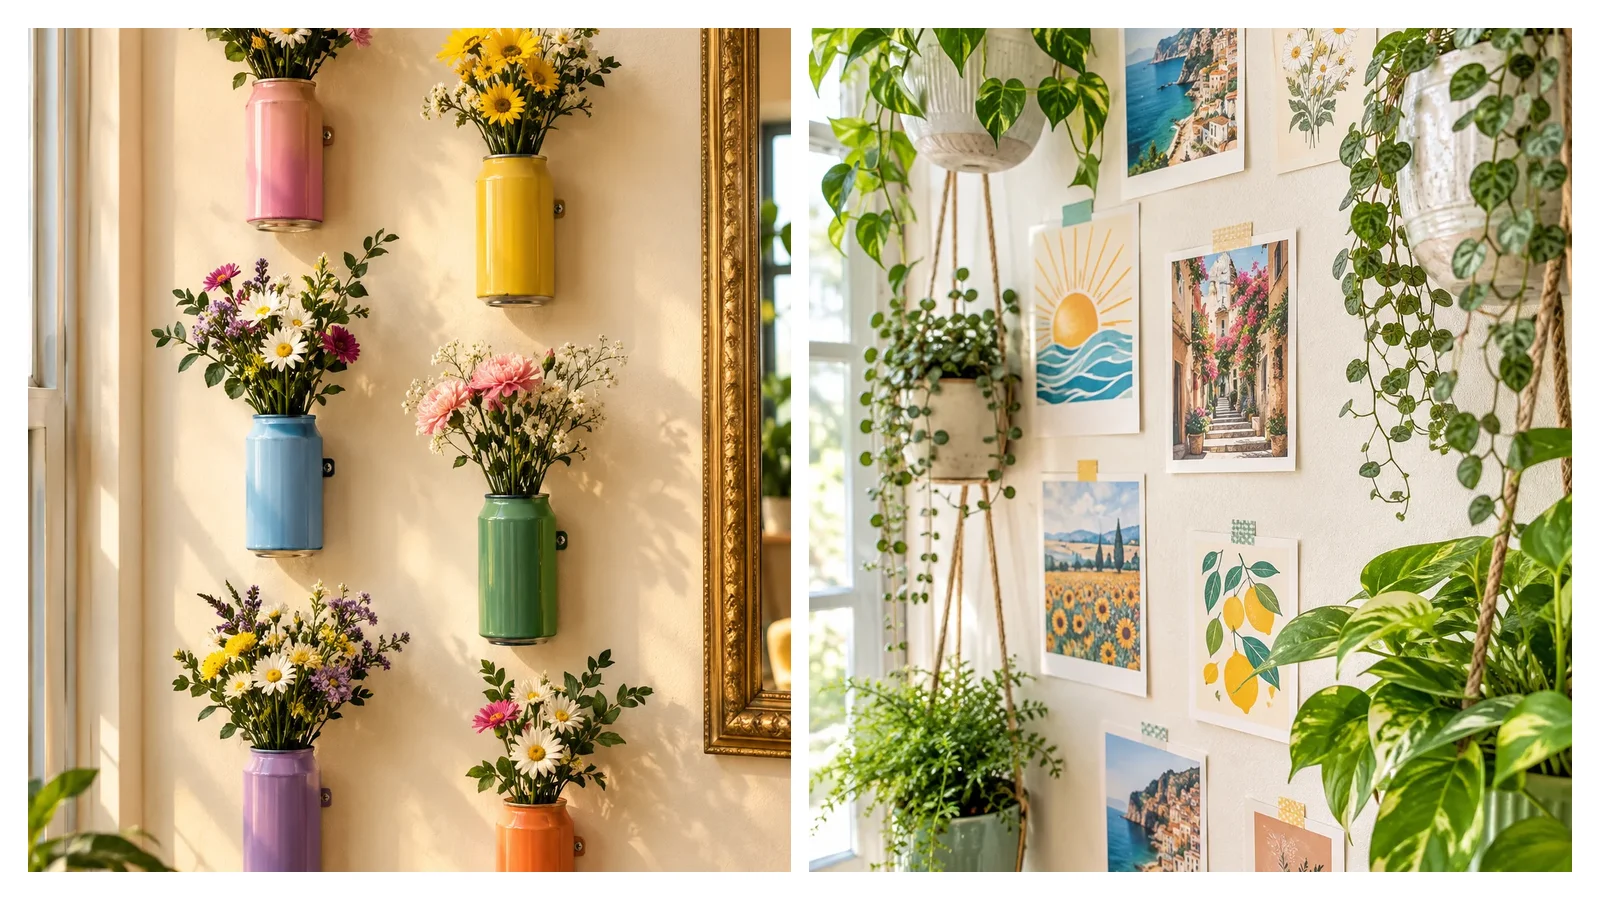
Your walls have been bare for months and you keep telling yourself you’ll get to it once you find the right store-bought piece. Meanwhile every home account on Pinterest is somehow filling entire walls with soda cans and dried lavender and it looks incredible. Here’s the part nobody says out loud: most of that decor isn’t bought. It’s built from things already sitting in a recycling bin or a junk drawer.
Room decor diy projects get a bad reputation for looking homemade in the wrong way, all crooked glue lines and mismatched paint. That’s usually a materials problem, not a skill problem. Pick the right base object and the project looks intentional on the first try.
These 16 ideas use jars, cans, embroidery hoops, and other stuff you can find without a special trip to the craft store. Some take twenty minutes. A few ask for a full afternoon. None of them need a drill, a saw, or any skill you don’t already have. Save the ones that fit your space and skip the rest.
1. Glue Soda Cans to the Wall and Fill Them With Fresh Stems
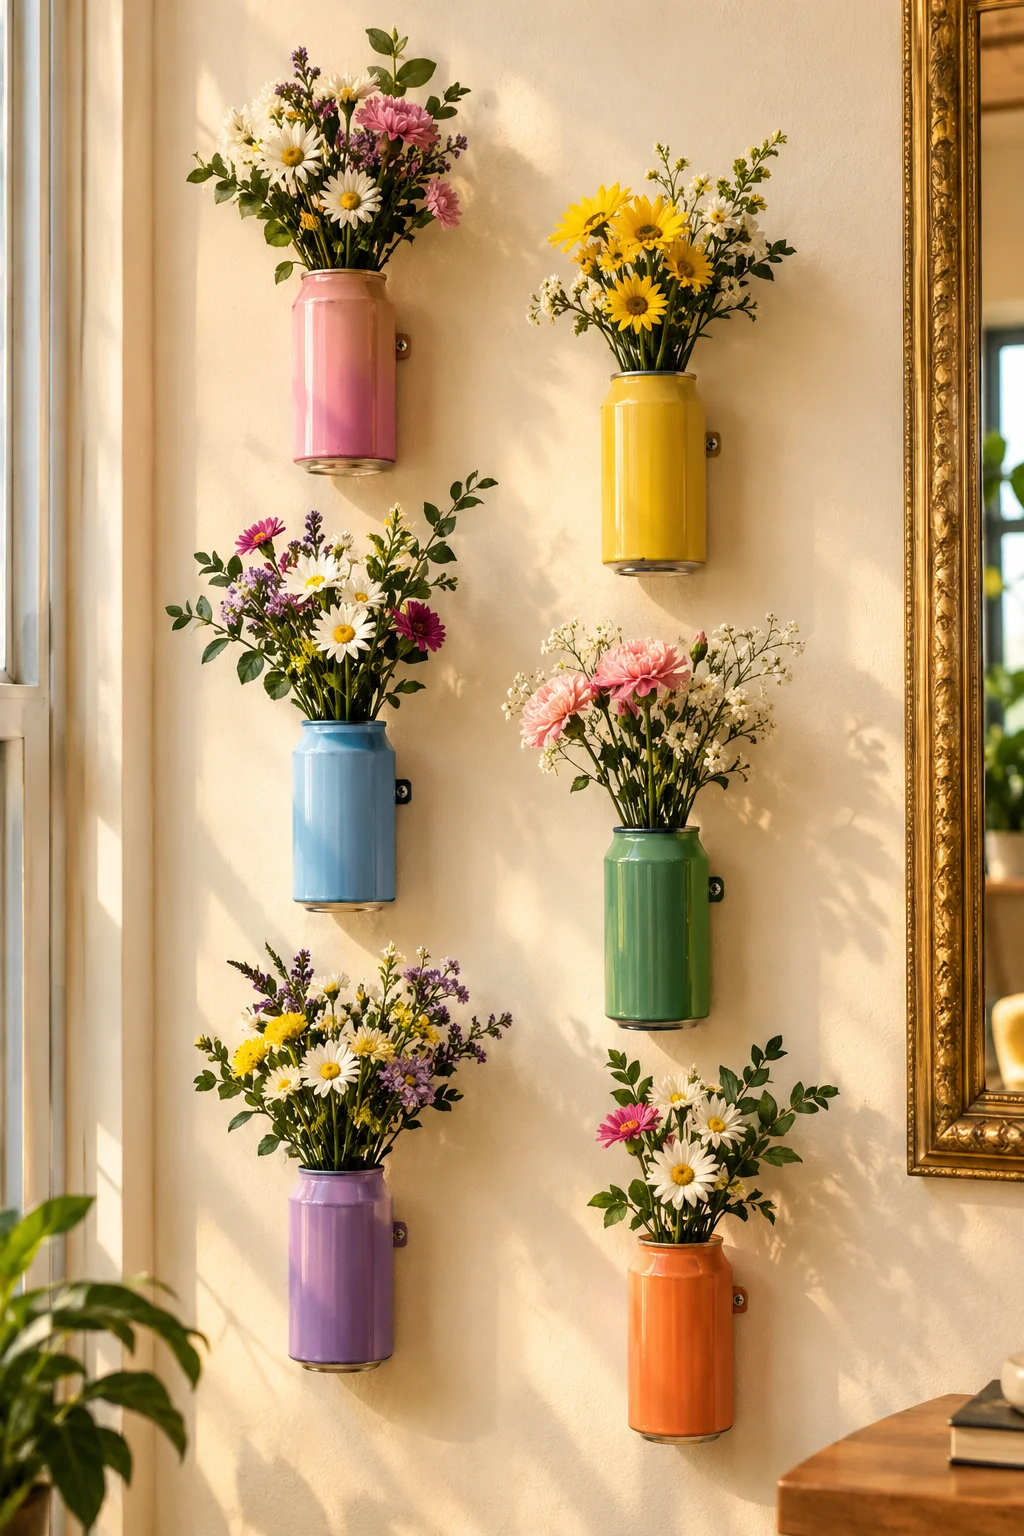
Empty soda cans already have the shape of a vase. All they need is a wrapped label or a coat of paint to stop looking like trash and start looking like something you’d buy.
What makes it hold up long term:
- E6000 or a strong glue dot keeps the can steady on drywall
- A picture hanging strip on the back skips actual glue if you rent
- Rinsed cans dry fast, so you can start decorating the same afternoon
Group five or six cans at different heights instead of one straight row. The gaps between them are where the wall actually starts to feel finished.
2. Paint Mason Jars Into Letters That Spell Out a Word on Your Shelf
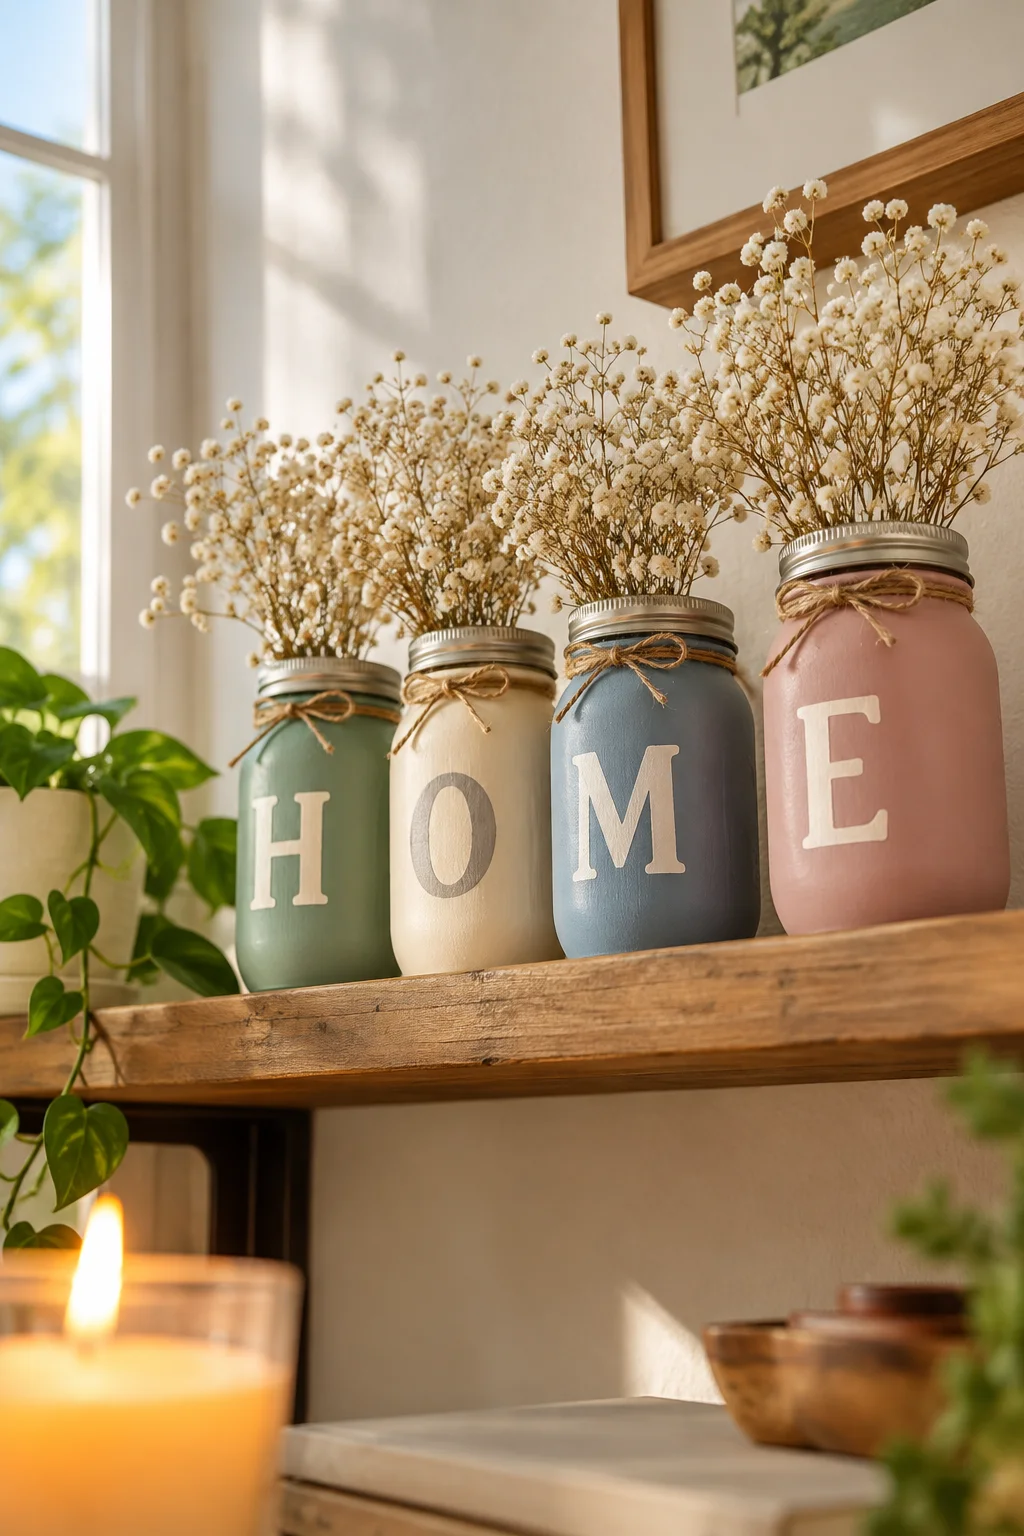
Line up four or five small jars, paint one letter on each, and you’ve turned a plain shelf into something that actually says what the room feels like. HOME, LOVE, or a name all work the same way.
Grab before you start:
- Small mason or baby food jars, matching size
- Chalk paint in two or three colors
- A paint pen for the letters and any doodled leaves
Twine wrapped around the jar necks hides any paint drips at the rim, which is the part beginners always mess up first.
Wash and dry the jars, then paint two coats of chalk paint, letting each dry fully.
Pencil the letter lightly first, then trace it with the paint pen so it stays even.
Wrap twine at the neck, tuck in a few dried stems, and set the jars in order.
3. Hang Three Little Jars From a Dowel for a Tabletop Plant Stand
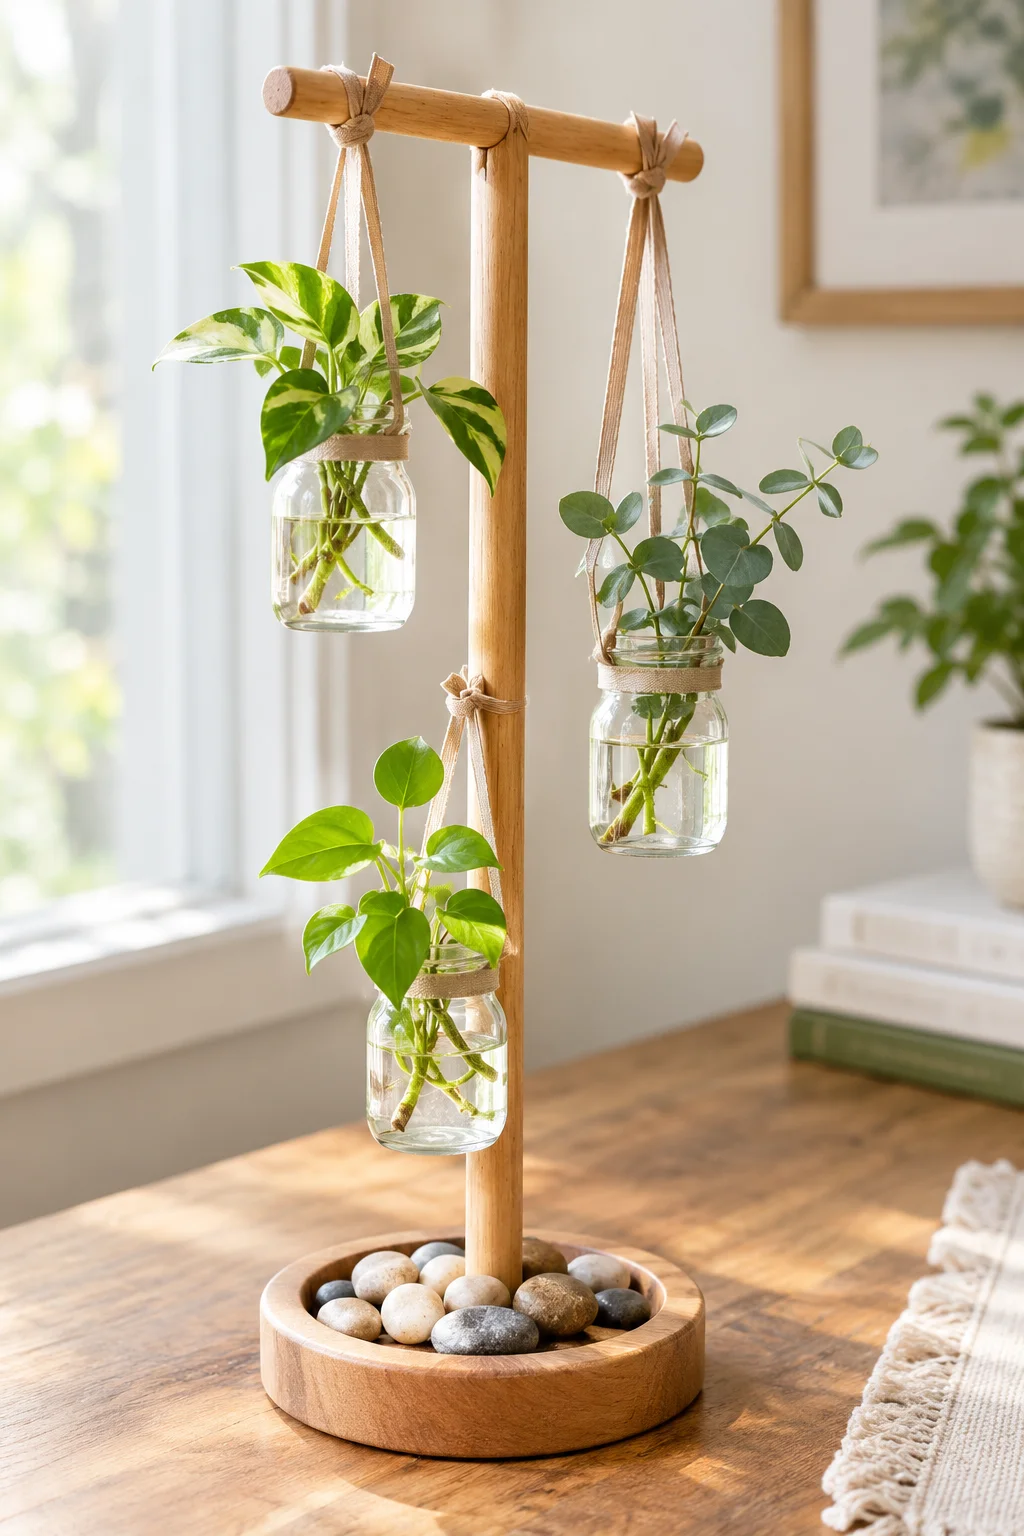
There’s that one corner of the dresser or entry table that never quite fills in, no matter what you set on it. A single dowel with tiny jars tied at different heights gives that spot actual dimension instead of one more flat object sitting there.
Ribbon at the jar rim doubles as the hanger, so there’s nothing to drill and nothing to buy that isn’t already ribbon and glue. Stones at the base keep the dowel from tipping once the jars have water in them.
A dresser corner with one flat candle and a lot of empty space around it.
Three jars at staggered heights, greenery spilling at different levels, height where there was none.
4. Sew Fabric Pockets Onto a Placemat for a No-Drill Vase Wall
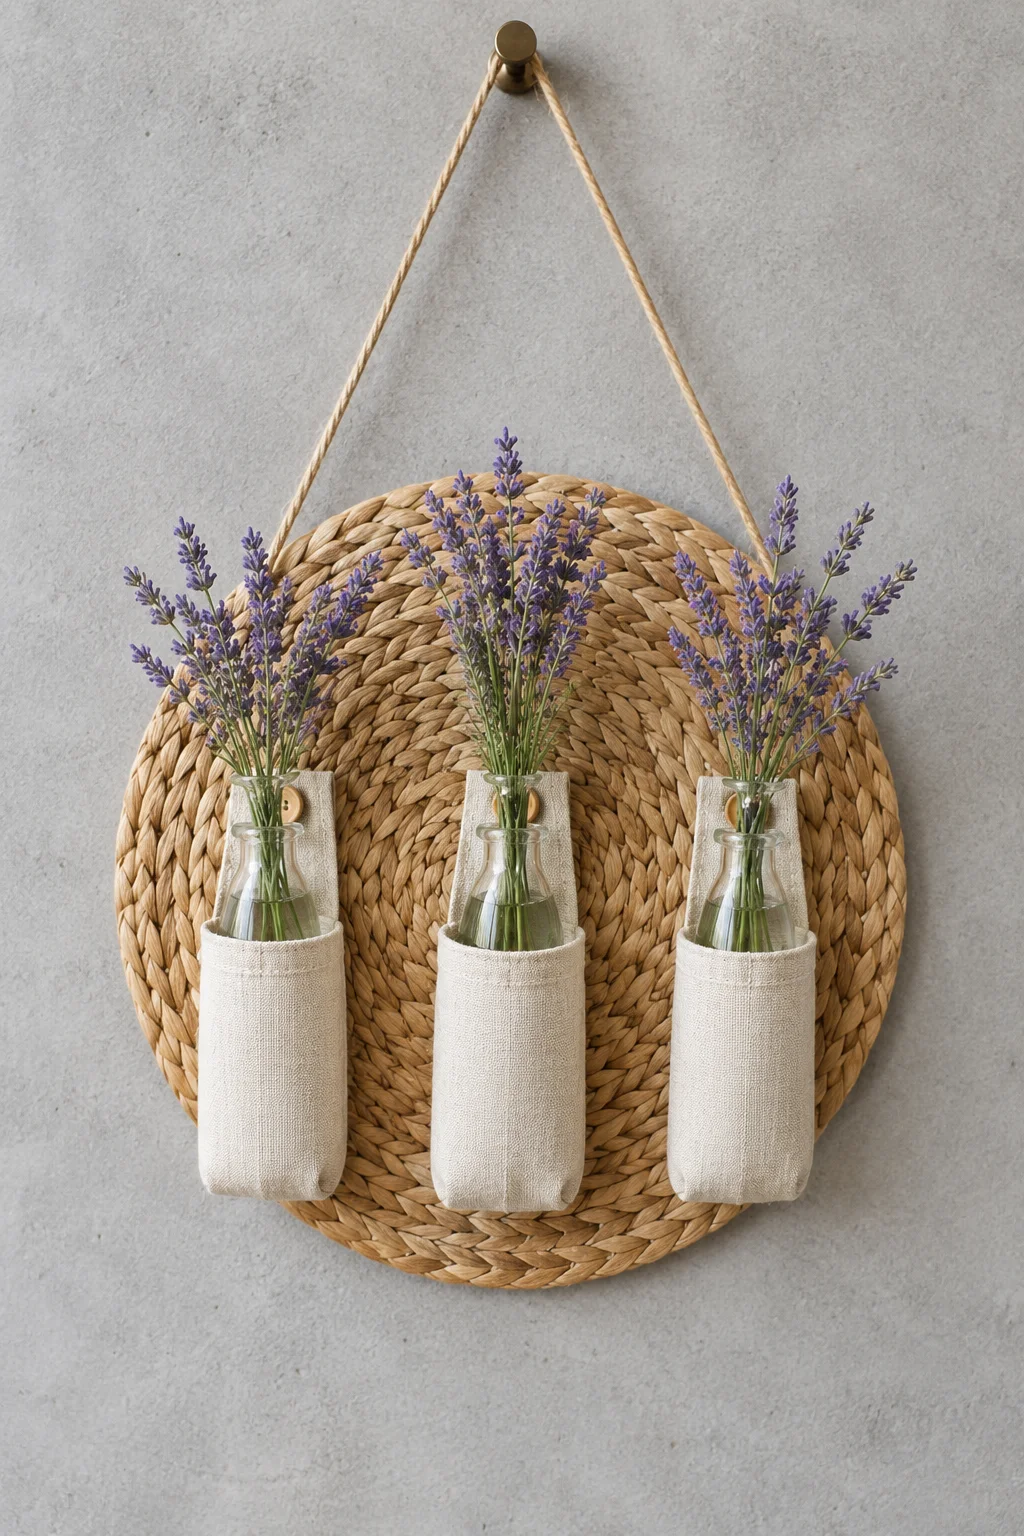
The mistake most people make with a rental-friendly wall display is reaching for hooks and nails first, then getting annoyed when the landlord rules get in the way. A woven placemat with sewn-on fabric loops holds small glass bud vases without touching the wall at all beyond one Command hook at the top.
Before you buy anything:
- One flat woven placemat, the sturdier the better
- Small bud vases or test tubes that fit snug in a loop
- Fabric scraps or ribbon for the pocket loops
This one comes down in about thirty seconds if you move.
Before you start sewing
5. Weave Fairy Lights Through a Faux Ivy Garland for Instant Glow
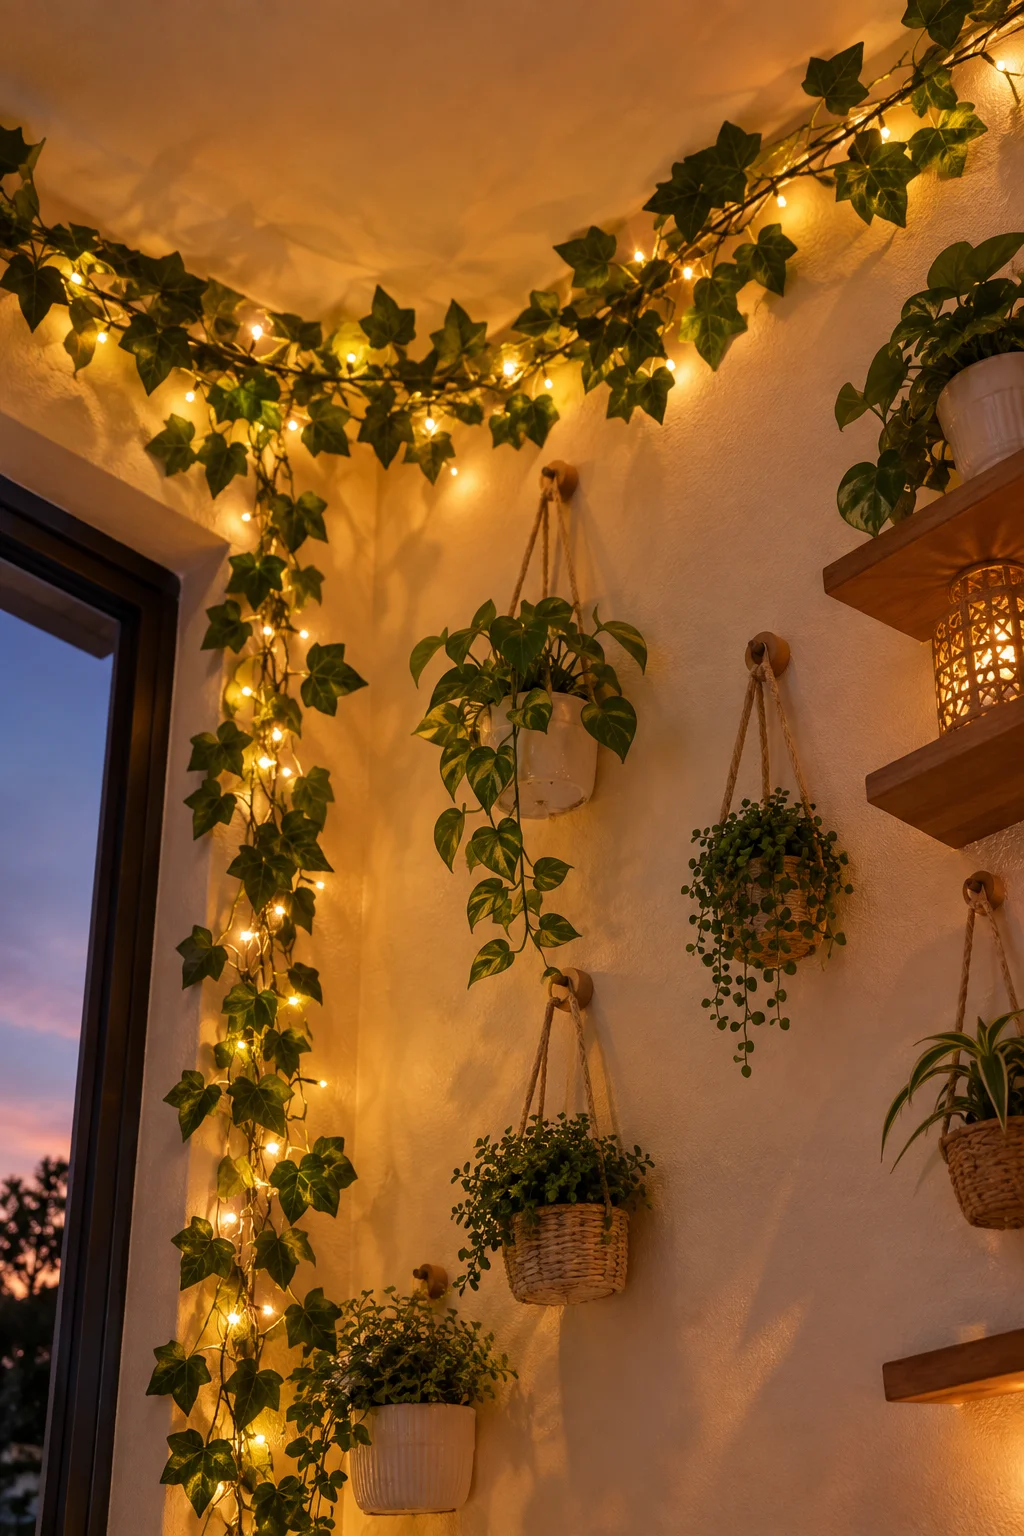
A wall full of little vases and jars looks nice by daylight and kind of disappears once the sun goes down. Weaving a warm white fairy light strand through a faux ivy garland fixes that in about ten minutes, and it’s the one detail that makes photos of the whole wall actually glow.
Battery packs tuck behind the garland leaves so there’s no visible cord running down to an outlet. Buy a longer strand than you think you need. Coiling extra length in one corner reads as intentional, running out of lights halfway across does not.
6. Tape Up a Mini Gallery of Postcards Between Your Planters
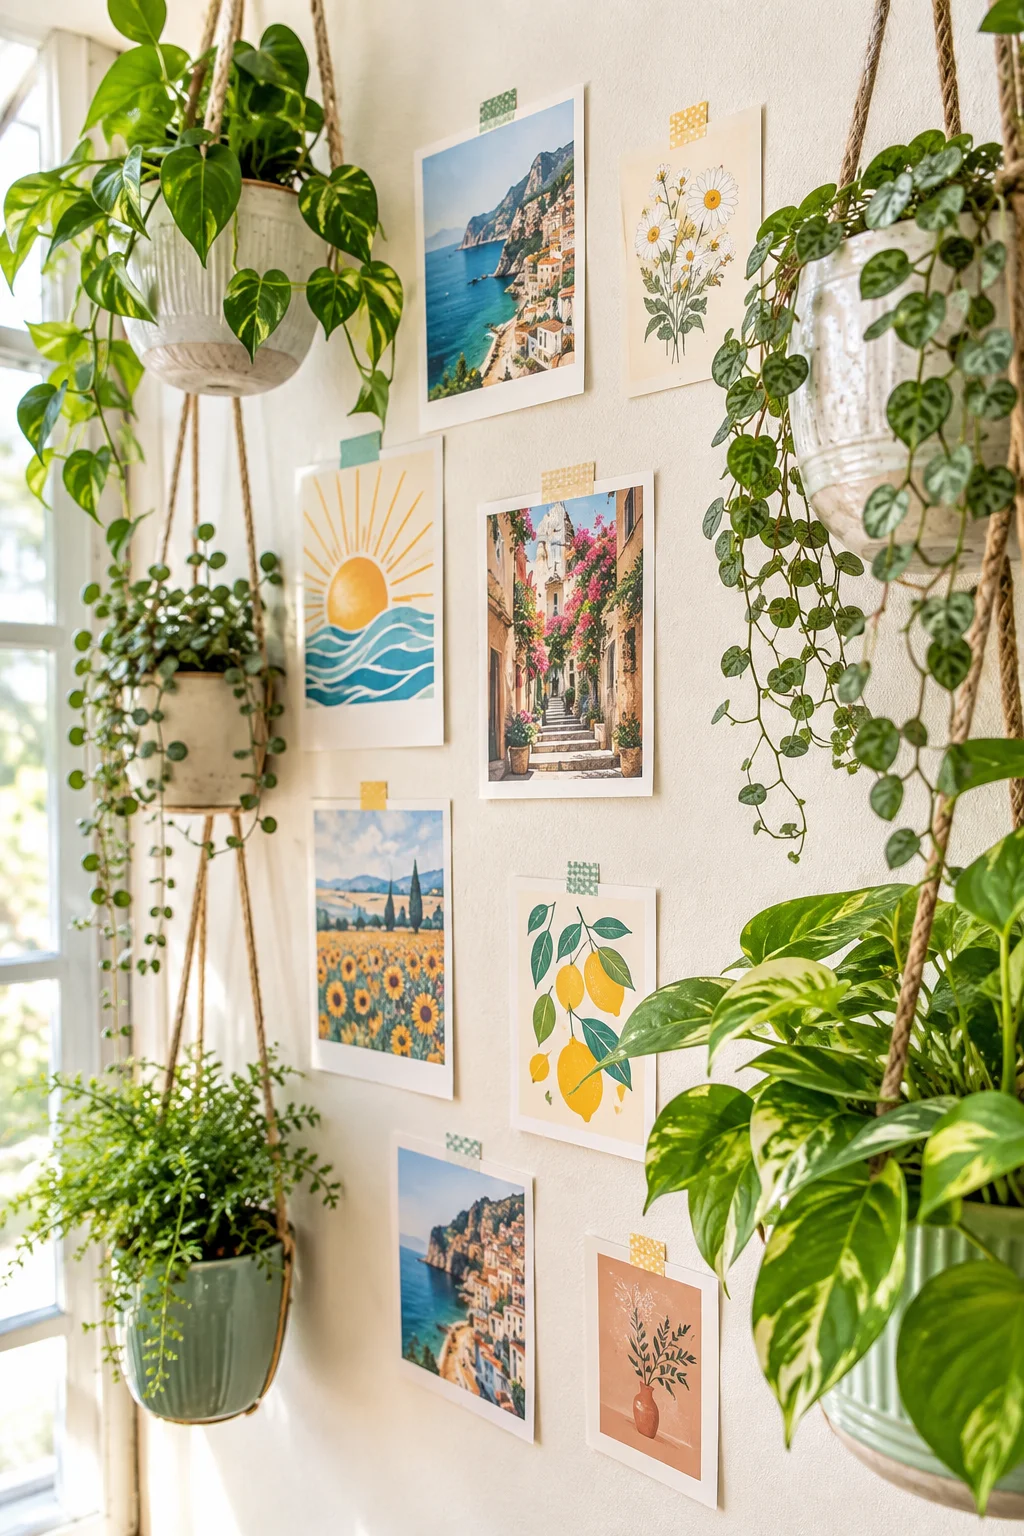
Look closely at any wall full of hanging planters and you’ll notice the gaps between them are doing nothing. That flat space between a fern and a jar of daisies is exactly where a small postcard or print earns its spot, filling the negative space without competing with the greenery for attention.
Skip the frames entirely. A loop of washi tape at each corner holds paper flat against the wall and comes off clean when you want to switch it out for something new next season.
| Washi Tape | Poster Putty |
|---|---|
| Peels off with zero wall damage | Can leave faint marks on some paint |
| Doubles as decoration itself | Invisible once pressed flat |
| Best for paper and postcards | Best for slightly heavier prints |
7. Press Real Flowers Behind Glass for Frames That Cost Almost Nothing
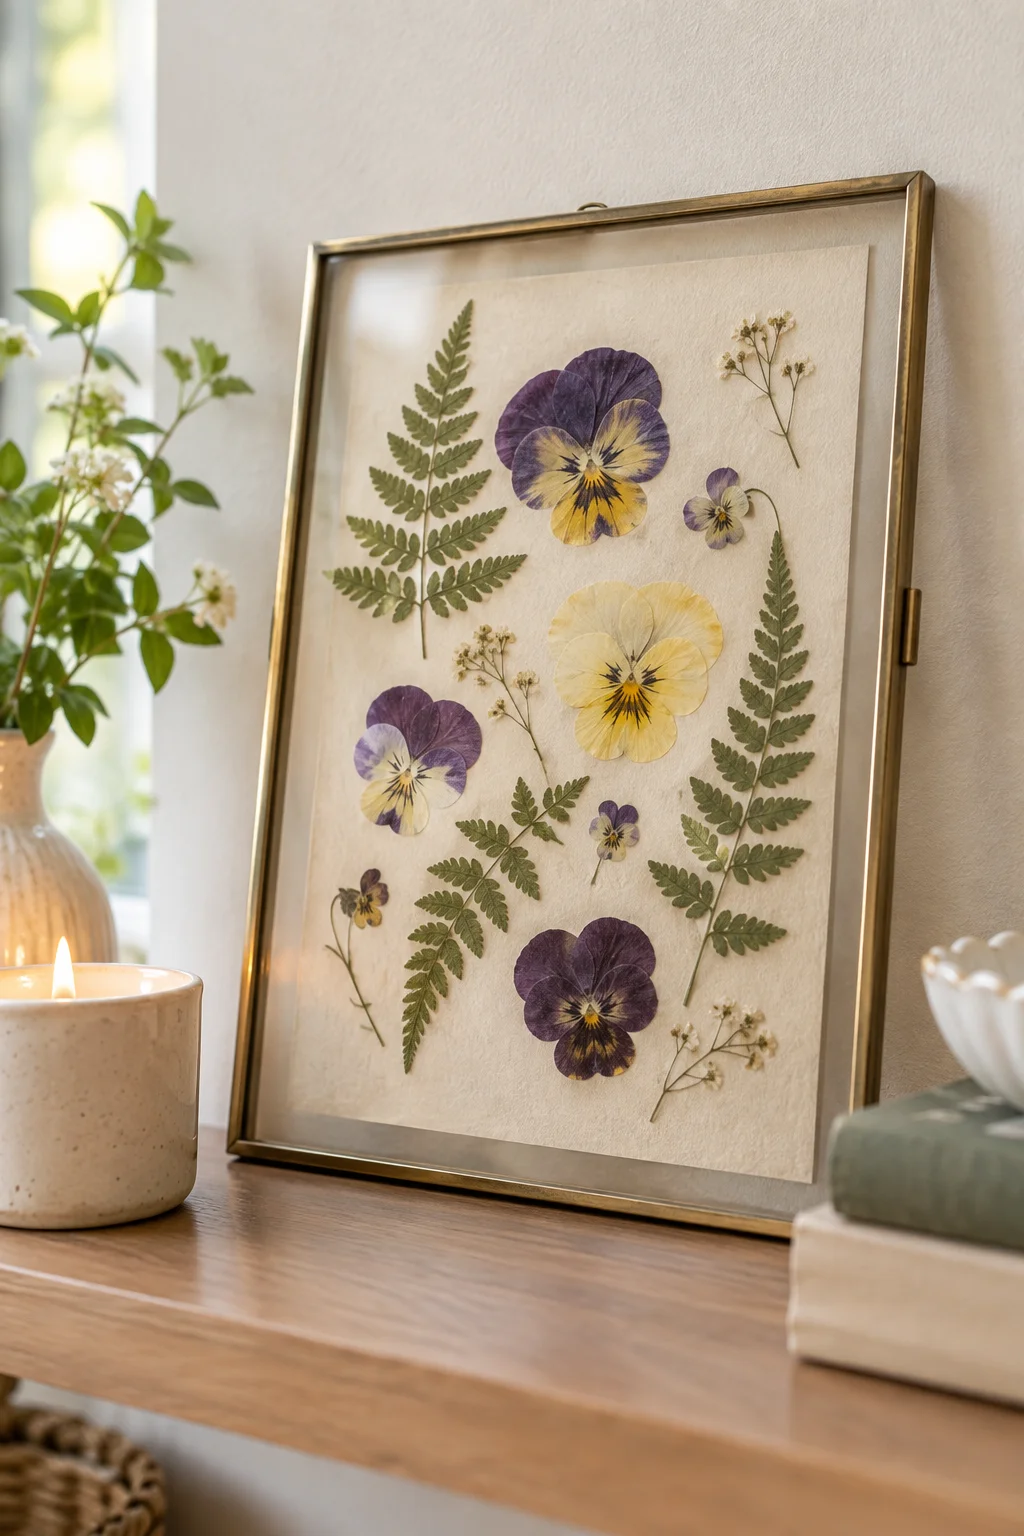
Flat flowers press well. Fluffy ones do not. That’s the one rule that decides whether this project looks like a botanical print or a squished mess, so reach for pansies, ferns, and single-petal blooms instead of anything with layers, like roses.
A heavy book does the actual pressing over about a week. After that, arrange the dried pieces on cardstock and slide it into a frame with the glass touching the flowers directly, no mat needed.
Pick flat blooms and press them for a full 7 to 10 days.
Use a thin frame so the glass sits close to the flowers.
Pressing thick or fresh-cut flowers before they wilt some first.
Stacking overlapping petals, they’ll mold instead of flatten.
8. Line Up Painted Glass Bottles for a Bud Vase Collection
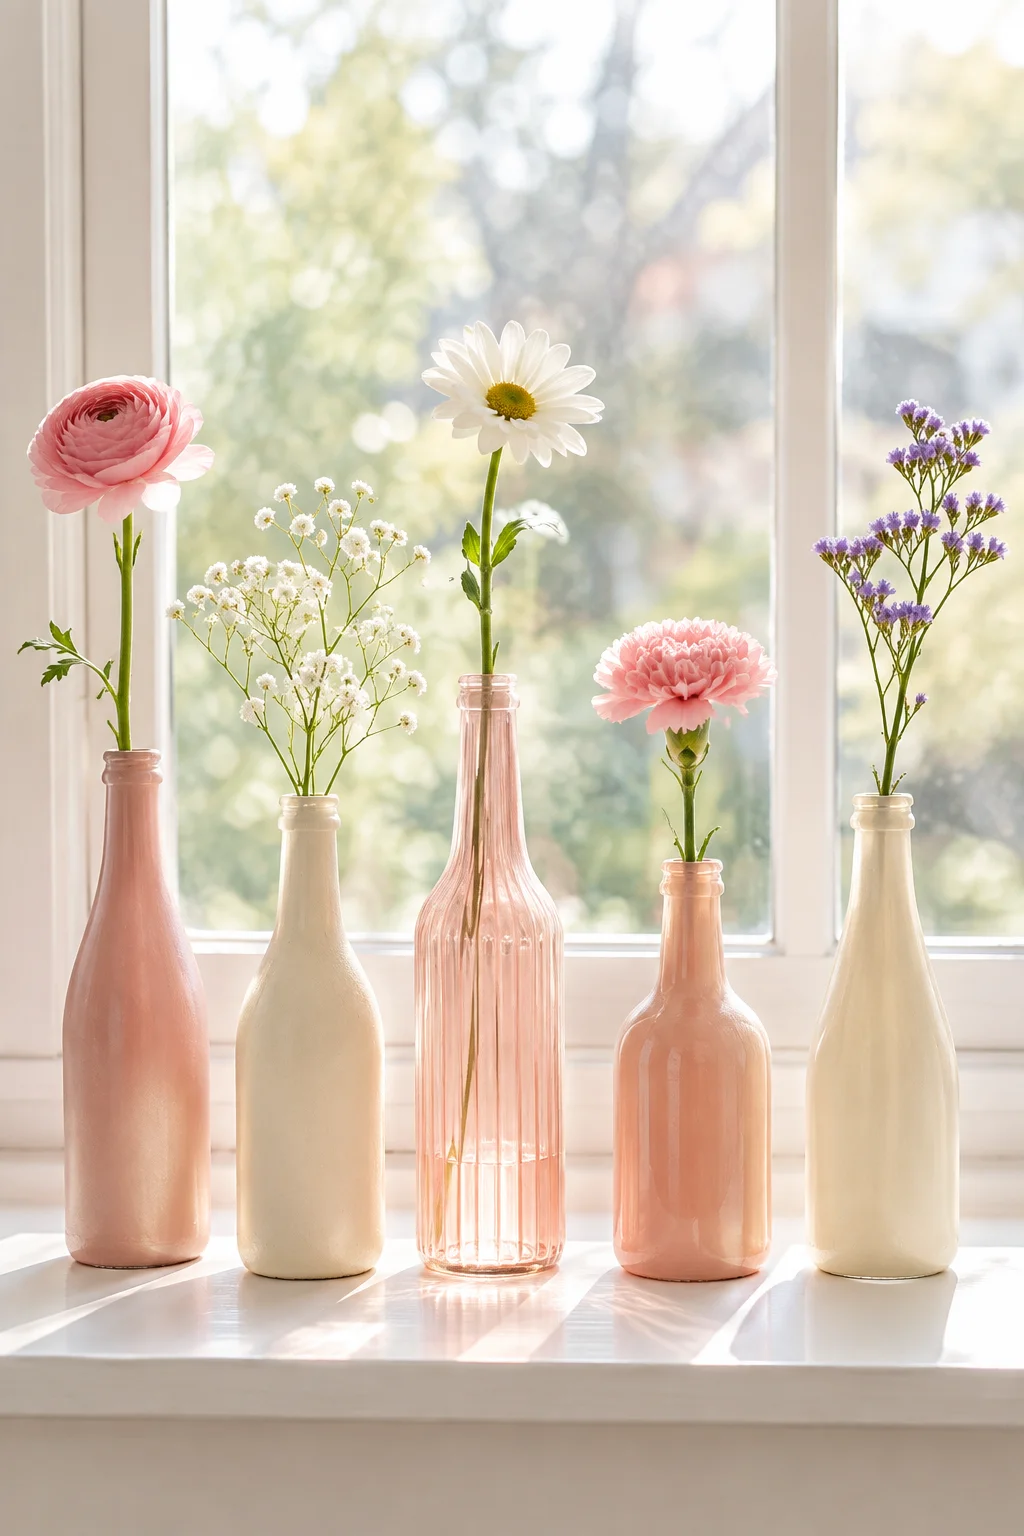
Wine bottles, olive oil bottles, even the tall sauce jars from dinner last week all have the same narrow neck that holds a single stem upright without flopping over. Paint the outside in muted shades of one color family and line five or six across a windowsill or shelf edge.
The trick is restraint. One color family, different heights, one stem each. That’s the whole formula, and it works because your eye reads a group like that as a collection instead of a pile of recycling that got decorated.
💡 Quick Tip
Acrylic paint mixed with a little dish soap grips glass without primer, and it peels off clean if you ever want the bottle bare again.
9. Skip the Sewing Machine and Knot a Fabric Wall Hanging Instead
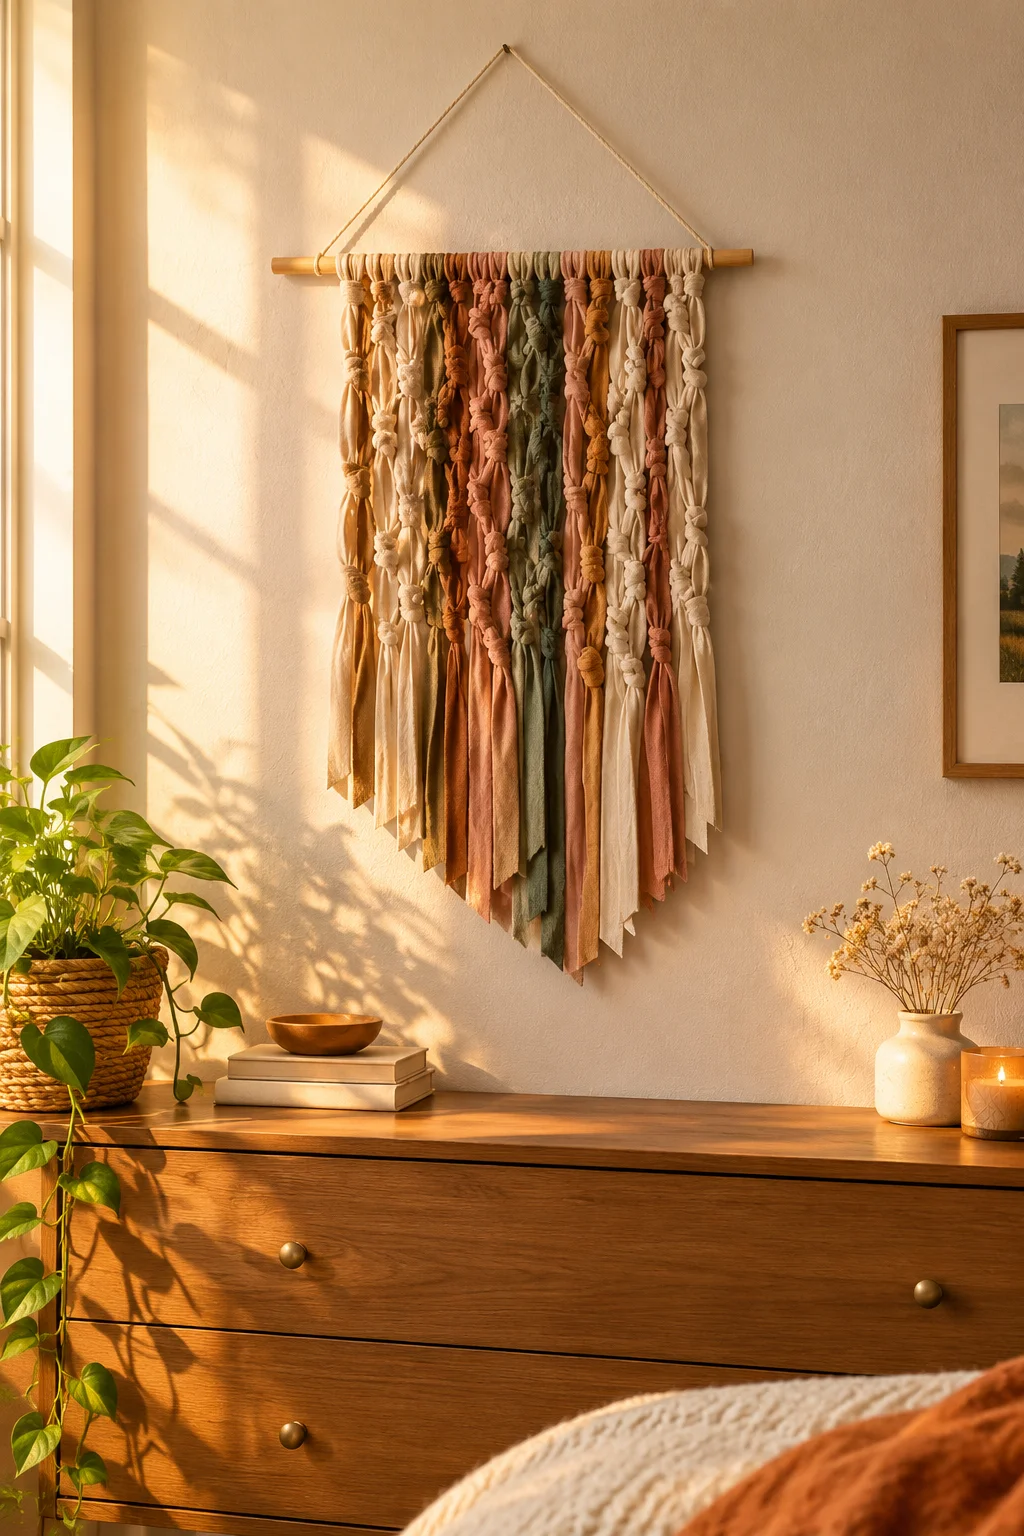
A lot of people rule out fabric wall art because they don’t own a sewing machine or don’t want to dig it out of a closet. You don’t need one. Strips of fabric knotted straight onto a dowel, no stitching at all, create the same textured, layered look that a woven macrame hanging gets, just faster.
Cut strips a little longer than you think, knot them in rows, then trim the bottom into a straight or angled fringe once every strip is hanging.
Knots hide uneven cuts better than stitches do, so this is actually the more forgiving version of fabric wall art, not a shortcut version.
10. Turn an Embroidery Hoop Into a Tiny Cork Board
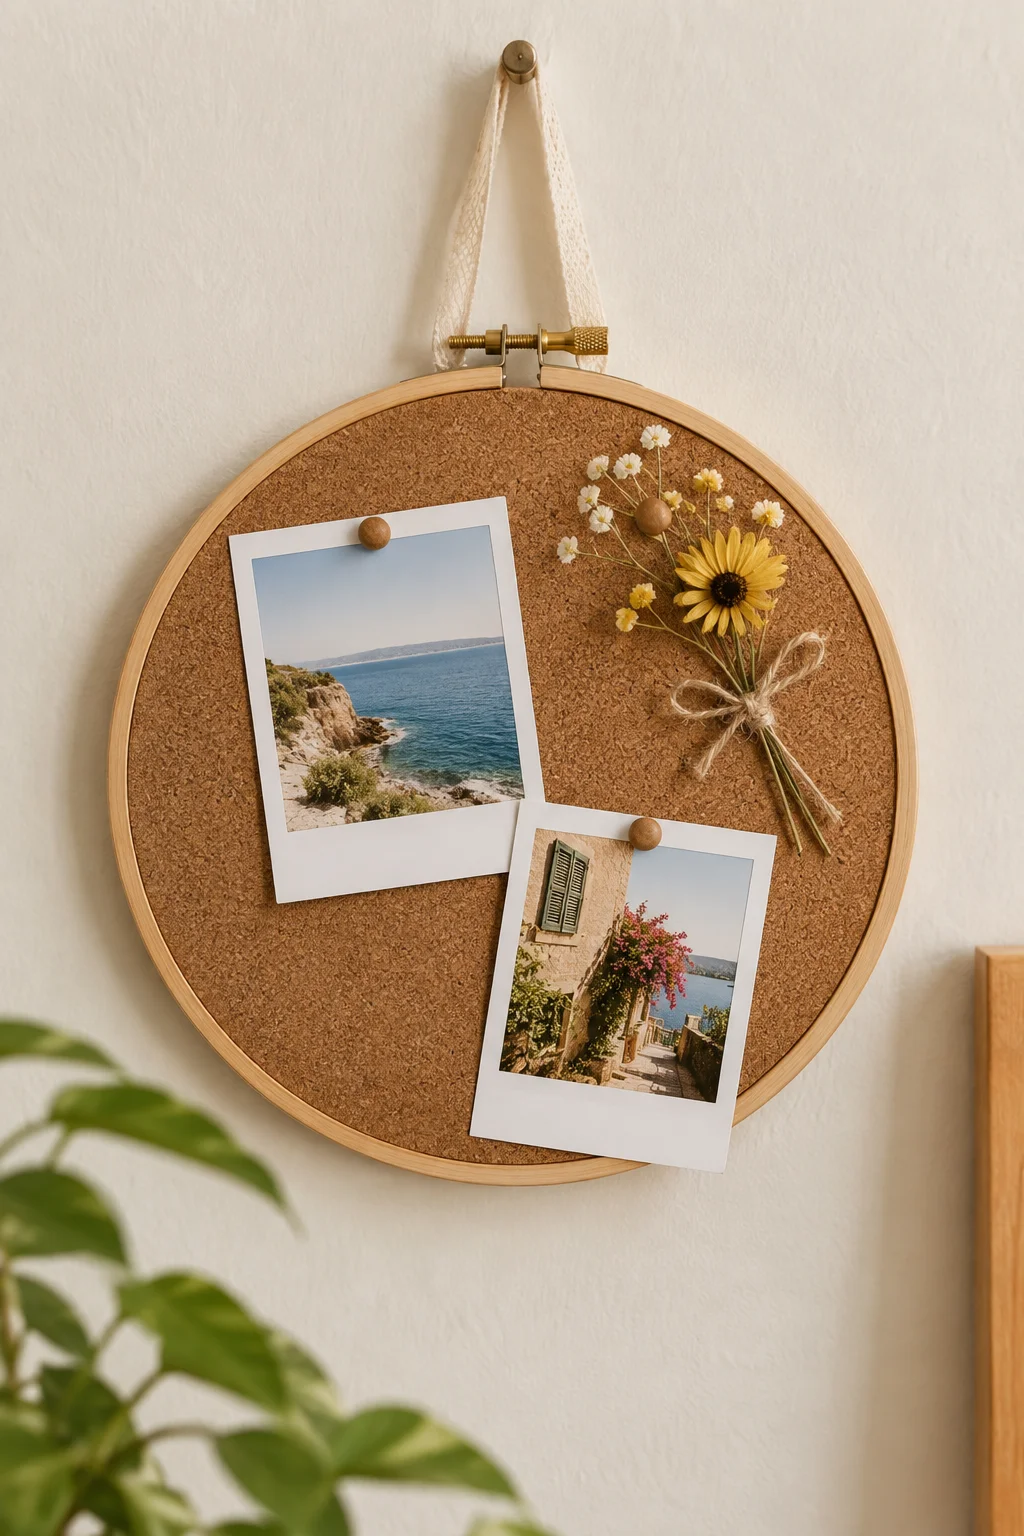
Cut a circle of thin cork sheet, glue it inside an embroidery hoop, and you’ve got a pinboard sized for exactly the amount of wall you want to fill. It holds a few photos, a ticket stub, one pressed flower, without needing an entire bulletin board’s worth of space.
Steps, start to finish:
Trace the inner hoop ring onto thin cork sheet and cut it out.
Glue the cork circle inside the smaller ring, then tighten the outer hoop over it.
Loop ribbon through the hoop’s screw hardware and hang it wherever you want a small, personal spot.
11. Wrap Jars in Twine for Candle Holders That Actually Match
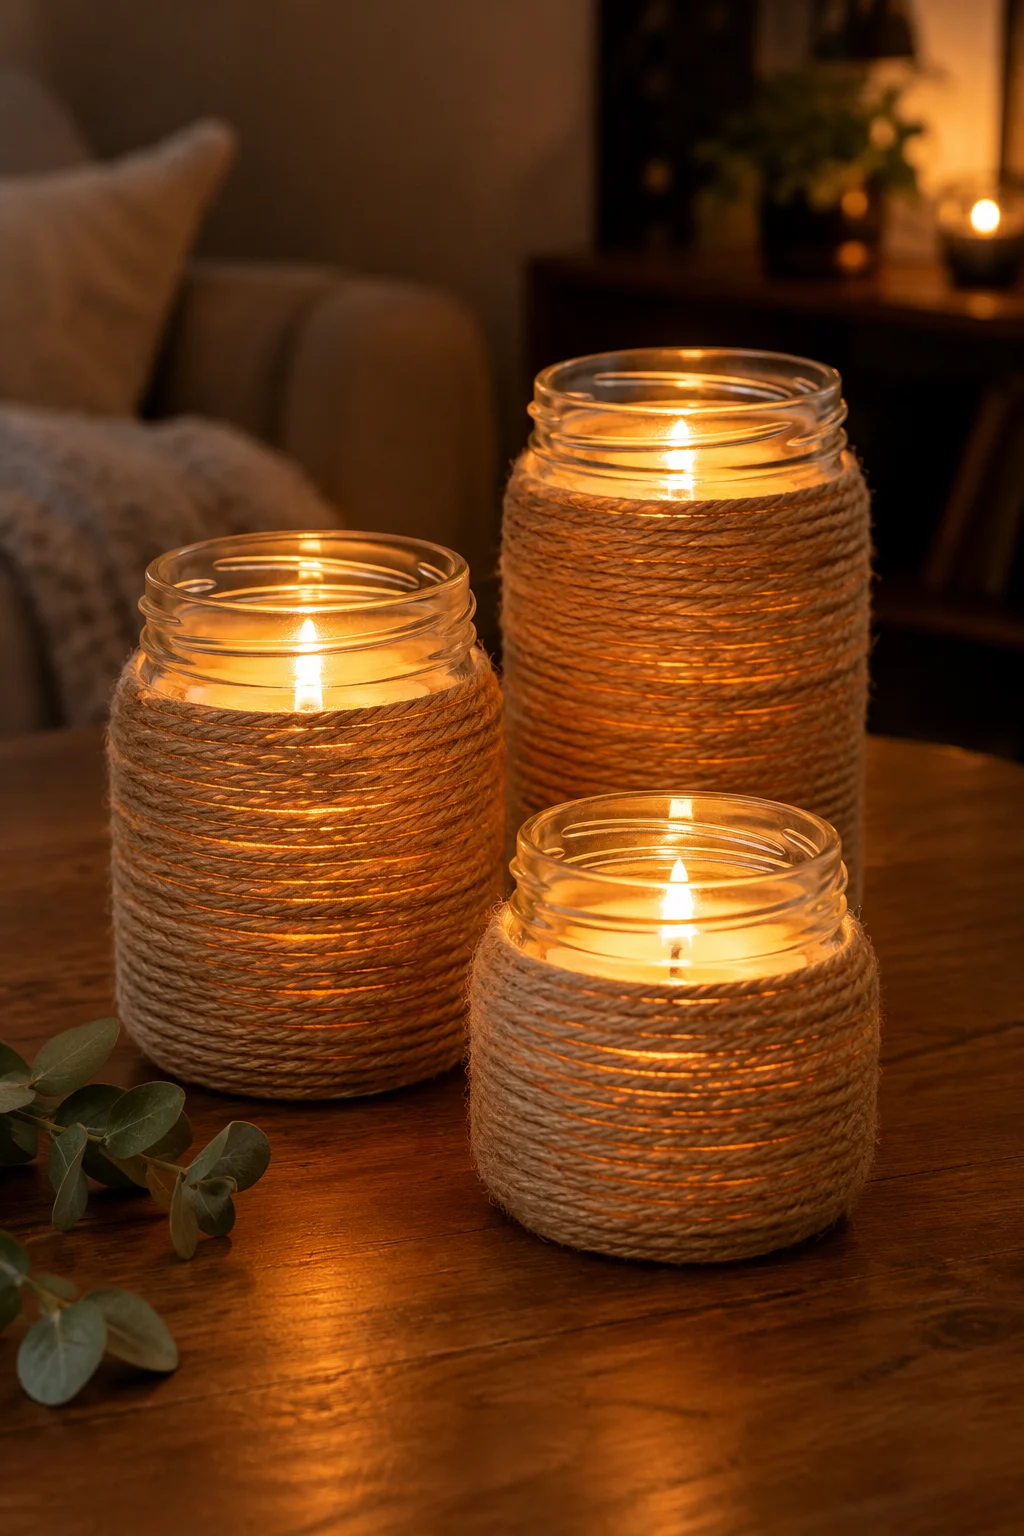
Mismatched candle holders are one of those small things that quietly bug you every time you light one, different heights, different finishes, nothing sitting together right. Wrapping a stack of plain jars in the same twine, hot glued row by row from the base up, solves that in one afternoon and costs about as much as a single store-bought holder.
A tea light or short pillar candle sits inside, and the glass keeps the flame contained while the twine gives off that warm, textured look candle brands charge extra for.
Three candle holders, three different finishes, none of them sitting well together on the shelf.
Same three jars, same twine, same warm finish, finally reading as one intentional set.
12. Flip a Cardboard Box Into a Shelf Tray for Loose Odds and Ends
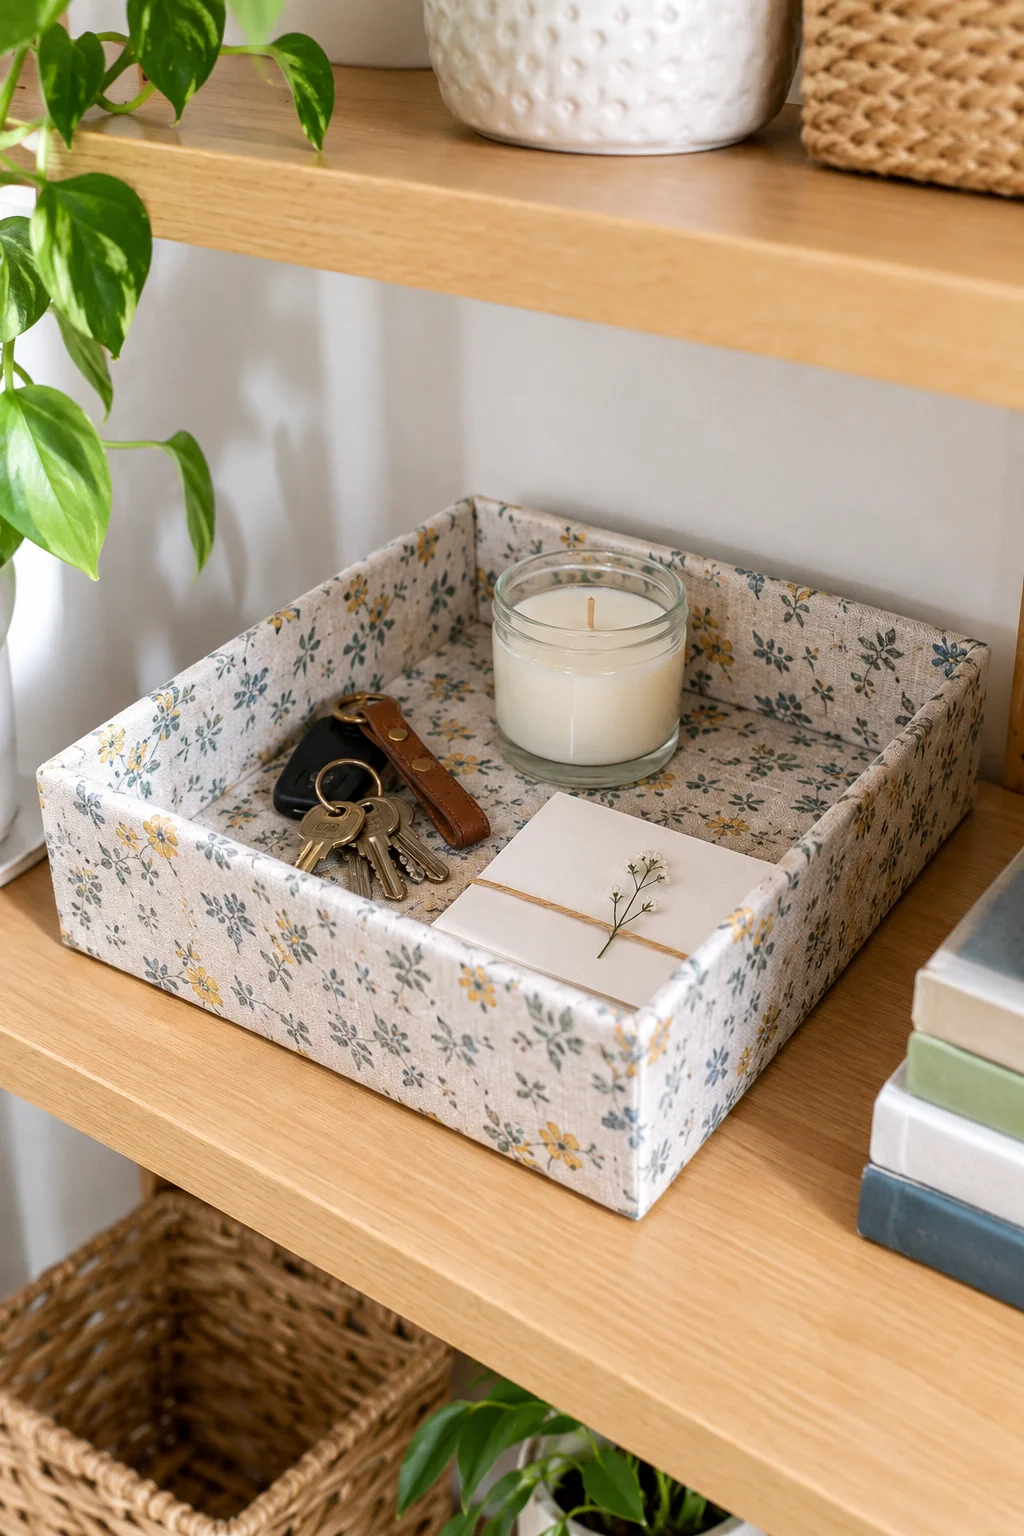
Every shelf has one section that becomes a dumping ground for loose stuff, keys, a lighter, a hair tie, nothing that belongs together but everything that needs somewhere to live. A shallow cardboard box lid, covered in leftover fabric or contact paper, turns that mess into a tray that looks like it was placed there on purpose.
- Cut the box lid down so the sides sit about an inch tall
- Wrap it in fabric using spray adhesive, folding corners like a gift
- Set it wherever loose items currently pile up uncontained
It’s the fastest project on this list and probably the most useful.
- ▸Works with any shallow box, shoebox lids included.
- ▸Fabric scraps from other projects are enough, no new material needed.
- ▸Takes under fifteen minutes once the box is cut to size.
13. String Photos on a Clothesline for a Wall That Changes With You
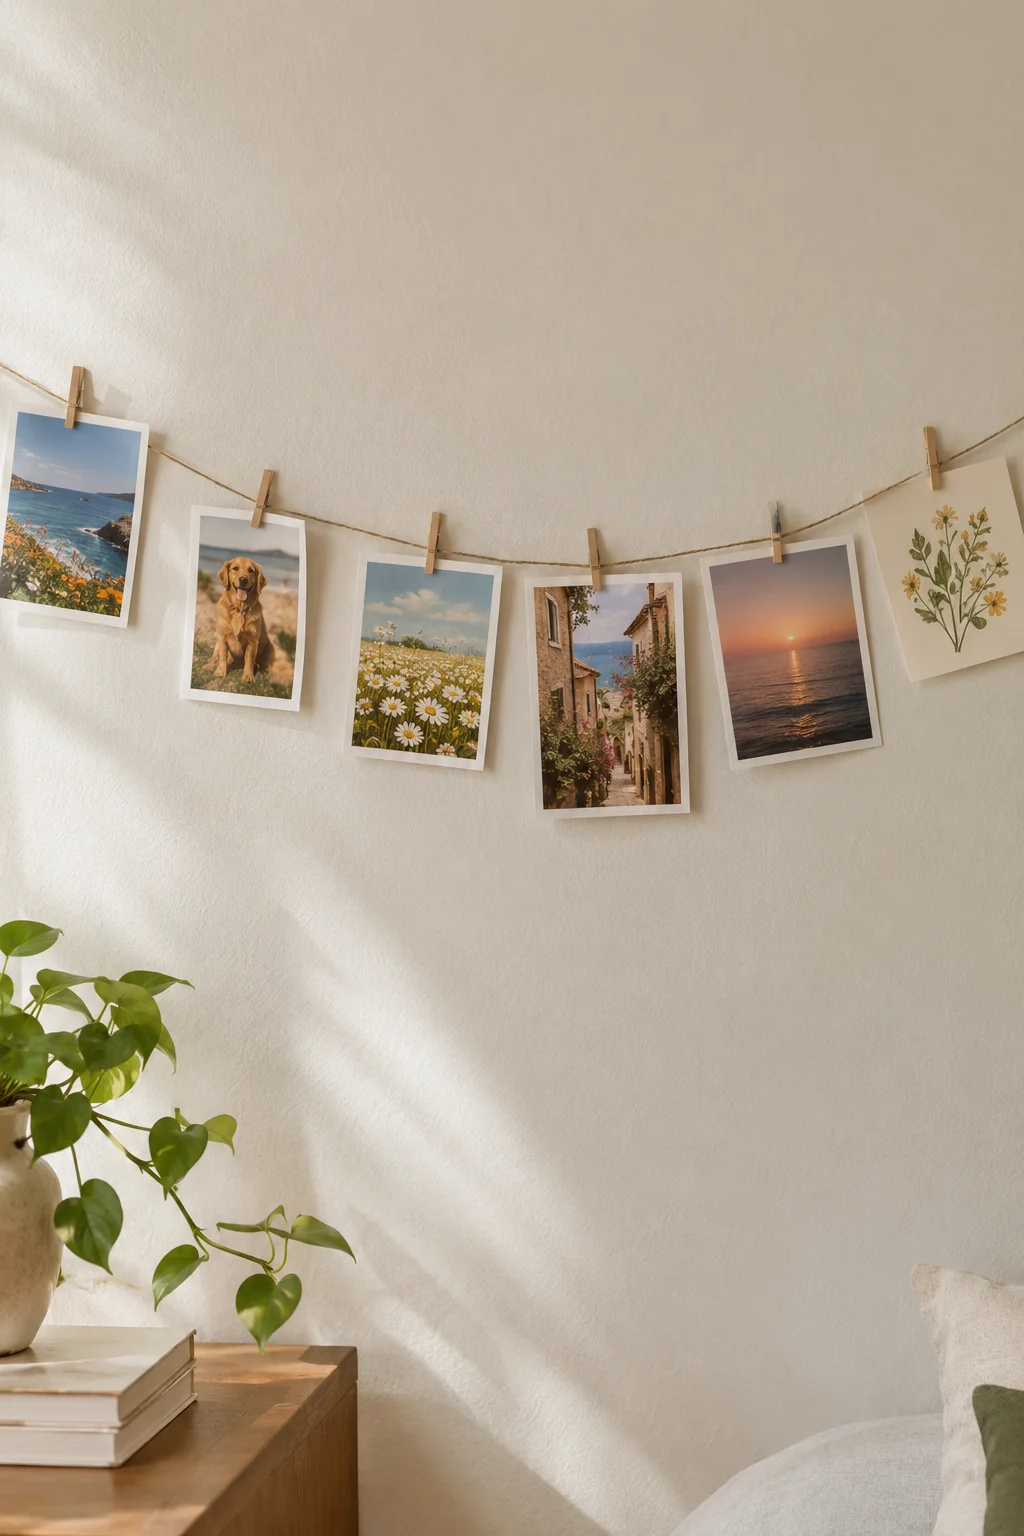
Photo walls built from frames are permanent in a way that stops feeling fun after the first few months, since swapping one picture means taking down hardware and patching holes. A length of thin twine strung between two hooks, with mini wooden clothespins holding printed photos, sidesteps all of that. Pull one clip, swap the photo, done.
Vary the heights slightly instead of keeping the line perfectly straight. A little sag in the twine actually reads as more relaxed and intentional than a taut, ruler-straight line.
14. Knot a Macrame Hanger So Your Plant Finally Gets Some Height
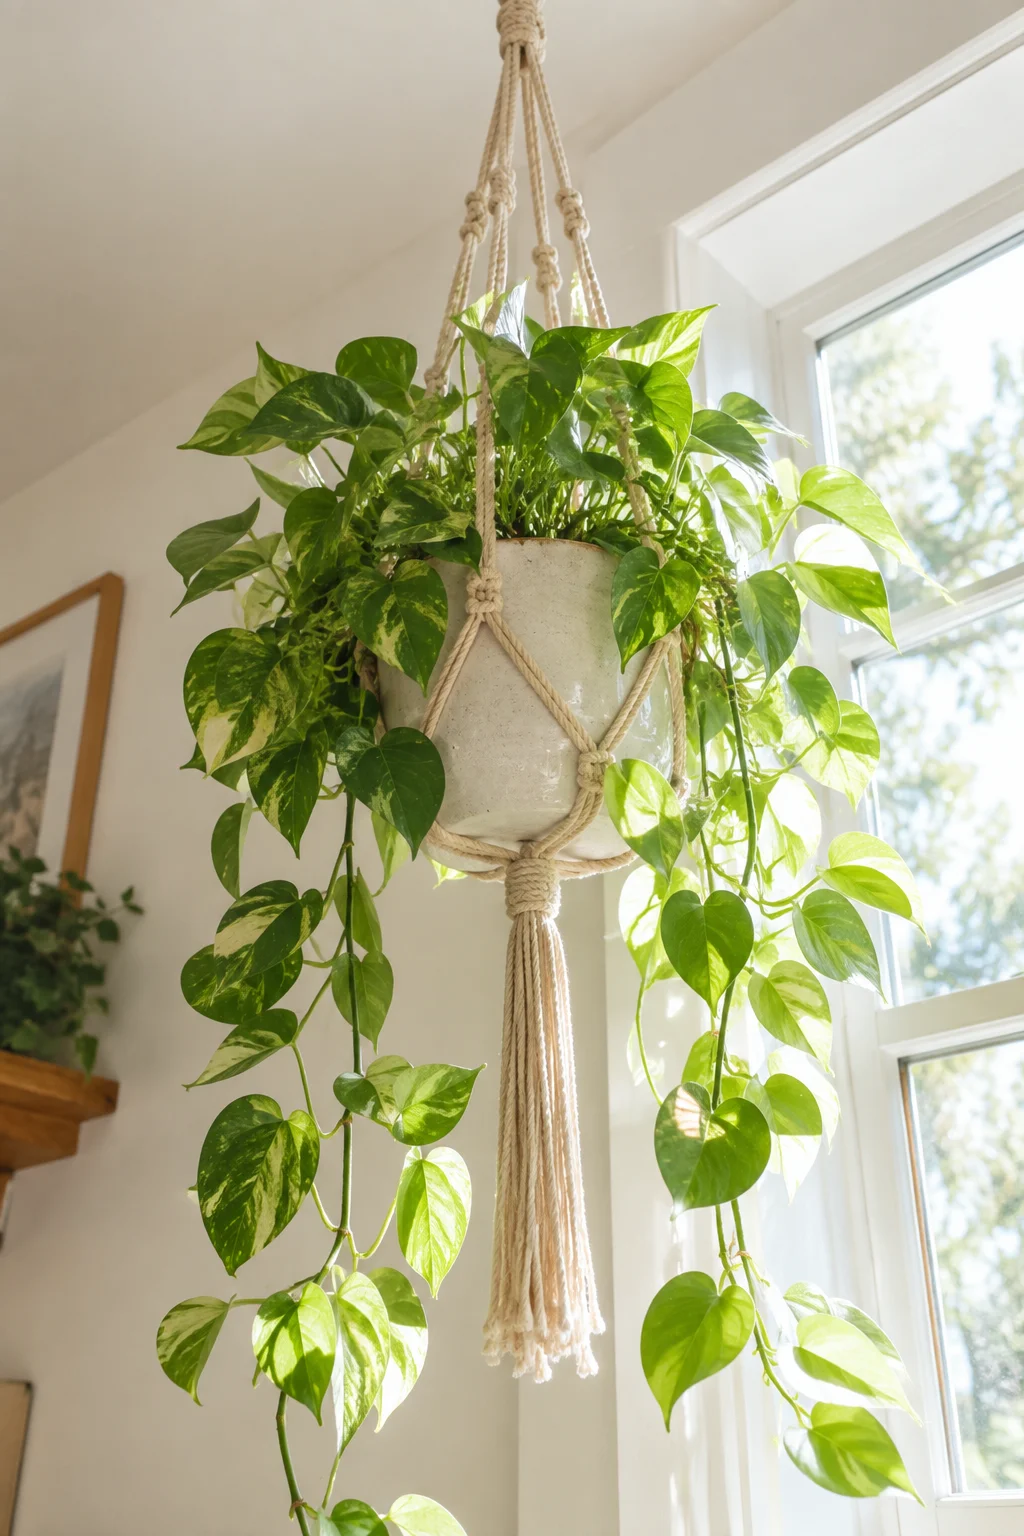
A plant sitting on the floor competes for attention with furniture legs and gets lost. Lifted up in a knotted cord hanger near a window, that same plant becomes the focal point of the corner instead of an afterthought.
Basic square knots repeated down a set of four cords are the whole technique. No special hardware, just cord and a plant pot that fits inside the woven cradle.
| Floor Planter | Hung Macrame |
|---|---|
| Competes with furniture for floor space | Uses empty air near the ceiling instead |
| Easy to bump or knock over | Out of reach of pets and foot traffic |
| Feels like one more object in the room | Draws the eye upward, makes the room feel taller |
15. Trace Washi Tape Lines for an Accent Wall You Can Undo
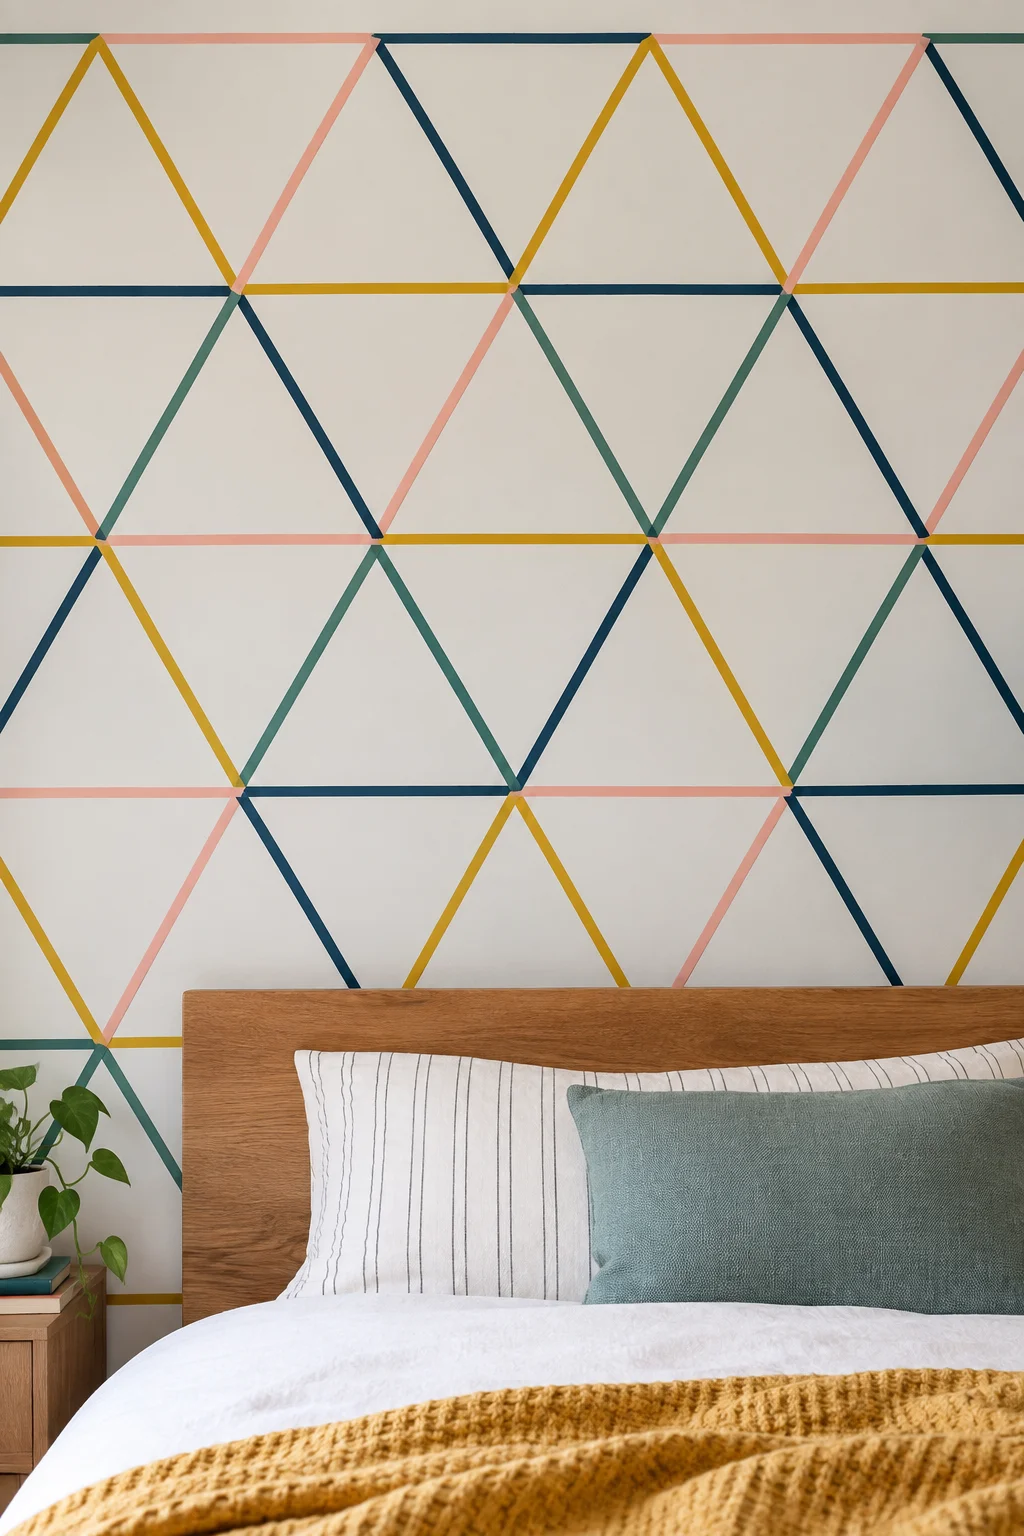
Paint is permanent enough that most renters skip an accent wall entirely, even when they’d love the look. Washi tape laid in a geometric pattern, straight lines or a simple triangle grid, gives the same bold wall moment and peels off completely when you move.
16. Repaint Tin Cans Into a Desk Caddy for Pens and Brushes
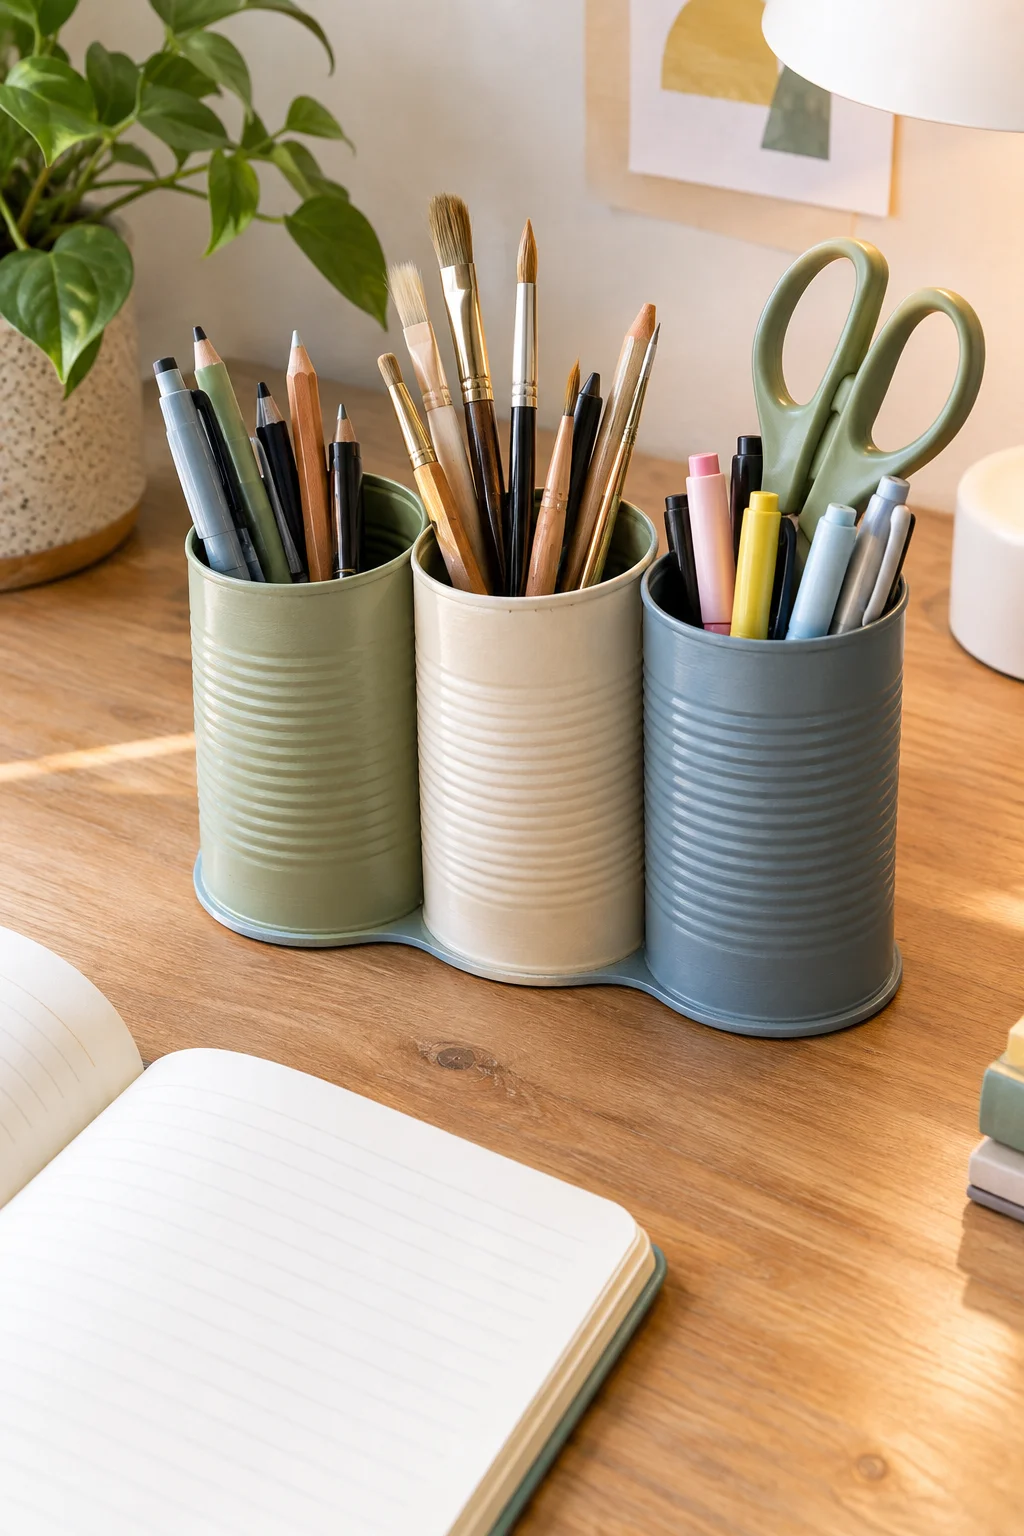
A desk covered in loose pens looks cluttered even when everything on it technically has a purpose. Two or three tin cans, sanded smooth at the cut edge and painted to match your desk setup, sort those pens into groups you can actually find, markers in one, pencils in another, scissors somewhere they won’t stab you when you reach in.
Grab first:
- Empty tin cans with the lid fully removed
- Fine sandpaper for the sharp rim
- Spray paint or acrylic in your desk’s color scheme
Glue two or three cans together at the sides so the set moves as one piece instead of sliding around every time you grab a pen.
Before you paint
The Real Payoff
None of these room decor diy ideas need a trip to a craft superstore or a weekend you don’t have. That’s really the point. A soda can, a jar you were about to recycle, a placemat from the kitchen drawer, all of it can end up on a wall looking like you planned it that way from the start.
Start with just one or two ideas instead of trying to build a whole wall in a single afternoon. A single jar of stems or one strand of fairy lights already changes how a corner feels, and you can build from there whenever you’re in the mood again.
Save this list for the next time your walls feel a little too bare and you want to fix it without spending much.