
Most cheap decor doesn’t look cheap because of its price. It looks cheap because of the finish. Shiny plastic, flat surfaces, and everything sitting at the same height tell the eye that nothing in the room was chosen on purpose.
Expensive looking rooms lean on texture, scale, and quiet color. A wall with soft brush marks. A big vase on the floor instead of a tiny one on a shelf. A cabinet front with ridges that catch the light. None of that needs a big budget. It needs a little patience and the right hardware store aisle.
That is why diy home decor works so well when you do it with intention. You are not copying a look from a catalog. You are building the details that make a room feel finished, using paint, clay, joint compound, glue, and cardboard.
The 15 projects below are beginner friendly, and every one uses materials from a dollar store, thrift shop, or hardware store. Save the ones that fit your space, and start with the one that scares you least.
Glue Half-Round Dowels onto a Plain Cabinet Front for a Fluted Finish
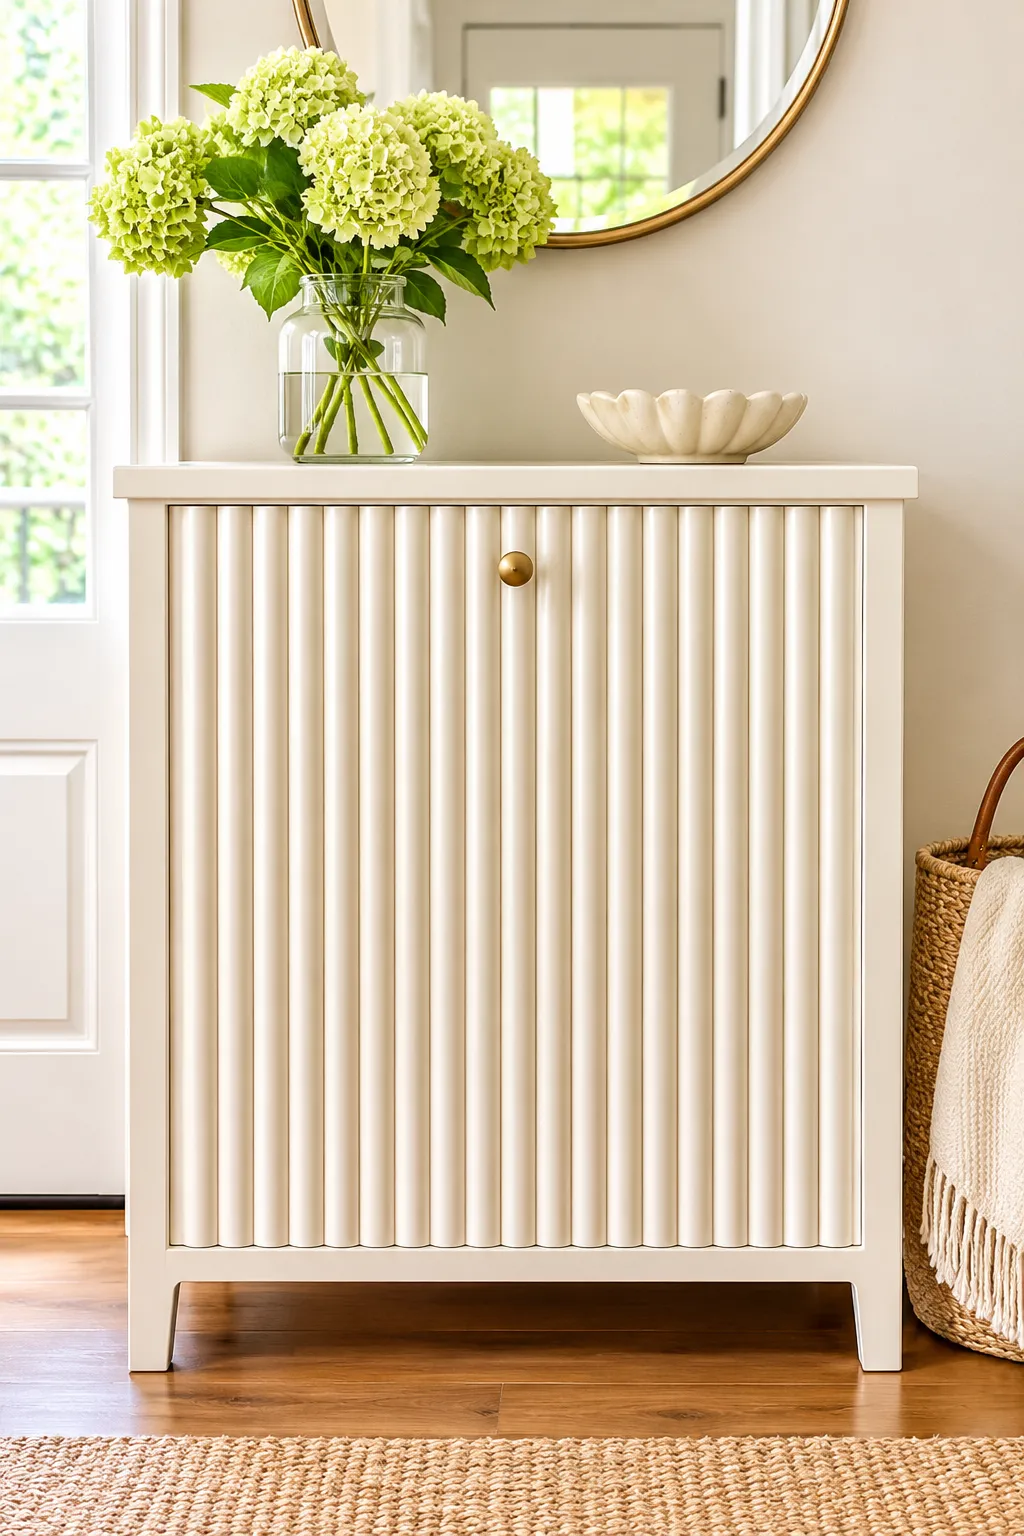
Flat cabinet doors look builder grade because nothing on them catches the light.
Half round dowels fix that fast. Cut them to the height of the door and glue them side by side with wood glue. The rounded edges throw tiny shadows across the whole front. Wipe off squeezed out glue right away, because dry glue shows through paint.
Paint the whole piece one color, like warm white or deep green, and the seams disappear. It reads as carved wood, not a craft project.
Flat panel doors take this best. Add a simple brass pull once the paint is dry, and the front looks custom.
Fake a Limewash Wall with Diluted Matte Paint and a Wide Brush
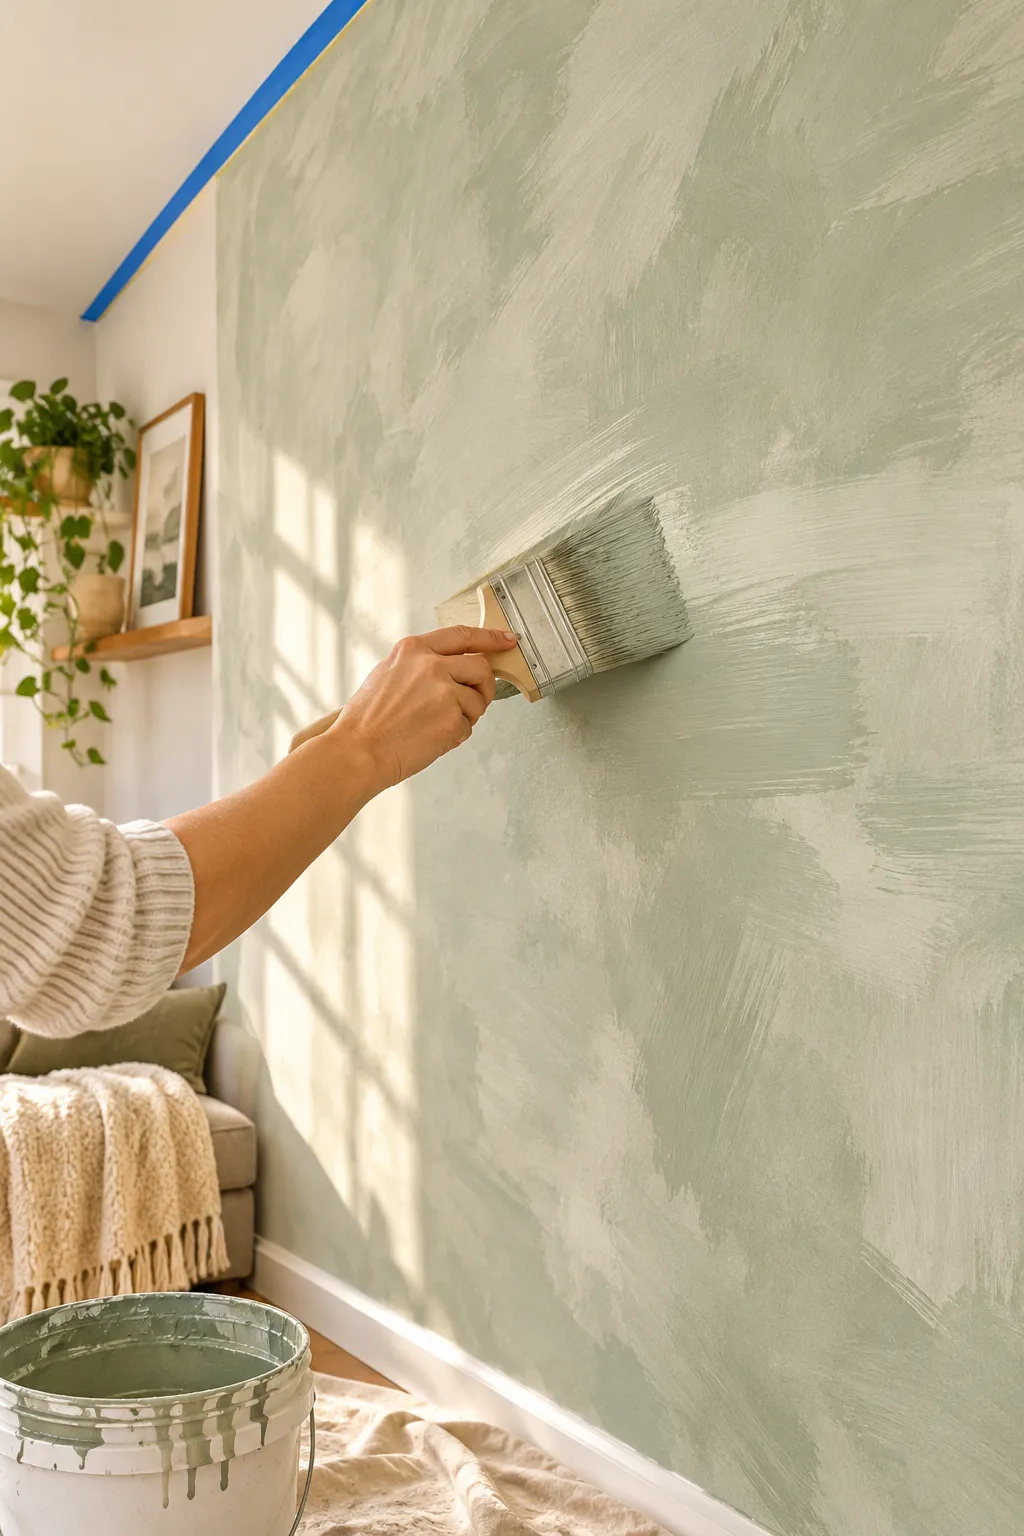
Start with matte paint, not satin or eggshell.
Shine kills the limewash look, which should be chalky and a little cloudy. Thin the paint with water until it drips lazily off the brush, then reach for a wide brush instead of a roller. Streaks while the paint is wet are fine. They soften as it dries.
Tape the ceiling line and trim first. Thin paint runs, and it will find your baseboards.
Renters should test a hidden corner and check the lease before painting.
Pour matte paint into a bucket and stir in water until it is about half and half. Test it on a scrap of cardboard first.
Brush in crossing X shaped strokes, one small section at a time, so the wet edges blend together.
Let the wall dry fully before you judge it. Add a second thin coat only where the color looks flat.
Spread Joint Compound Across a Blank Canvas for Plaster Style Art
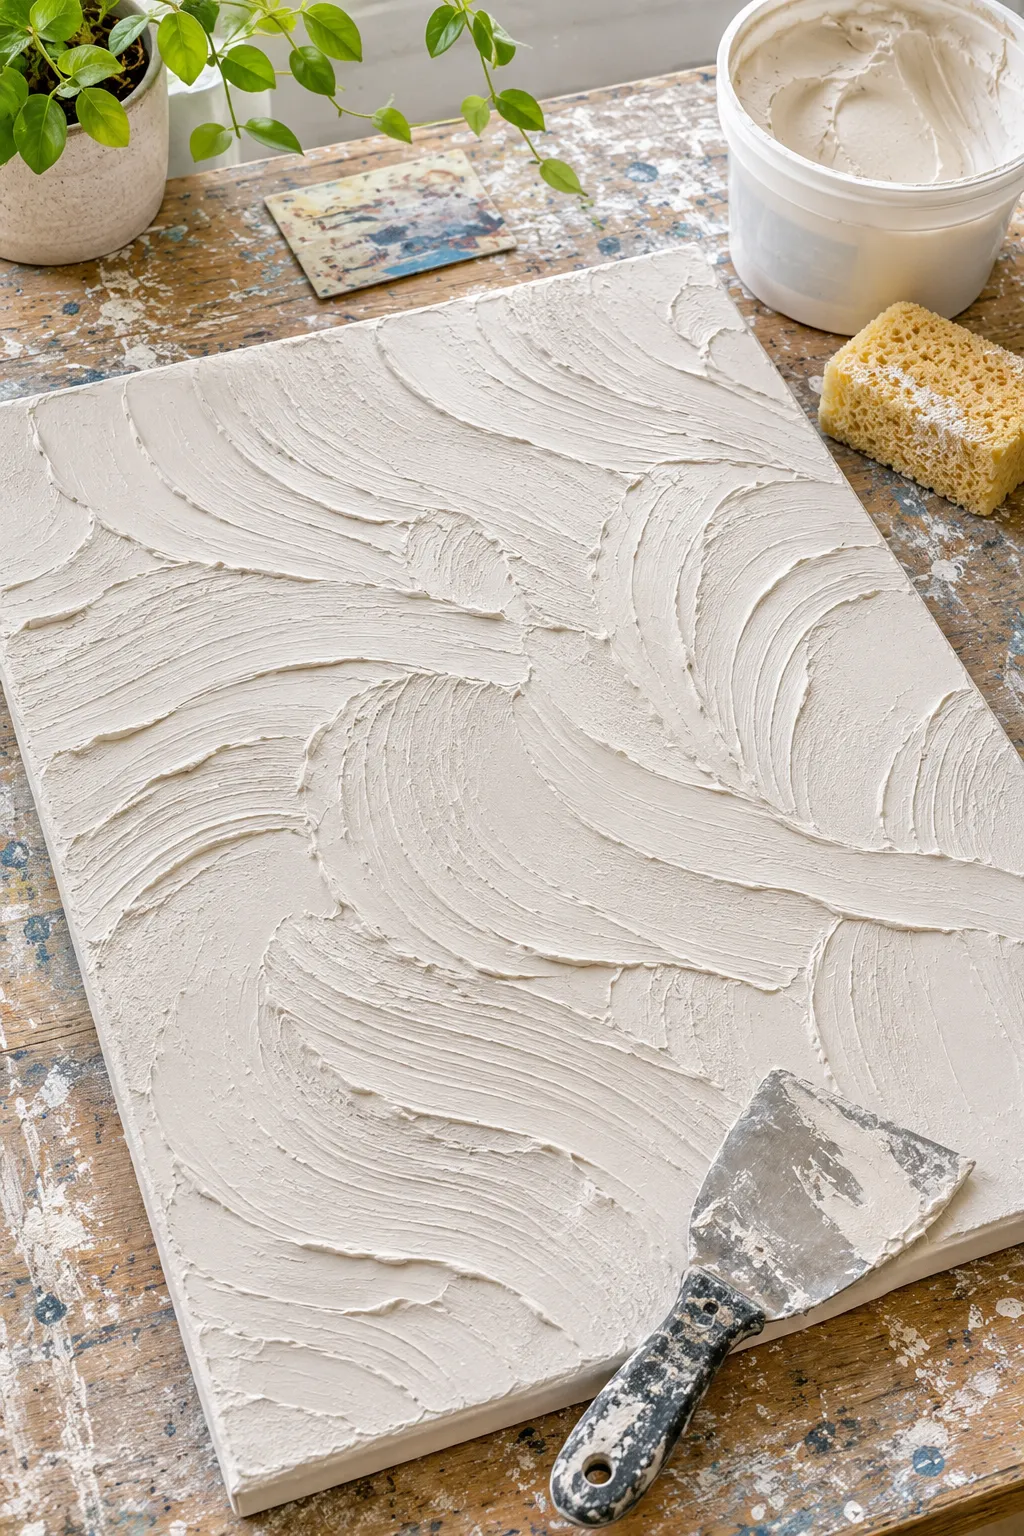
Look closely at pricey textured art and you will notice ridges, soft pits, and smooth patches, all in one muted color.
Joint compound gives you every one of those for a few dollars. Spread it over a cheap canvas with a putty knife, then drag, press, and dab while it is still wet.
Once it dries, brush on matte paint in warm white, sand, or clay. The paint also locks in the chalky dust.
Thick spots can take a full day to dry, so wait before you hang it.
Turn a Cardboard Tube into an Oversized Floor Vase
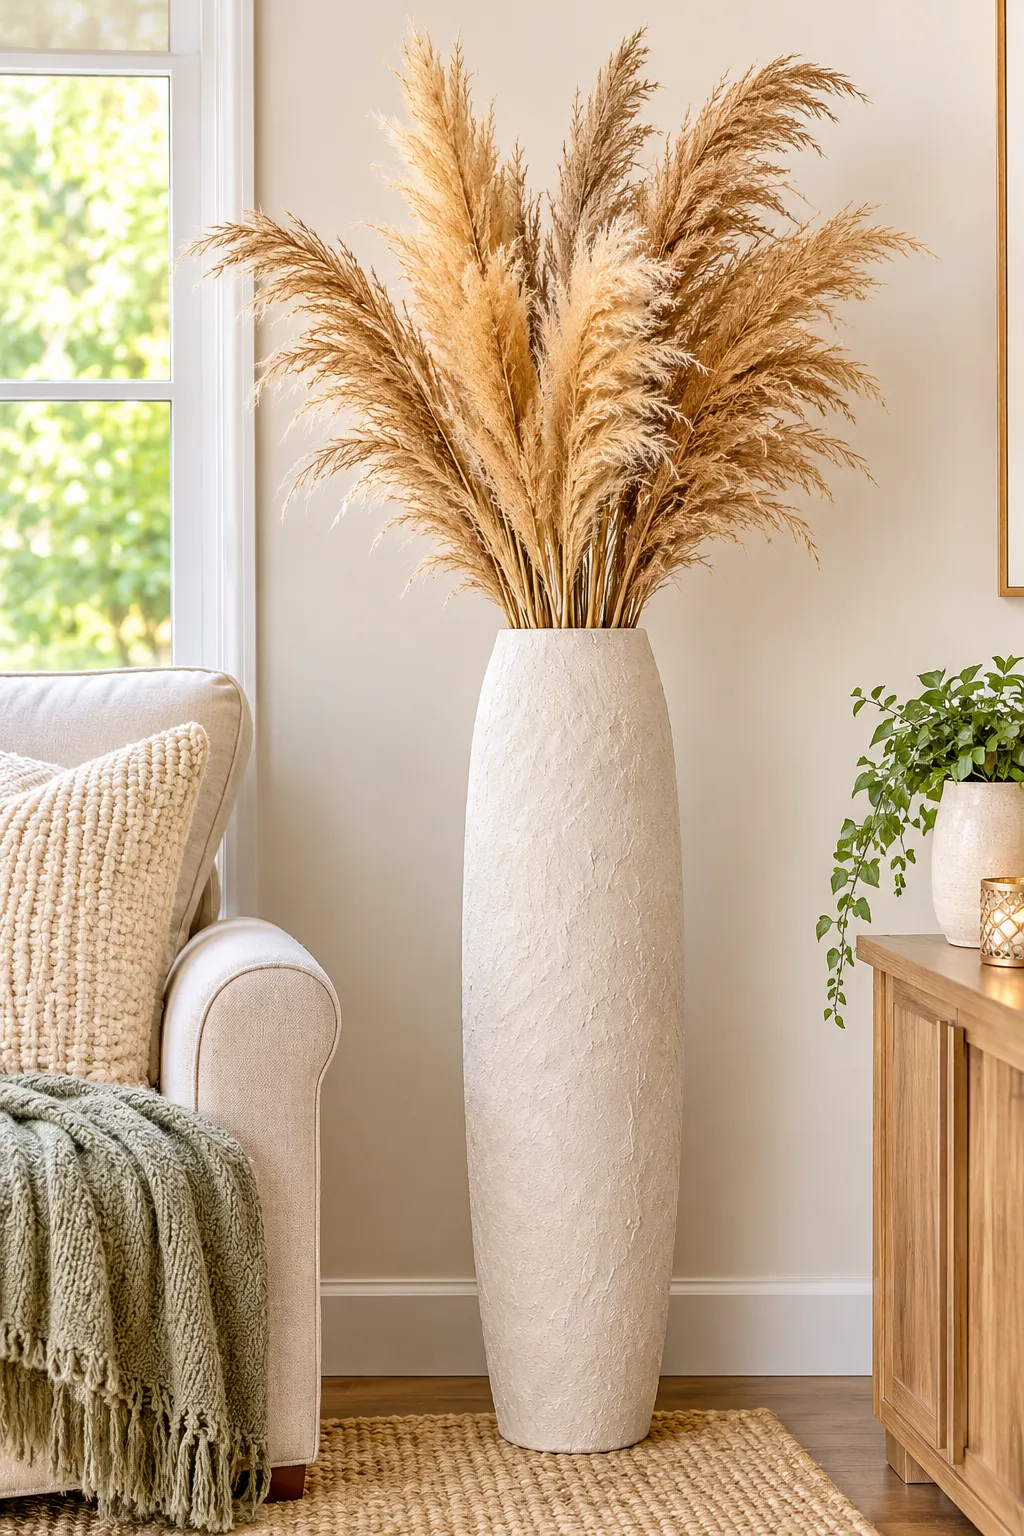
One free tube can stand in for a floor vase that sells for a lot at a decor shop.
Ask a flooring or fabric store for the cardboard tube left after a roll runs out. Some will hand them over for free. Smooth the outside with joint compound or paper mache, sand it lightly, and paint it a stone or warm white shade.
Pour a bag of sand or a few rocks into the bottom so it does not tip when you add tall stems.
Dried stems only. Cardboard and water do not get along.
What to gather
Shape Air Dry Clay Bowls and Seal Them to Look Like Stoneware

Air dry clay has a reputation for looking like a school project.
The finish is usually the problem, not the clay. Press a ball of clay over an upside down bowl wrapped in plastic wrap and smooth the rim with a damp fingertip. Let it dry until firm before lifting it off, then flip it to dry the inside.
Next, sand the rim and paint it a matte cream or soft gray. Flick tiny brown specks on with an old toothbrush for a speckled stoneware look.
Keep these as trinket dishes. Air dry clay is not food safe.
Sanding the rim and sealing with a matte coat does more for the stoneware look than any shaping skill. Shine is what gives clay away.
Give Thrifted Frames and Knobs an Antique Brass Finish
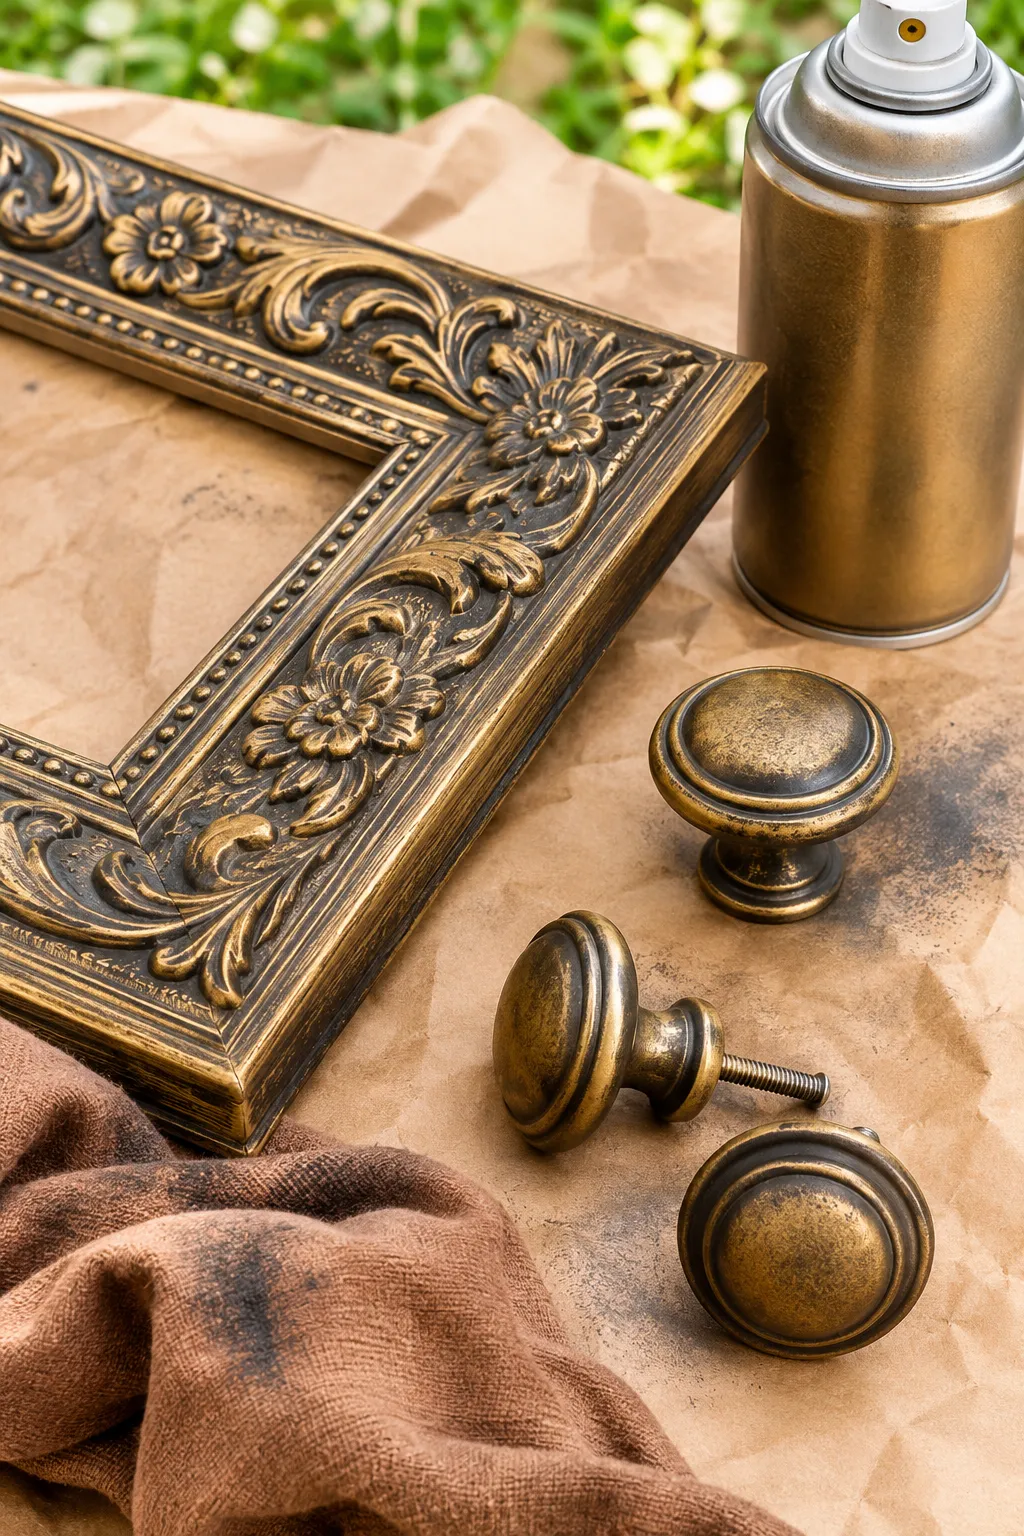
Real brass costs real money, and plain gold craft paint looks like a trophy. The trick is the second layer.
Spray a thrifted frame or a set of knobs with brass metallic paint and let it dry. Then rub a little dark brown acrylic over it and wipe most of it off with a rag. The dark stays in the grooves and corners, which is exactly where real age shows up.
Finish with a light coat of clear matte sealer so the layers hold.
Mixed metals stop looking random when they all share the same warm tone.
⚠️ Watch Out
Spray outside or in a well ventilated spot, wear a mask made for paint fumes, and lay cardboard down first. Overspray travels farther than you expect.
Float Cheap Prints Inside Oversized White Mats
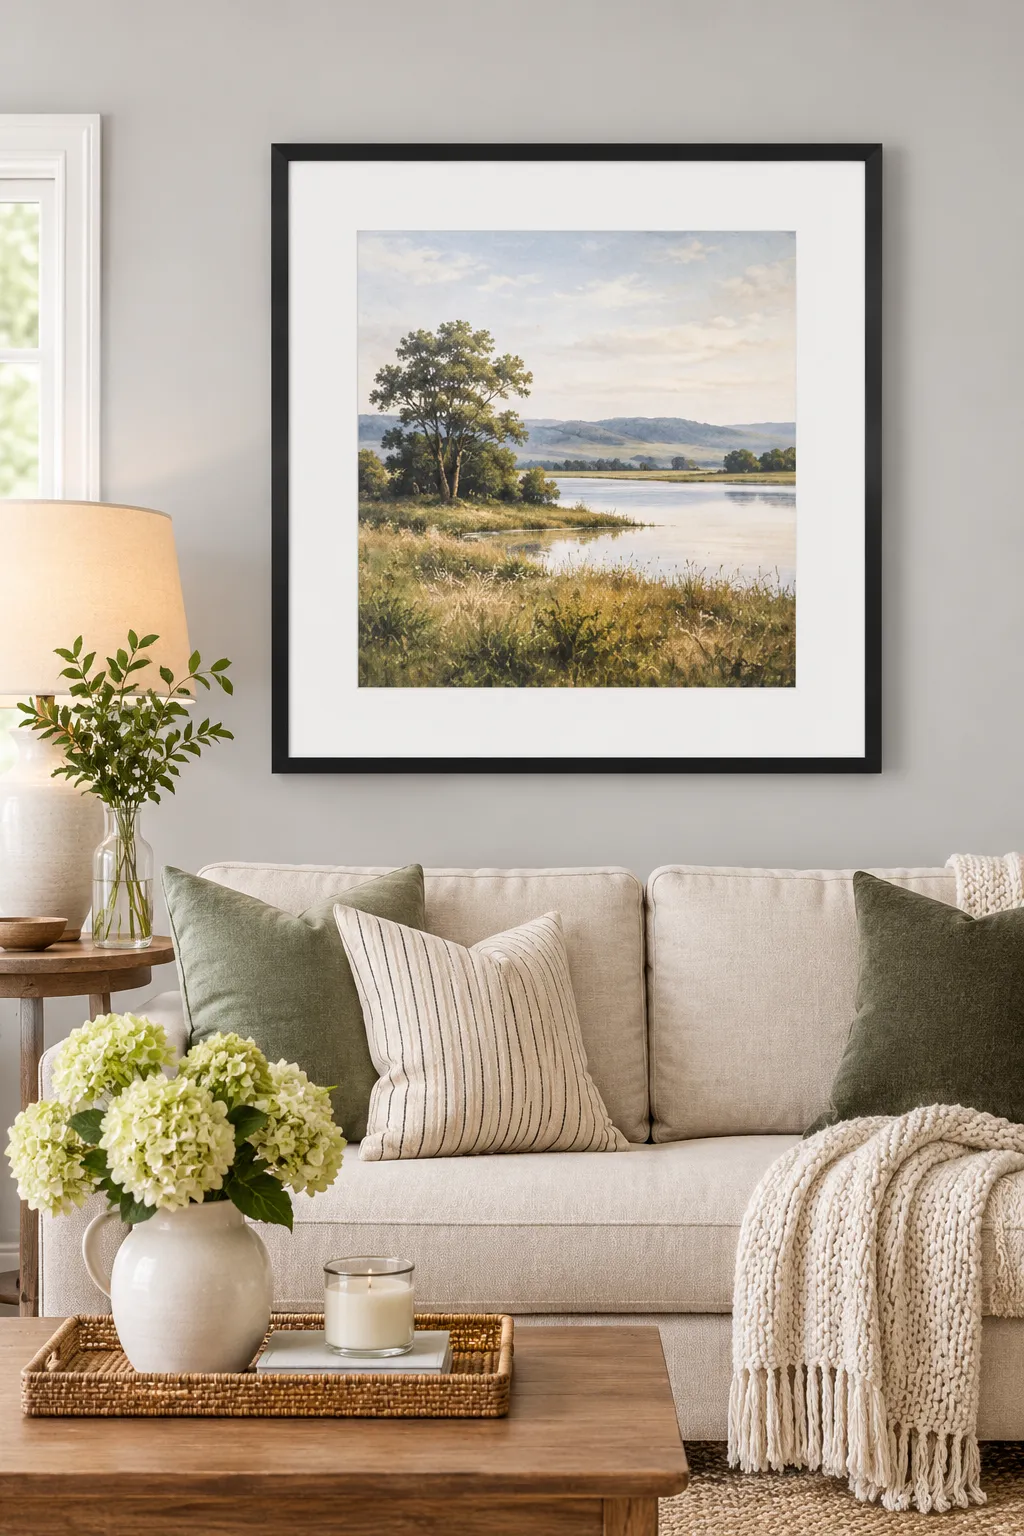
A print should not fill its frame. That is the whole secret.
Buy a frame two sizes bigger than your print and use a wide white mat so the art floats in the middle. That empty border is what makes cheap paper look gallery ready. Leave a little more space at the bottom than at the top and the piece looks steady on the wall.
Print free public domain artwork or your own photos at a copy shop, and ask for matte paper. Glossy paper catches light and shows its price.
Hallways and the wall above a sofa are where this works best, because the frame has room to breathe.
Choose a mat border that is wider than it looks like it needs to be.
Print on matte paper in soft, muted tones.
Keep the frames in one finish, like all black or all oak.
Cropping the print to touch the edge of the frame.
Glossy photo paper that glares under lamps.
Mixing three different frame styles on one wall.
Build a Picture Frame Molding Grid on One Plain Wall
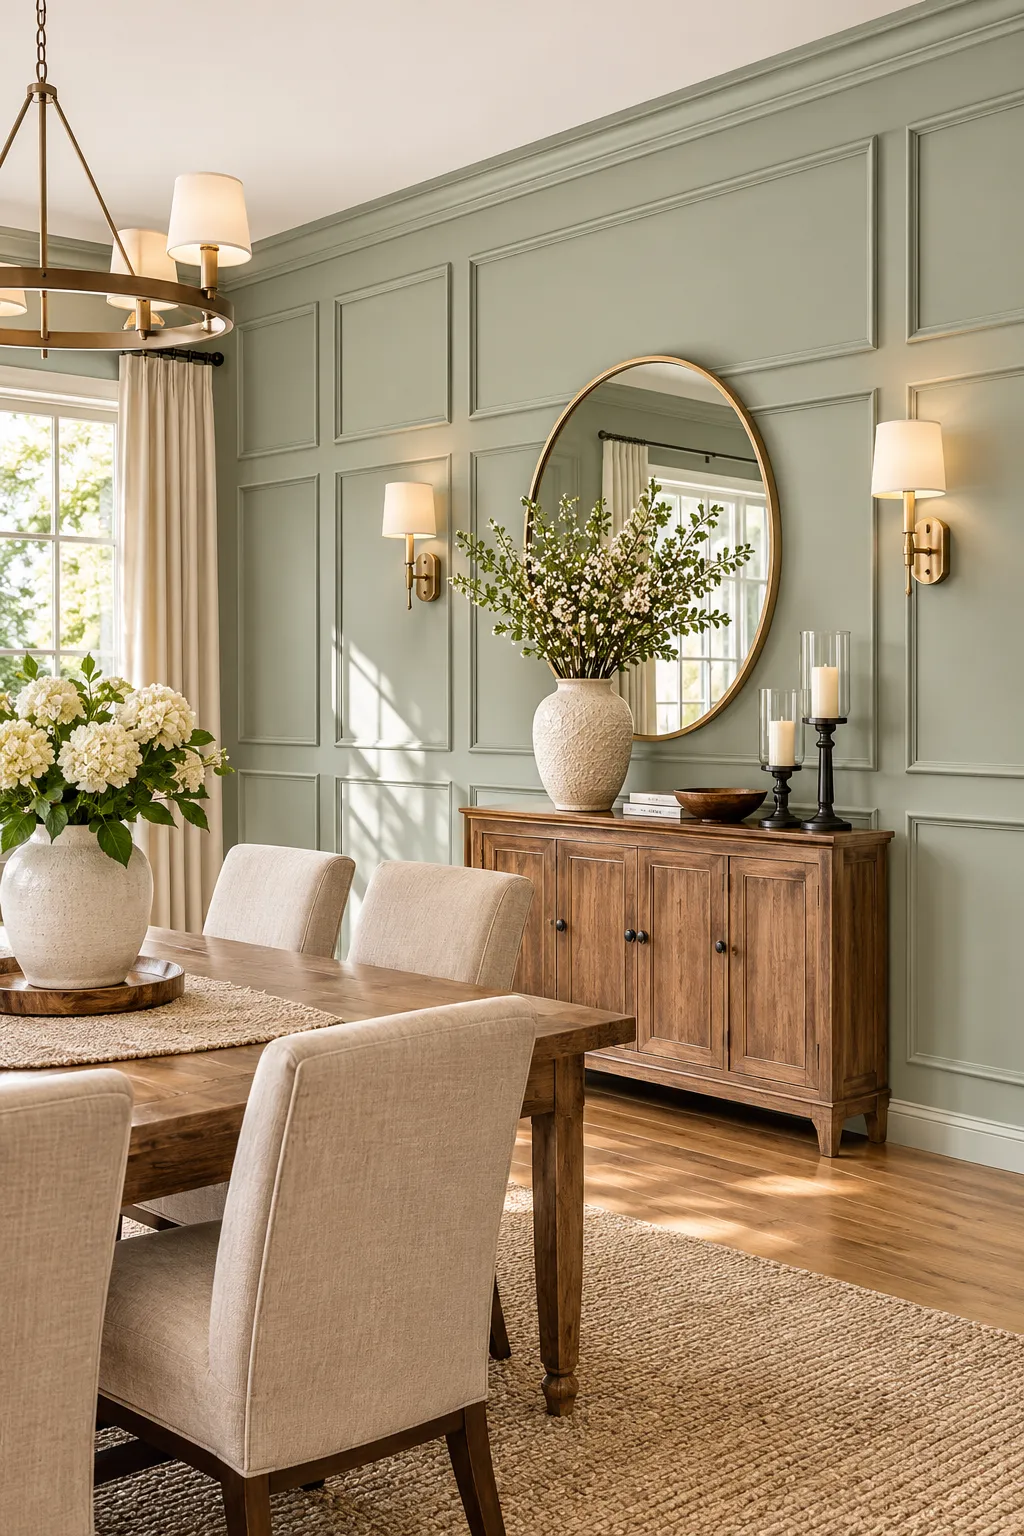
Draw it on the wall with painter’s tape before you glue a single strip.
Picture frame molding is just a grid of rectangles, and the spacing is what sells it. Tape the boxes, step back, and fix anything that looks crowded. Then follow three rules:
- Keep the gap between boxes equal
- Use a level for the first strip and build everything off it
- Paint the wall and trim the same color
One color makes the molding look built in instead of stuck on. Fill the corner gaps with paintable caulk before the final coat.
| Primed MDF trim | Lightweight foam trim |
|---|---|
| Crisp edges and sharp shadow lines | Softer edges that can dent if bumped |
| Cut with a miter box and a saw | Often cuts with a utility knife |
| Heavier, so use adhesive and small nails | Light enough that adhesive alone may hold |
| Best for a sharp, classic look | Best for a first try or a quick weekend |
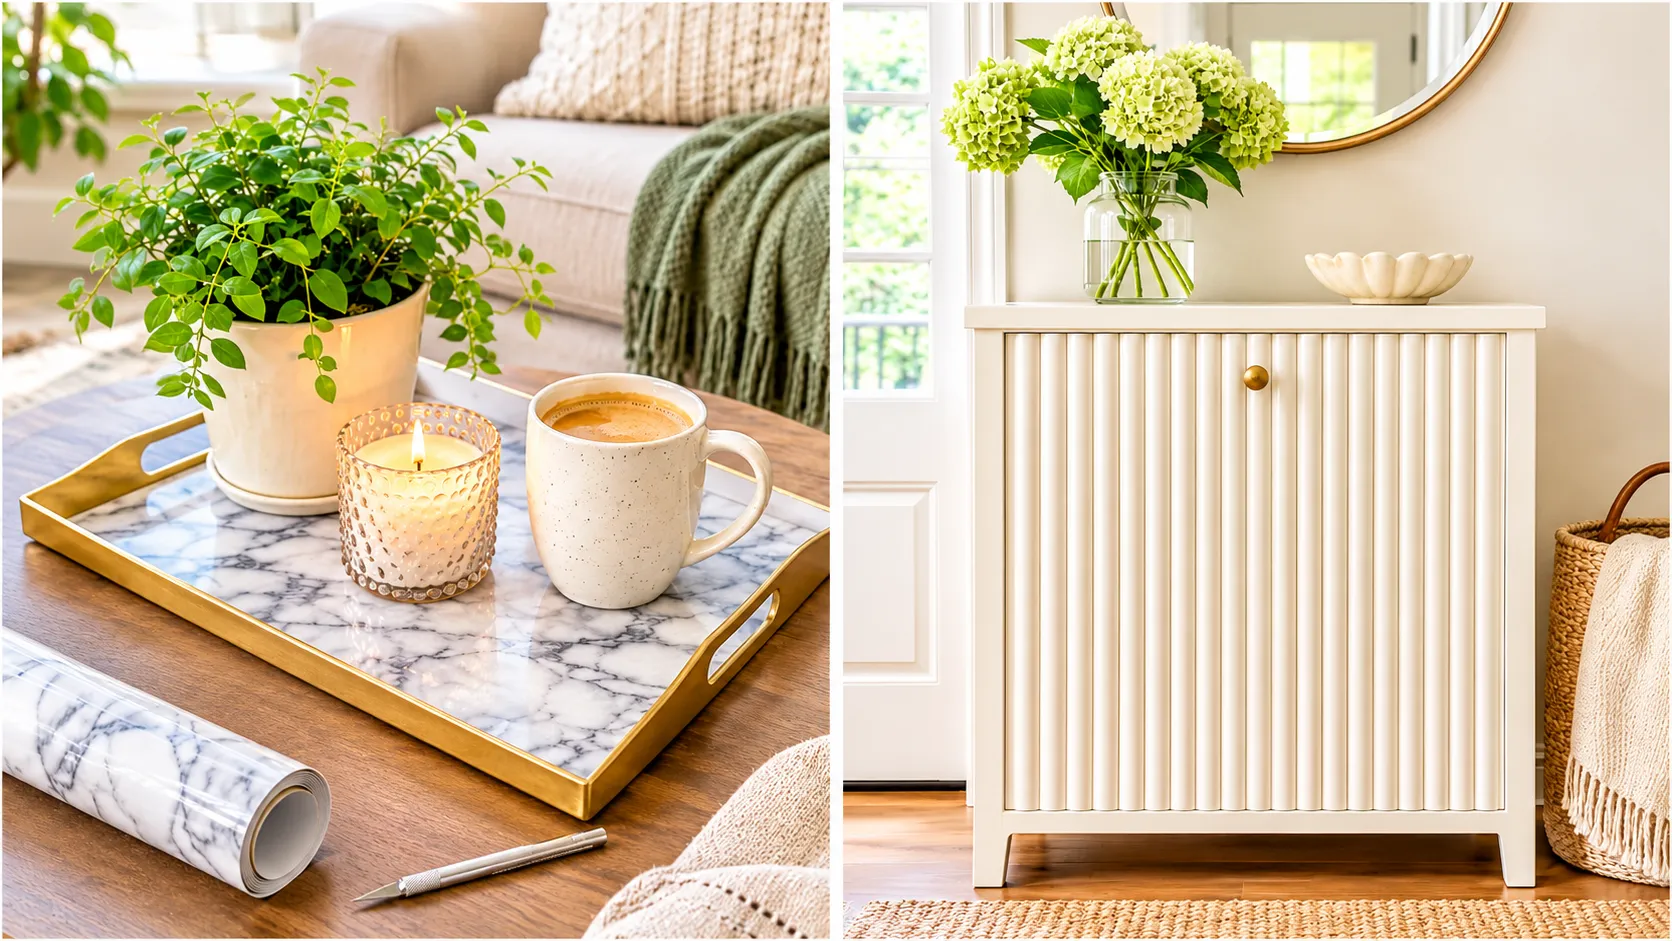
Cover a Thrifted Tray with Faux Marble Paper
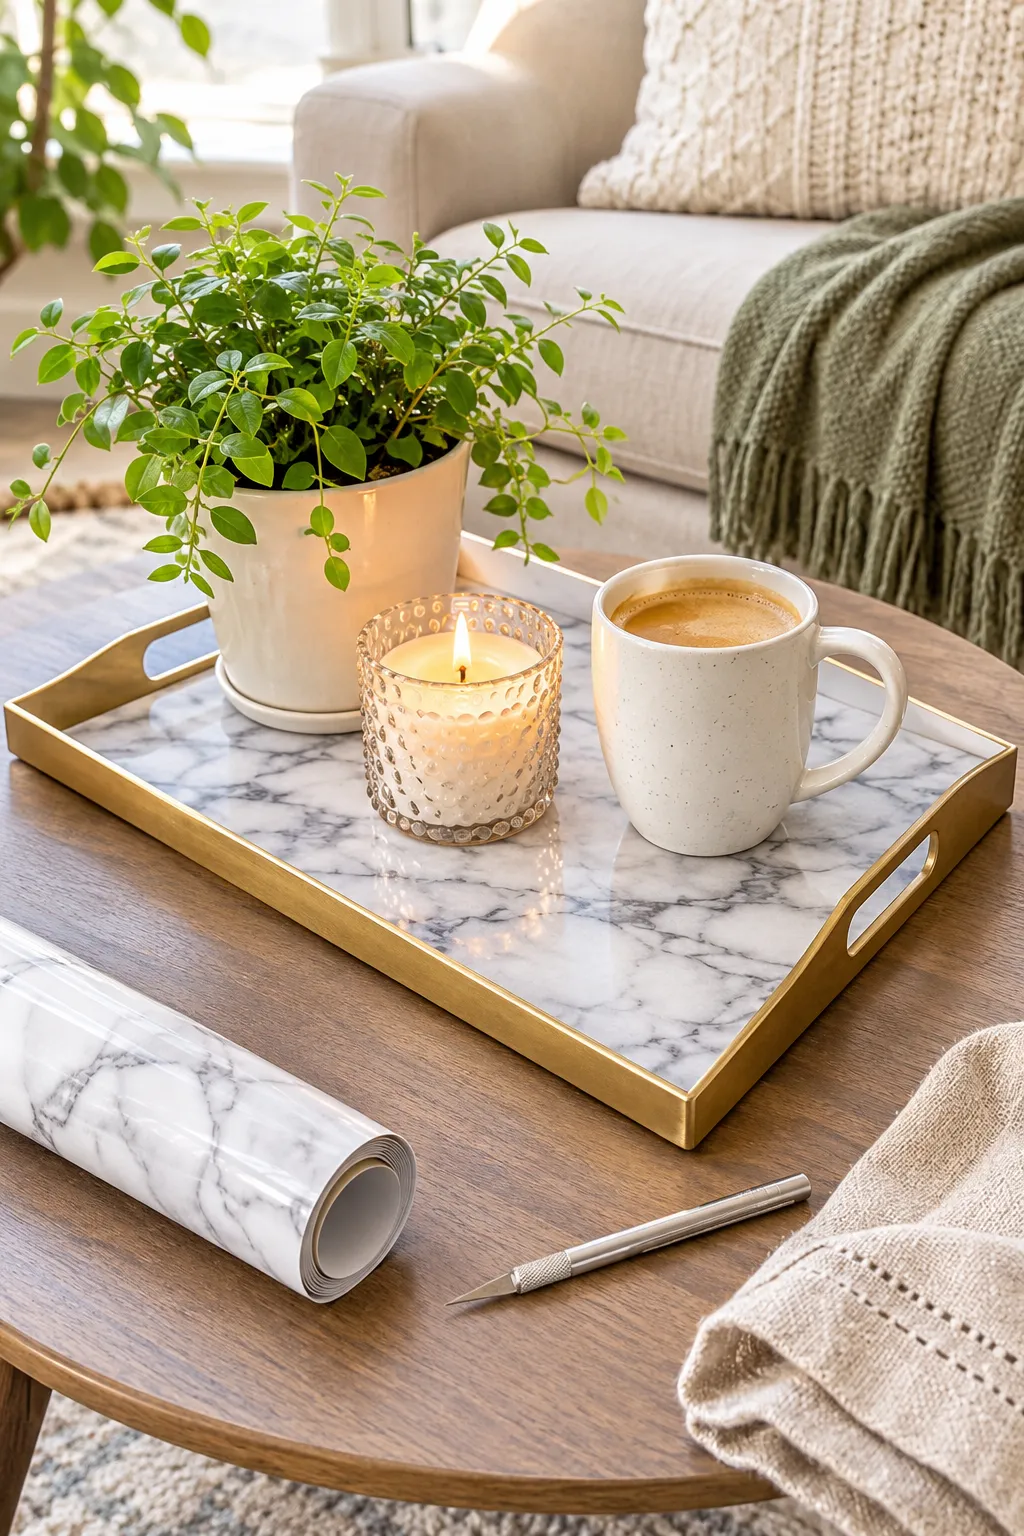
Real marble has soft gray veins that wander, not bold black stripes.
Look for marble contact paper with thin, blurry veining and skip anything with a high contrast pattern. Trace the bottom of your tray onto the back, cut it out with a craft knife, and press it down from the center to the edges with a credit card. A hair dryer on low heat relaxes stubborn bubbles.
Touch up the rim with brass paint and the tray reads as stone with metal trim.
Wipe it with a damp cloth only. Soaking lifts the edges.
Cast Concrete Candle Holders in Paper Cups
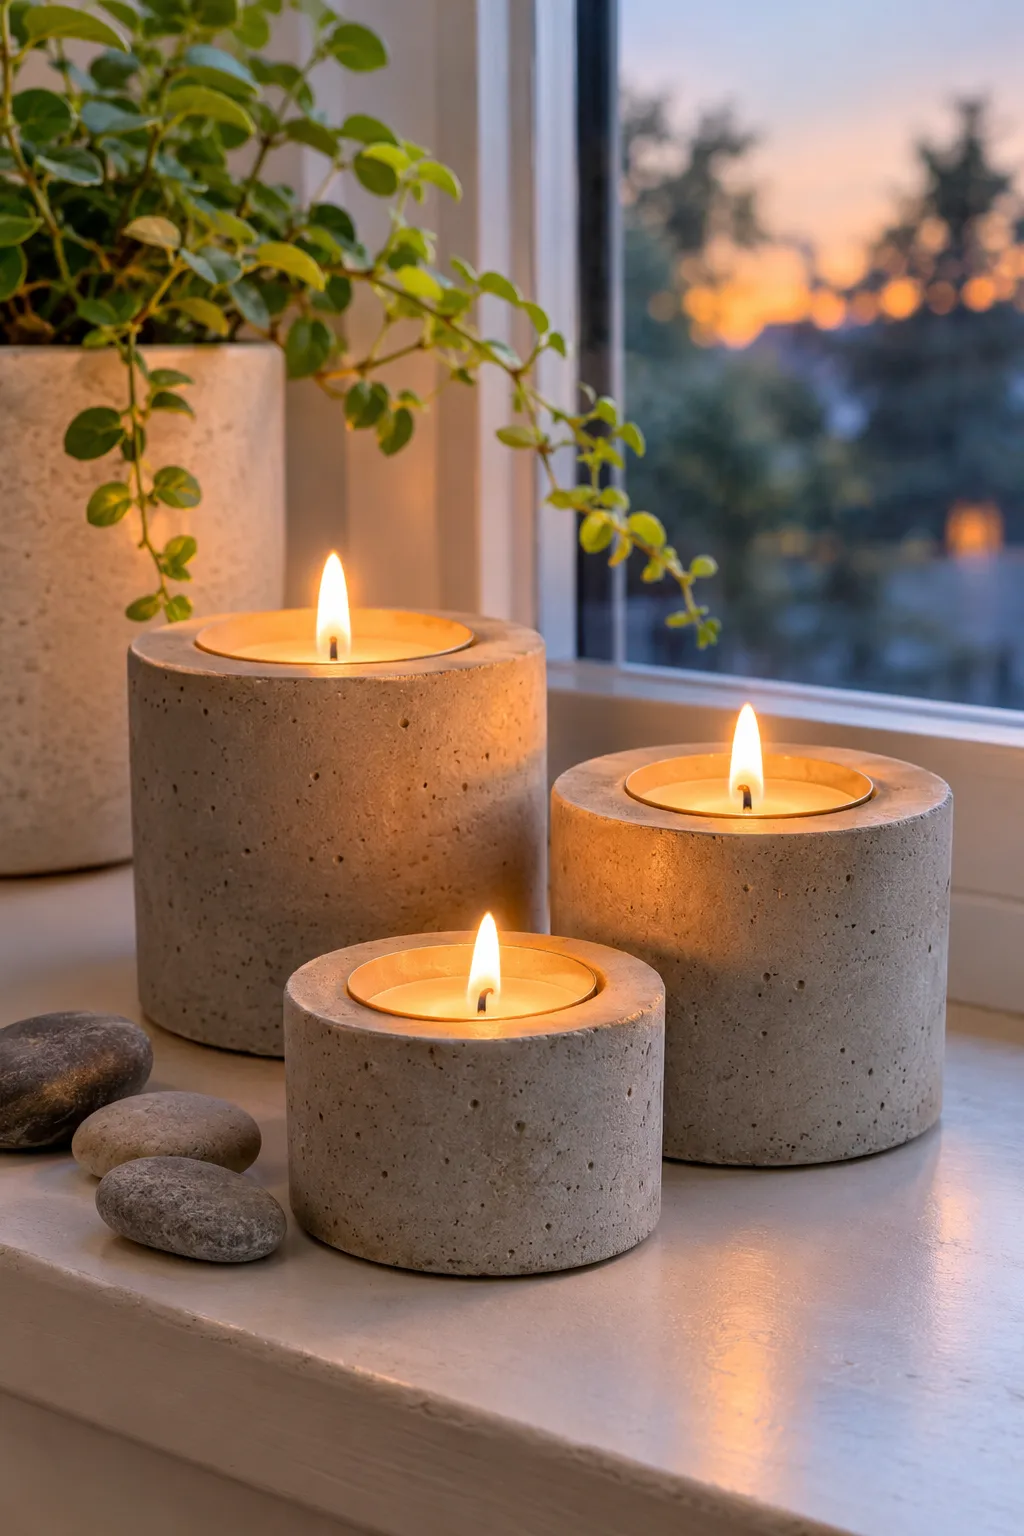
Most first batches come out pitted or cracked because the mix is too wet. Aim for thick oatmeal, not soup.
Use a larger paper cup for the outside and a smaller one pressed into the center to make the candle well. Tap the cup on the table to bring air bubbles to the top. Once it cures, peel the paper away and sand any rough edges.
Wear gloves and a dust mask while mixing, because dry cement powder is very dusty. Set a tea light in its metal cup inside, or use a battery one.
Make three in different sizes and you have a set.
Add water to the concrete mix a little at a time and stir until it is thick like oatmeal.
Pour it into the large cup, press the small cup into the center, and drop a few pebbles inside the small cup so it stays put.
Let it cure for as long as the bag says, then tear off both cups, remove the pebbles, and sand the rim smooth.
Hem Budget Curtains with Iron On Tape and Hang the Rod High
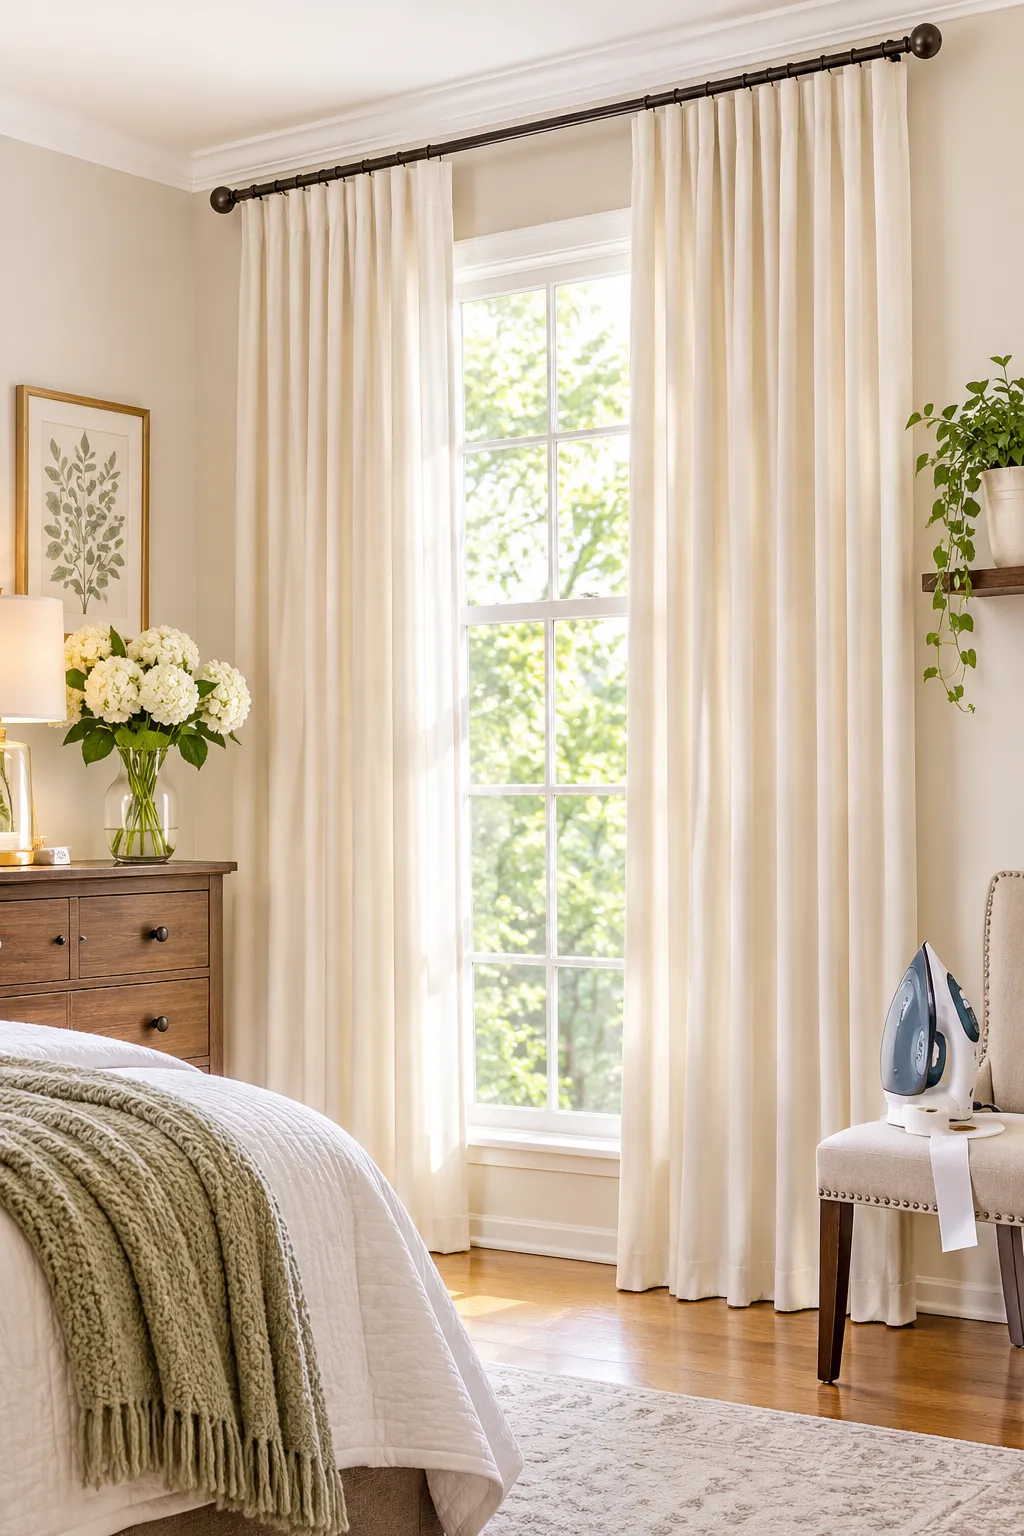
Curtains that start high and skim the floor make a room feel taller. That is most of the trick.
Mount the rod close to the ceiling instead of right above the window frame, and let the panels extend past the glass on each side so the window looks wider too. Budget panels rarely come in the right length. Fold the hem up, slip iron on hem tape inside, and press with a hot iron until it bonds. No needle needed. Measure the drop after the rod is up, since the new height changes the length you need.
Steam the packaging creases out first. Those fold lines give away a cheap panel faster than the fabric does.
The rod sits right above the frame, the panels stop short of the floor, and sharp package creases run across the fabric.
The rod sits near the ceiling, the hem just touches the floor, and the creases are steamed flat. The window looks taller and the whole wall follows.
Make No Sew Pillow Covers from Linen Napkins
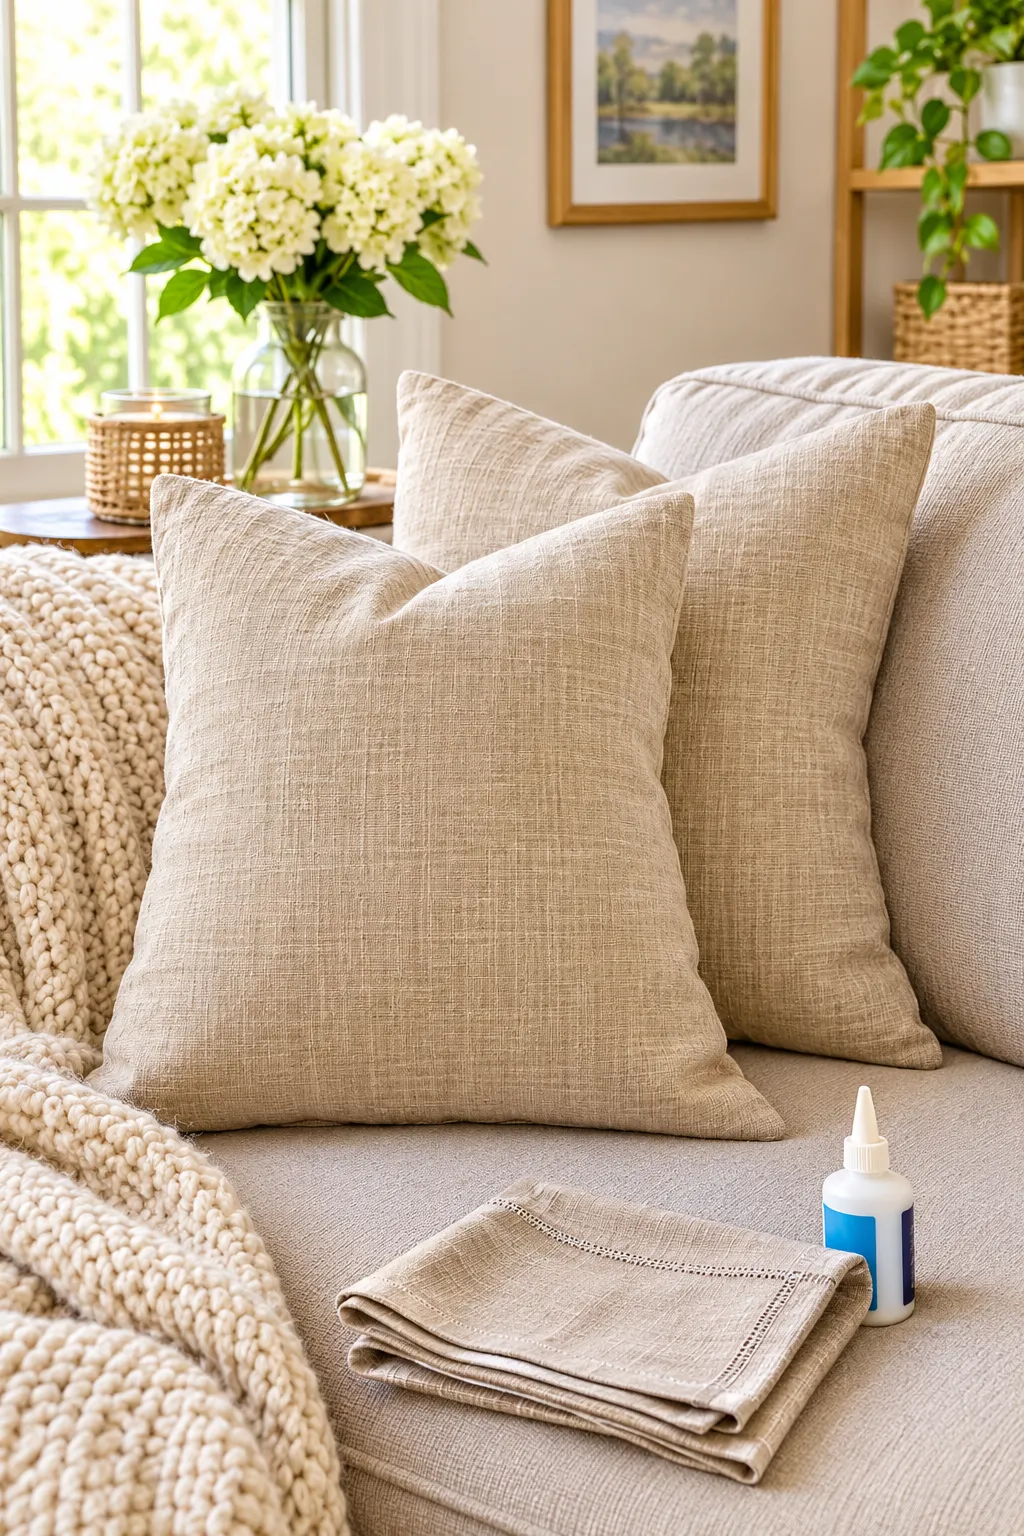
Two linen napkins can become one pillow cover in a single sitting.
Stack them with the pretty sides facing each other. Run fabric glue or iron on hem tape along three edges, then turn the cover right side out. Leave the fourth edge open, slide in the insert, and tuck the opening to the back. Pick napkins slightly smaller than the insert so the cover looks plump instead of loose.
Stick with oat, stone, or soft white. Busy prints give the price away.
💡 Quick Tip
Wash and dry the napkins before you glue anything. Linen shrinks, and a cover that shrinks after gluing puckers along the seams.
Spray Paint Mismatched Thrifted Vases in One Color
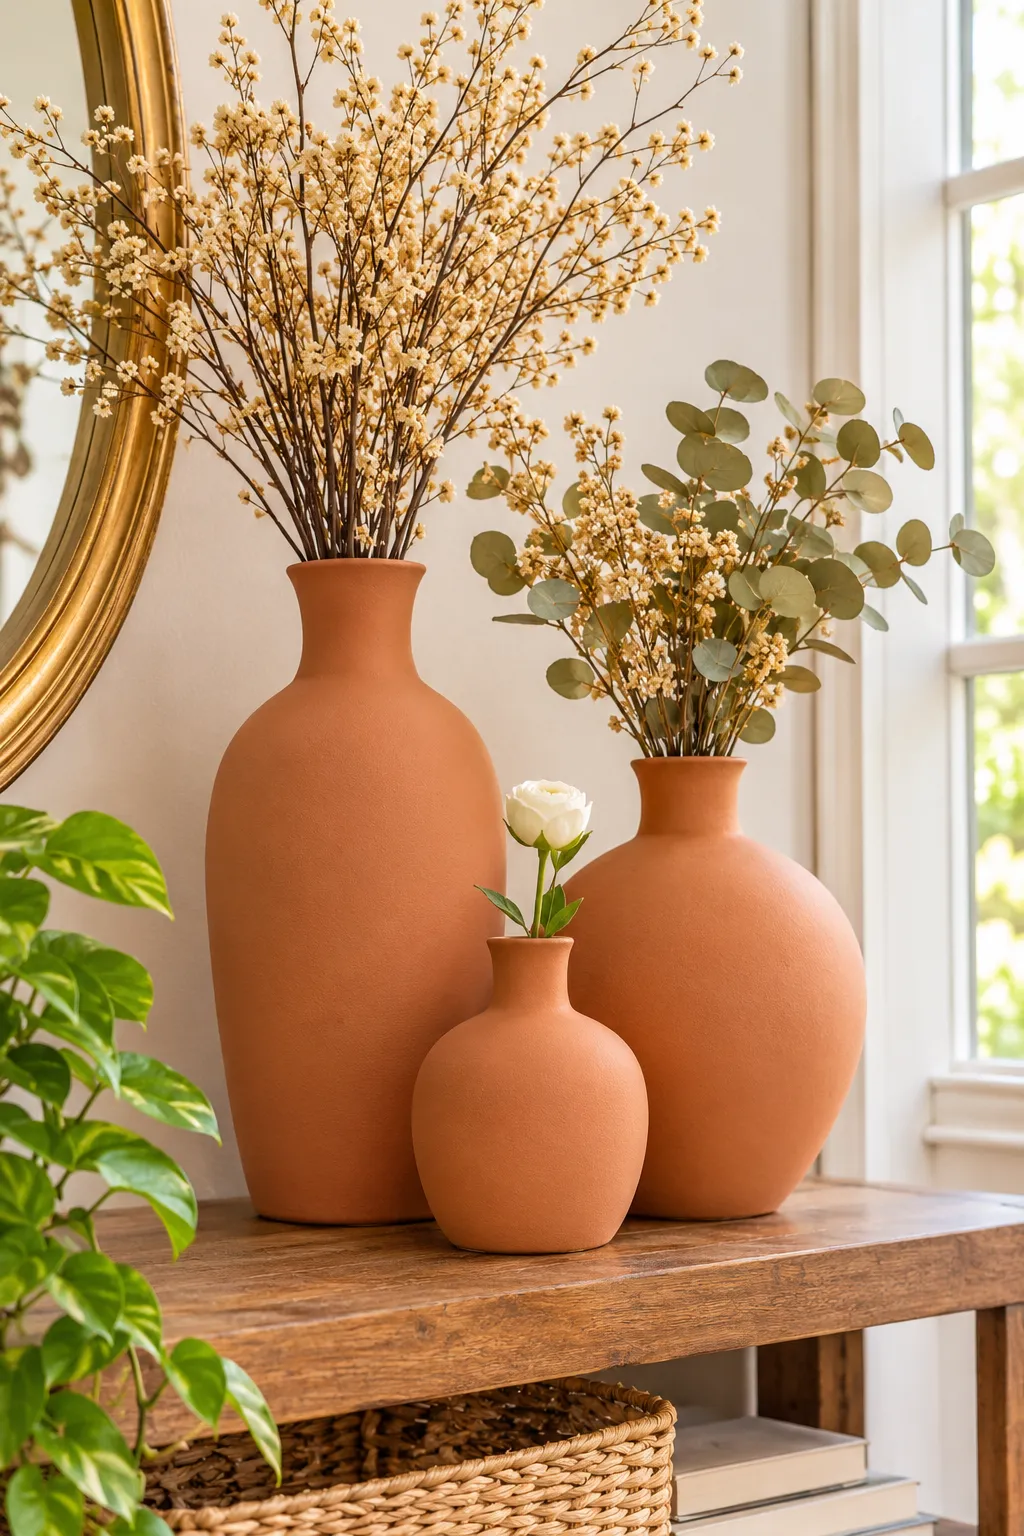
Three odd vases look like clutter. Three vases in one color look like a collection.
Thrift shops sell dated glass and chipped ceramic for next to nothing. Wash each one, scuff glossy surfaces with fine sandpaper, and spray a thin coat of primer. Then add the color in light passes instead of one heavy coat, which is what causes drips. Chalky white, warm clay, and soft gray all read as pottery.
Matte hides dents. Gloss shows every one.
String a Wooden Bead Garland on Cotton Cord
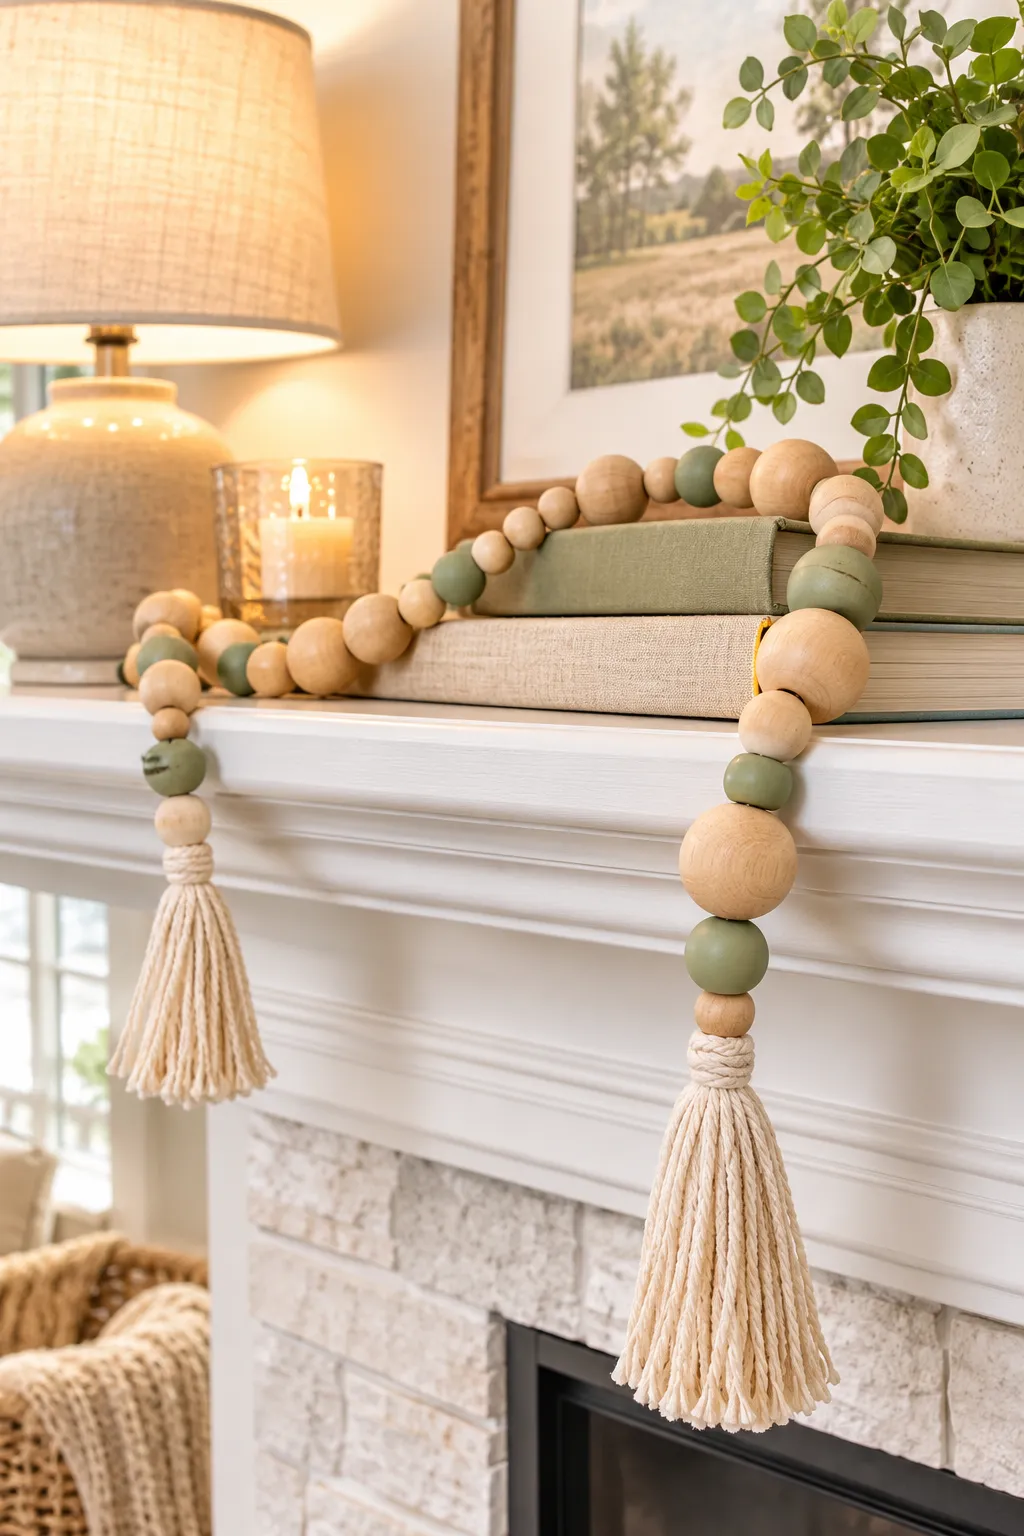
Look at the wooden bead garlands in decor shops and you will notice the beads are rarely all the same size.
Mix large and small beads in a loose pattern, and tie a small knot between groups so they do not slide together. Use thick natural cotton cord, because thin string looks flimsy. Finish one end with a cord tassel, then drape the garland over a mantel, a shelf, or a stack of books on the coffee table. Paint a few beads in matte clay or sage for a hint of color.
Leave the rest raw. Plain wood keeps it calm.
What to grab first
Paint Abstract Arch Art with Leftover Sample Pots
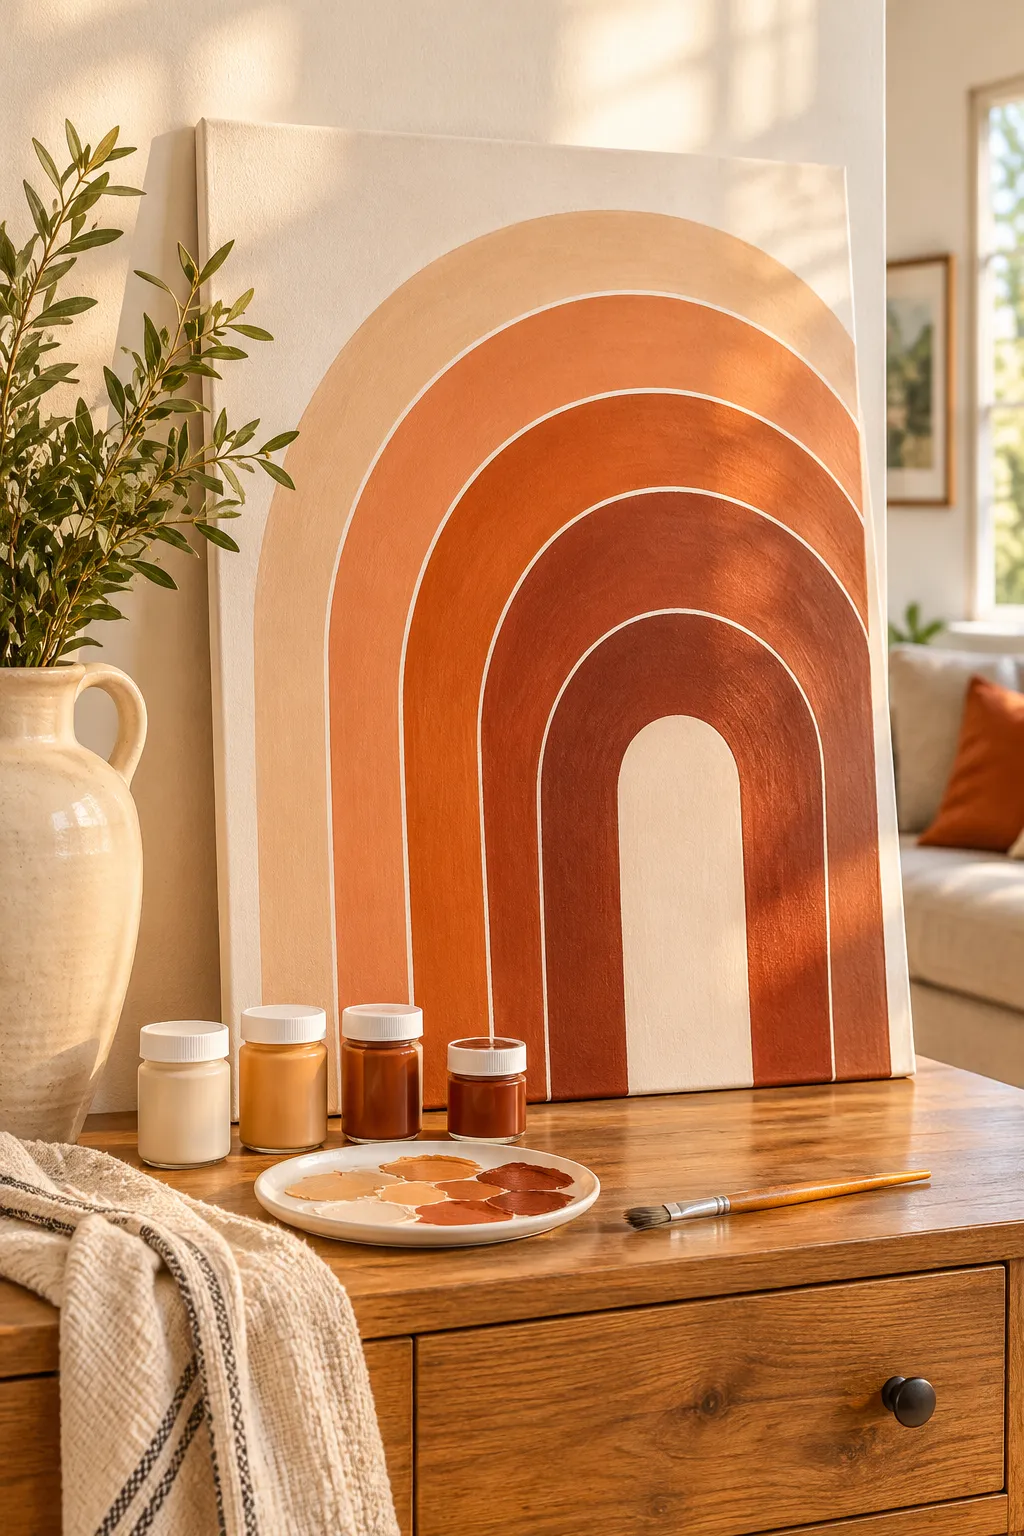
Check the garage shelf. Odds are good there are two or three half used sample pots collecting dust.
Pencil one big arch on a canvas and fill it with your lightest color. When it dries, paint a smaller arch inside it with a thin gap between, in a darker shade. Keep going until you run out of room. Use matte paint only, and stay in one color family so the layers feel calm.
Tape the bottom edge with painter’s tape so the base line stays dead straight.
Paint order: lightest shade on the biggest arch, darkest in the center.
Conclusion
A high-end room is mostly a list of small choices. Matte paint instead of shine. A bigger vase instead of a tiny one. A frame with a wide border, a wall with real texture, a curtain rod hung higher than feels normal.
Every project here shows that diy home decor does not need a big budget. It needs a little patience and an eye for finish. You do not have to make all 15. Pick two or three that suit your space, gather the supplies this week, and let each piece dry fully before you judge it.
Your home will start to feel more finished, one detail at a time.
Not sure where to start? Try these three first