
The sun drops behind the fence around six, and suddenly everyone is standing in the yard with their arms crossed, talking about going inside. You bought the string lights. You own the chairs. What the yard is missing is a reason to stay put.
A fire gives people that reason. It also gives you something to look at besides a phone, and a little heat on your knees while the rest of you cools off.
You do not need a landscaper or a big budget to get one. This list of firepits backyard DIY ideas includes a one afternoon block ring, a sunken gravel pit, and a propane table, and most can be built with basic tools and materials from a home center. Some are cheap and quick. Others need a full weekend and some muscle.
I added a safety flag wherever a material can go wrong, because a few popular shortcuts really do cause trouble. Pick the one that fits your yard, your skill level, and your patience.
Dry-Stack Retaining Wall Block Ring You Can Set in One Afternoon
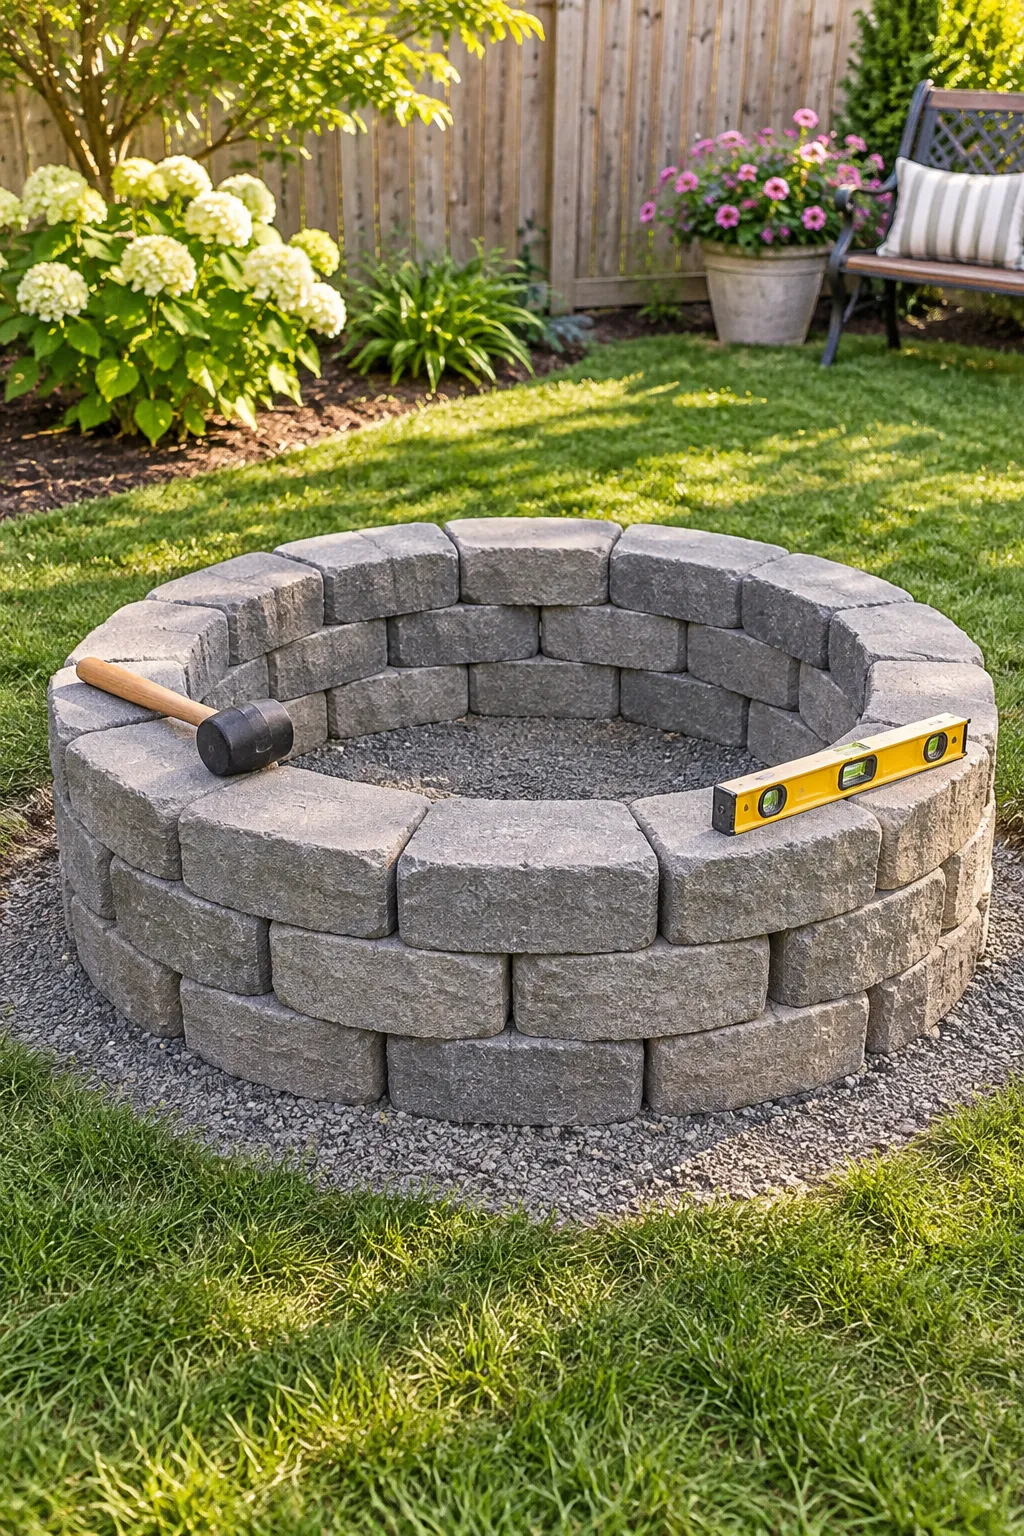
No mortar, no forms, and nothing to wait on while it cures.
Retaining wall blocks are made to stack, so this ring goes up faster than any other pit on the list. Buy a few extra, because one or two will always have a chipped corner you want hidden at the back. Choose blocks with a flat top so a grate or a mug has somewhere to sit.
Inside the ring, add a steel insert or a layer of fire brick so the block faces never take the flame directly.
Best for first timers with a shovel and a rubber mallet.
Build it in four moves
Mark the circle with a stake and a string, then dig out the grass and a few inches of soil.
Pour in gravel, tamp it hard, and check that it is level in two directions.
Set the first row with a rubber mallet and check level across the full ring before you move on. Every row copies this one.
Stack the remaining rows with the joints staggered, then glue the top row down with masonry adhesive.
Sunken Gravel Fire Pit That Sits Level With Your Lawn

Some yards are too small for a pit that sticks up above everything.
A sunken pit solves that. You dig a shallow bowl, set a ring of stone or steel inside it, and put a gravel base underneath so rain drains away instead of pooling. When the fire is out, the lawn looks open again.
Before you dig:
- Call your local utility locate service so you do not hit a buried line.
- Skip river rock. Wet, porous stone can crack or pop when it heats up.
What goes in the hole
GROUND LEVEL, THEN DOWN
Square Paver Fire Pit With a Cap Ledge for Mugs
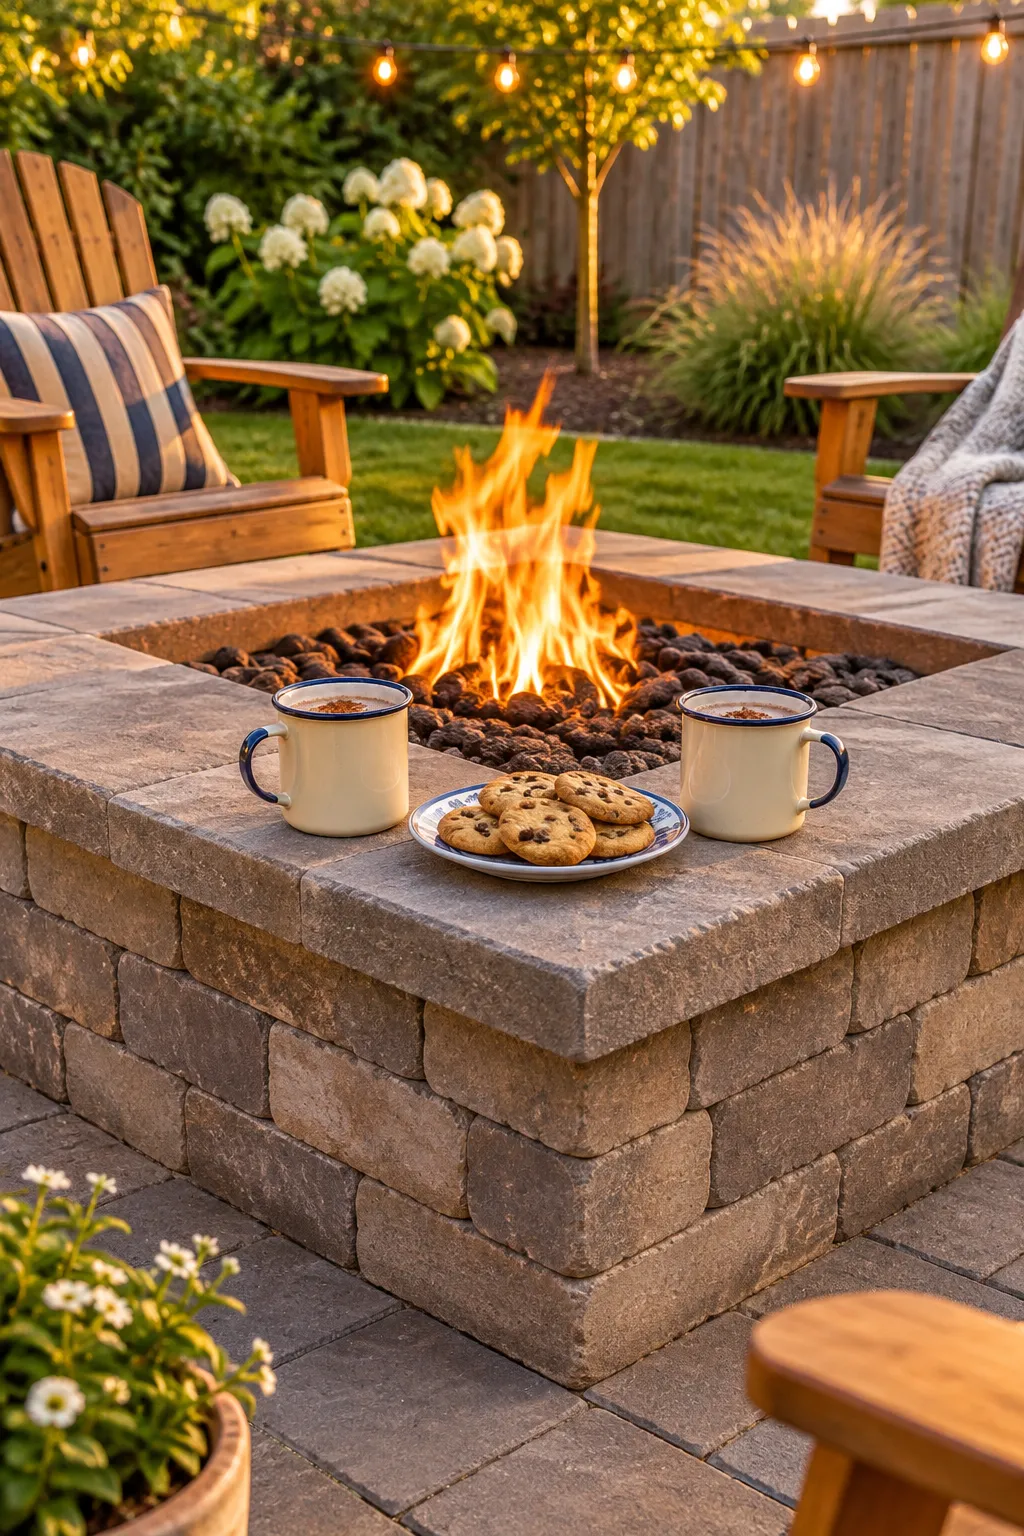
The top row is the part people lean on, touch, and set drinks on.
Build the walls from square pavers or patio blocks, stacked in a hollow square with the corners offset on every row. Finish with cap pieces that stick out an inch or so past the wall. That small overhang gives you room for a mug, a plate, or a bag of marshmallows without dragging over a side table.
Use a level on every cap before the adhesive sets, because a tilted ledge sends drinks sliding.
| Compare | Flat top row | Overhang cap |
|---|---|---|
| Mug space | Narrow, drinks sit close to the edge | Wide enough for a mug and a plate |
| Cost | Lower, same pavers all the way up | Higher, you buy extra cap pieces |
| Effort | Easiest, no extra leveling | Slower, every cap needs checking |
| Finished look | Simple and blocky | Tidy, like a store bought pit |
Fieldstone Ring Lined With Fire Brick
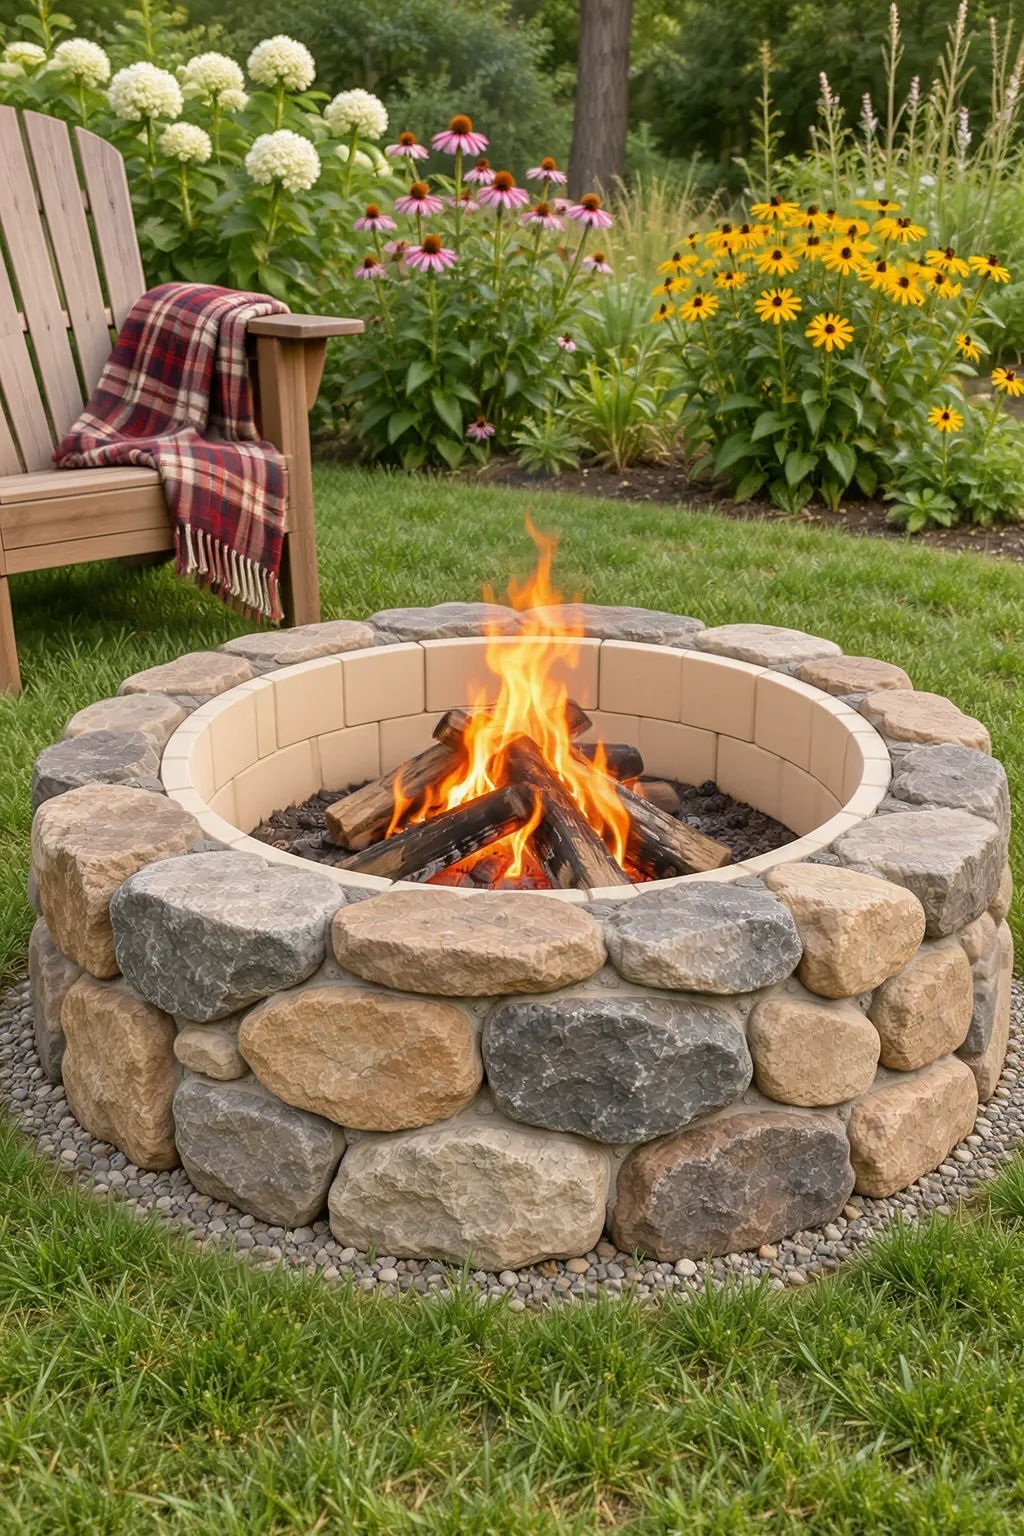
Plenty of people assume any rock from the yard can sit next to a fire. It cannot.
Dense stone that has been sitting wet can crack under heat, so gather dry fieldstone and test fit the whole ring before you set a single piece. Turn the flattest face outward and let the odd shapes lock together like a puzzle. Use smaller stones to fill the big gaps.
Then line the inside with fire brick so the fieldstone is not carrying the heat.
Slower than a block ring, but no two ever match.
Set the ring on tamped gravel, not bare dirt.
Stagger the joints like brickwork.
Use heat rated mortar on the fire brick liner.
Gathering stone from creek beds or soaked ground.
Using flaky, layered pieces that crumble in your hand.
Using ordinary mortar near the flame.
Concrete Fire Bowl Cast From a Mixing Bowl

The usual mistake is buying whatever bag of concrete is cheapest.
Ordinary mix can crack or flake when the heat hits it. Look for a mix labeled for fire or high heat use, and follow the cure time on the bag before you light anything.
For the mold, nest a small plastic bowl inside a larger one and fill the gap between them. Coat the surfaces that touch the concrete with cooking spray, and set a few stones in the smaller bowl so it does not float up.
Keep the flame small. This is a bowl for a gel fuel can or a little burner, not a big log fire.
Plan for waiting time between pouring and your first fire.
What to grab before you mix
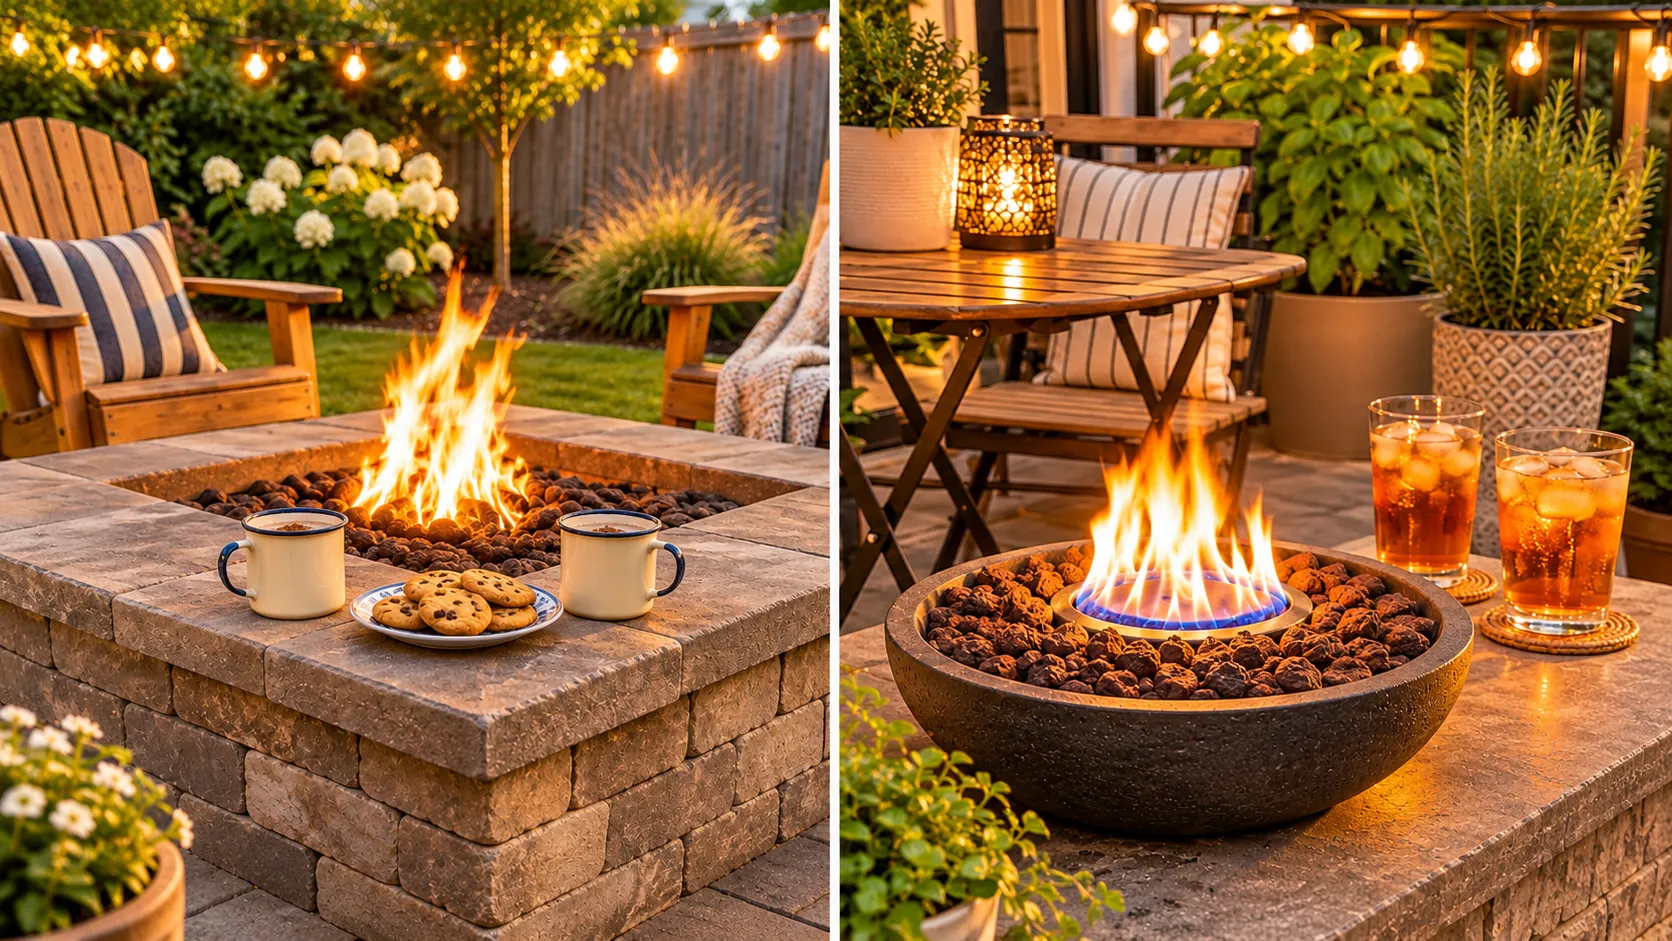
Tabletop Fire Bowl With a Burner Insert and Lava Rock

A wide, shallow bowl, a ring of dark lava rock, and one low flame in the middle.
That is the whole look, and it fits on a patio table or a low stone ledge. Pick a bowl made for heat, like concrete, thick steel, or a ceramic piece rated for outdoor fire. A thin decorative bowl can crack. Set the burner insert in the center, then pack lava rock around it so the burner is hidden and the heat spreads out.
Keep the fuel source easy to reach, and keep the whole thing away from umbrellas and hanging plants.
Best for small patios where a full pit would crowd the chairs.
Wheelbarrow Fire Pit That Rolls Away After the Party

A fire you can wheel back to the corner when the night is over.
A tired old metal wheelbarrow with a rusty tray works well here. Drill a few drain holes in the tray so rain does not pool, then pour in a few inches of sand or gravel to shield the metal. Burn small split logs, not big rounds.
Park it on dirt, gravel, or pavers, never on a wood deck or dry grass.
Check that the tray is steel before you buy, because plastic will melt.
⚠️ Watch Out
Do not wheel it anywhere while a single coal is still glowing. Let the fire burn out and the ash cool all the way first. While it is lit, block the wheel with a brick so it cannot roll.
Propane Fire Table Built Around a Burner Kit
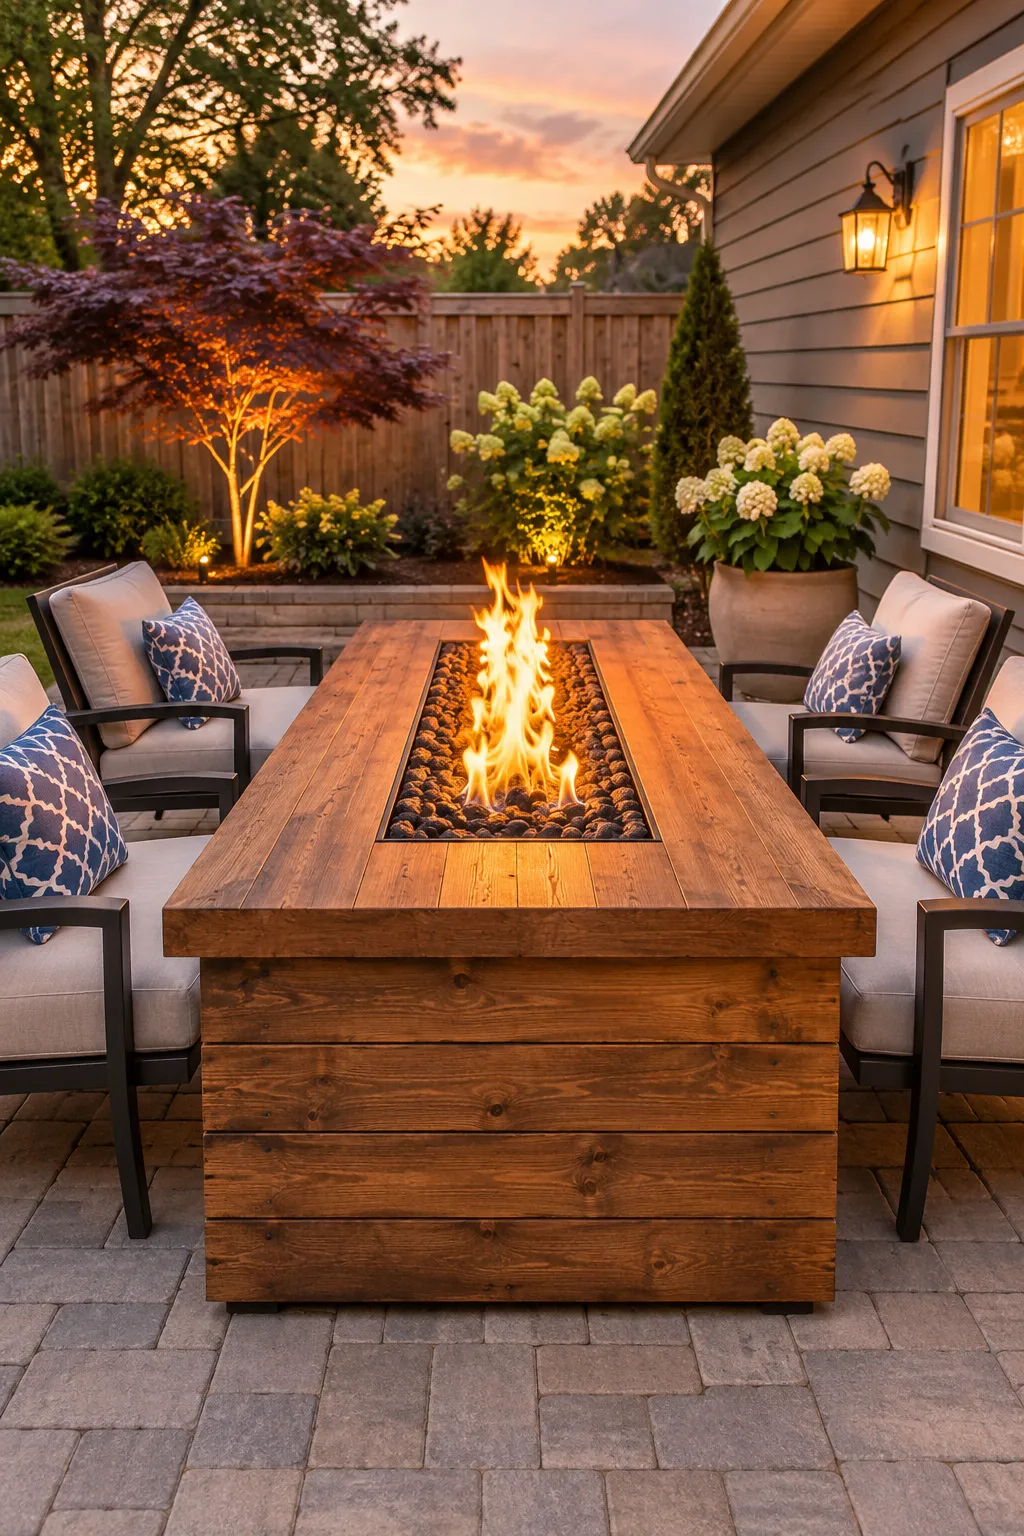
Here is the tiny rule for gas: the instructions that come with your burner kit beat any build plan online.
A propane fire table is a sturdy box with a burner set into the top, a tank tucked inside, and a door to swap it out. Natural gas hookups belong to a licensed pro, so this build is for the propane version. Before you cut a single board:
- Follow the kit’s rules on what can sit near the burner.
- Cut the vent openings it calls for, since a closed box around a tank is a problem.
- Brush soapy water on every connection and watch for bubbles.
Done right, you get a clean flame at the turn of a knob and no ash to shovel.
Your burner kit’s manual is the real set of plans. Check its clearance and venting rules before you buy a single board or tile.
Curved Block Seat Wall Built Right Into the Fire Pit

People never sit where you planned. Give them a low wall and they perch, lean, and prop their boots on it.
Build the seat wall from curved retaining wall blocks in a wide arc behind the chairs, and leave one side open as an entry. Keep the wall well back from the flame so nobody roasts. Cap it with flat pieces, since a smooth top is far easier to sit on than a rough block edge.
- Leave one gap wide enough to roll in a wheelbarrow of firewood.
- Set the base on compacted gravel so the wall does not shift.
A row of outdoor cushions along the cap makes it feel like a built in bench.
Log Stump Seats Cut to Mixed Heights

The common mistake is setting raw logs straight into the grass and calling it done. Wood sitting on damp soil soaks up water and softens at the base.
Gather log sections in a mix of heights, so the circle has a low seat for kids, a taller one for a perch, and a flat spot for a tray. Keep them well back from the flame, since a spark can smolder in dry bark.
Tree crews are a good first place to ask for free sections.
Pick dry, solid log sections with no deep cracks or soft, crumbly spots.
Cut the top and bottom flat so each stump sits without rocking. If you do not run a chainsaw, ask the supplier to cut them.
Sand the tops and round the edges so nobody leaves with a splinter.
Seal the bottoms with outdoor wood sealer and set them on gravel or pavers instead of bare soil.
Pea Gravel Circle With Metal Edging Around the Pit

Grass around a fire pit wears down to bare mud faster than anyone expects.
A gravel circle fixes it. Dig out a wide ring around the pit, set steel or aluminum edging along the outer line, and lay landscape fabric inside. Then spread a couple of inches of pea gravel on top. The edging keeps the stones from wandering into the lawn.
Pick metal over plastic, since plastic edging can warp if embers land on it.
Leave a clear band between the gravel and the pit wall so loose stones stay out of the fire.
Chair legs sink into patchy grass. Every rain turns the spot into mud, and the mud rides into the house on your shoes.
Chairs sit flat on firm gravel. Rain drains through, the edges stay crisp, and the lawn stops creeping toward the fire.
Cooking Grate That Turns the Pit Into a Grill

Set a grate across the top and the pit starts cooking dinner.
Buy a heavy steel grate sized to your ring, or an adjustable swing arm grate that pivots off the heat when you need it to. Wait for a bed of glowing coals before you cook. Tall flames burn the outside and leave the middle raw.
Burn seasoned hardwood or lump charcoal for cooking. Never cook over treated or painted wood.
Scrub the grate while it is still warm, not the next morning.
Keep this within arm’s reach
Rolling S’mores Cart With a Skewer Holder

The s’mores supplies always end up scattered: marshmallows on a chair arm, chocolate softening in someone’s pocket, skewers lost in the grass.
A cart keeps it all in one place. Start with a small rolling kitchen cart or bar cart. Screw a mason jar or a short length of PVC pipe to the side for the skewers, and lay a cutting board across the top as a tray.
Lock the wheels once it is parked, and keep it a few steps back from the flames. Cover the food between rounds so bugs stay out.
Cedar Slat Windbreak Behind the Seating
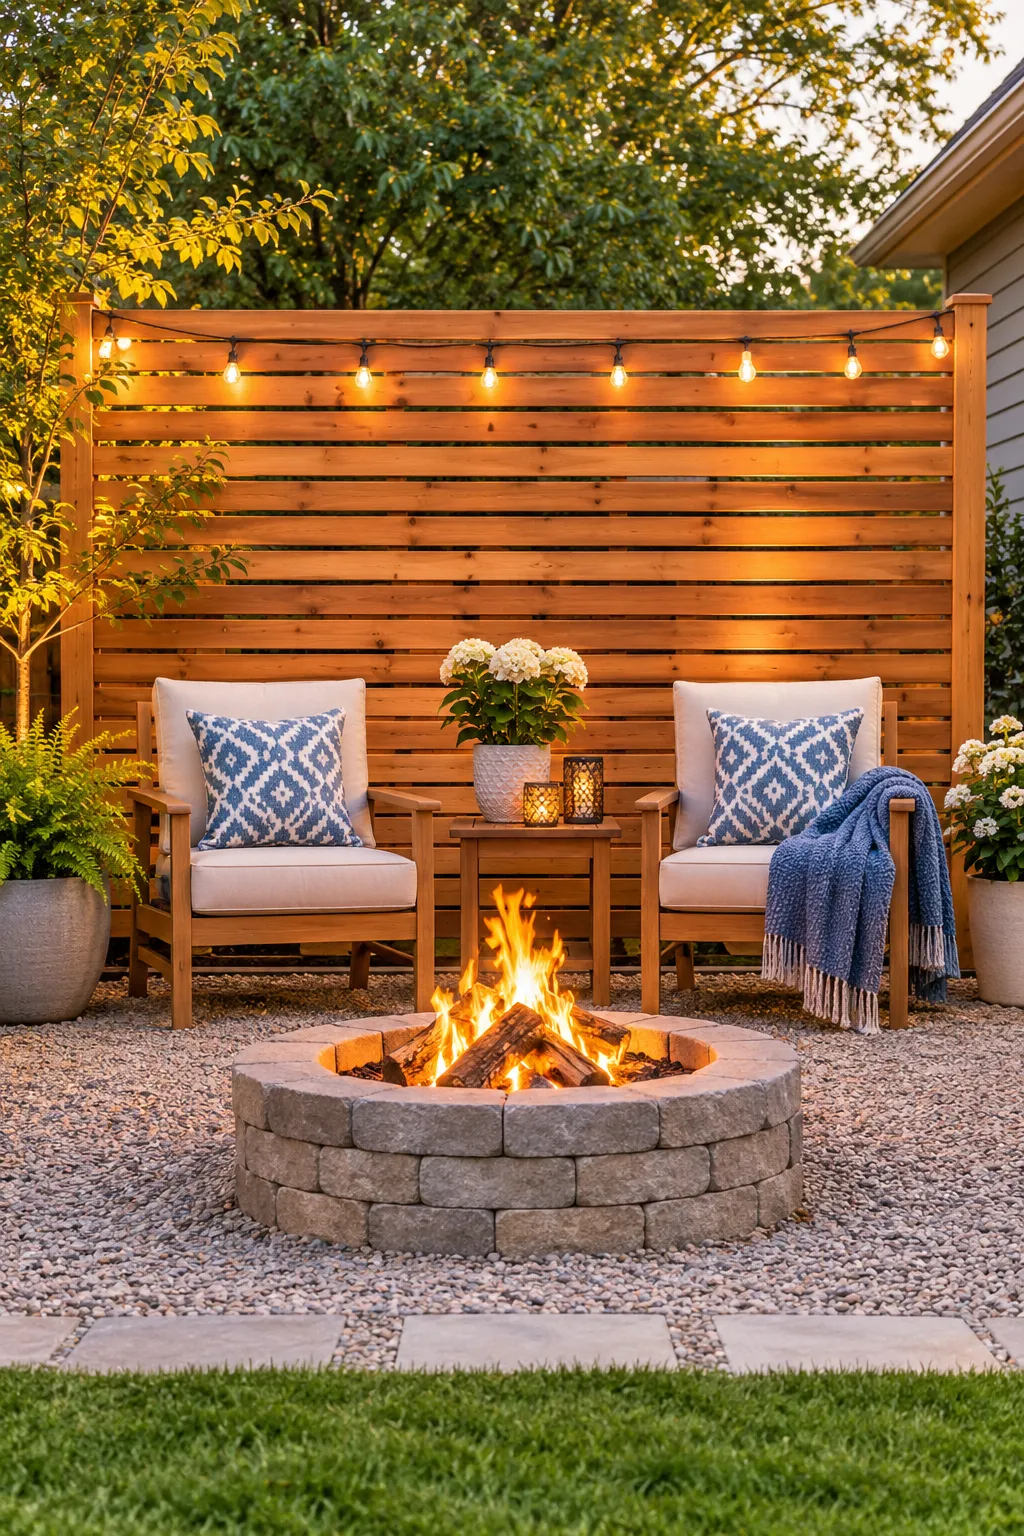
A windbreak does not have to be a solid wall. A solid wall can bounce gusts right back over the top and onto your neck.
Slats with small gaps let some air through and slow the rest down. Nail horizontal cedar boards to two or three sturdy posts, leaving a gap about as wide as a finger.
- Set the posts in gravel and concrete so a gust cannot tip the screen over.
- Place it on the windy side, behind the chairs.
It also hides the neighbor’s recycling bins, which is a bonus nobody plans for.
⚠️ Watch Out
Cedar burns. Keep the screen well back from the flame and any flying embers, and never build it around the pit. Check your local rules for how far a fire pit has to sit from fences and structures.
String Lights Hung From Cedar Posts Around the Fire Zone
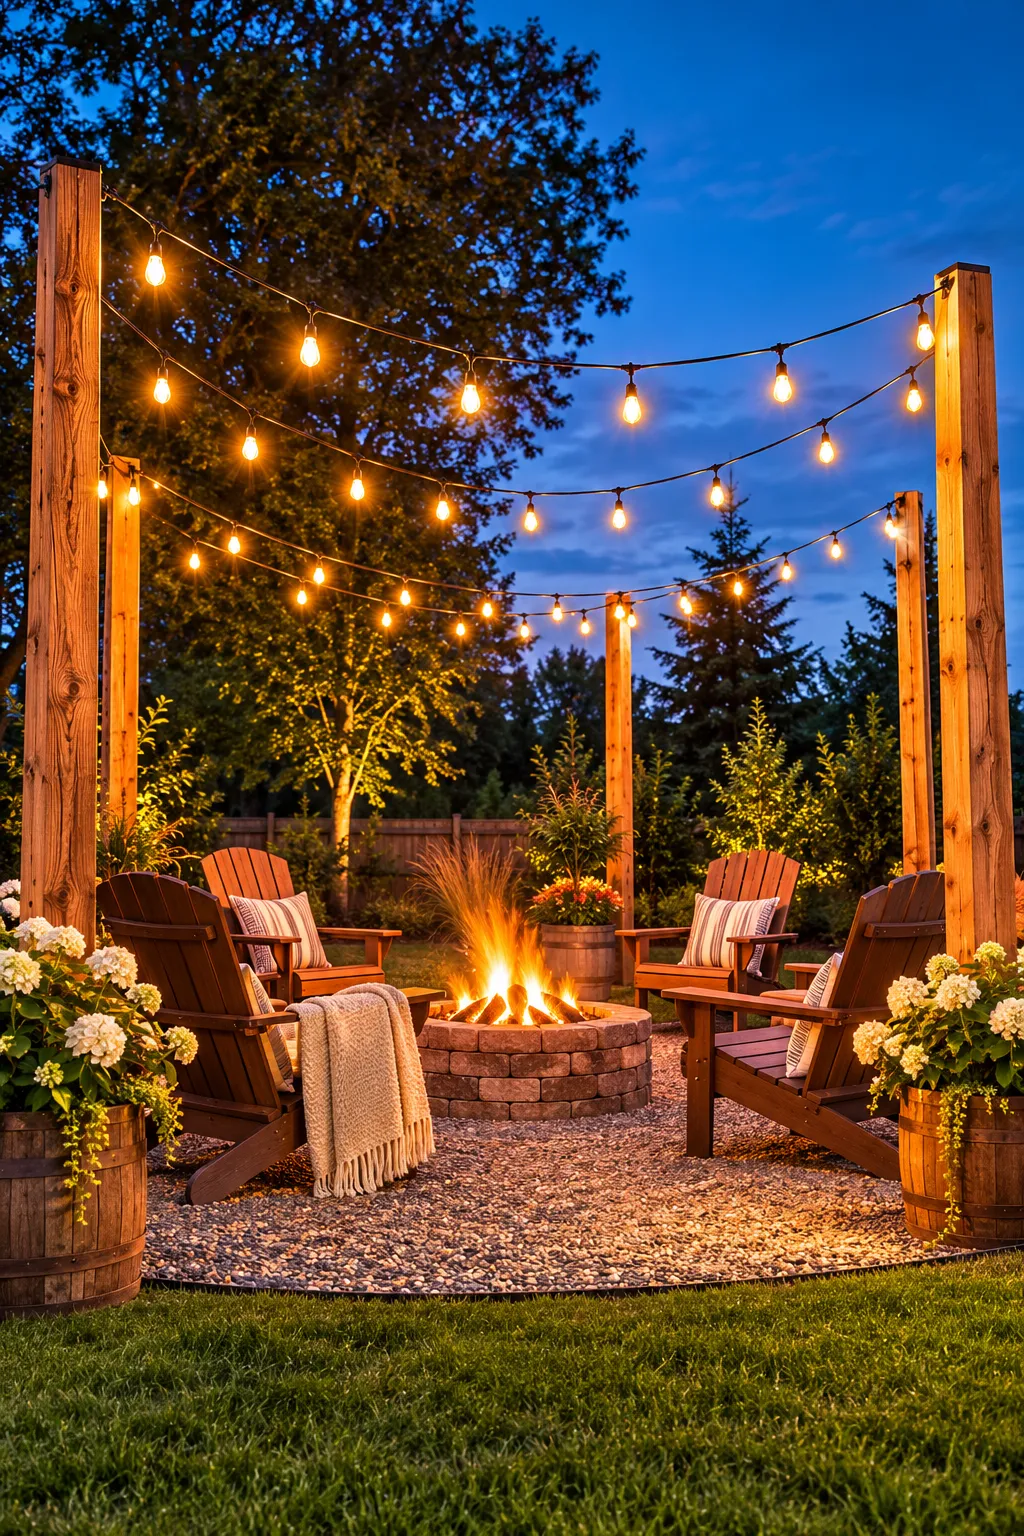
Warm bulbs at head height or higher make everyone around the fire look good, and they give the yard a ceiling.
Set tall cedar posts in buckets of gravel or in concrete footings around the seating area. Run outdoor rated string lights between them in loose swags, and plug into a weatherproof outlet.
Hang the lights well above head height and away from smoke and sparks, so the bulbs and cords stay safe.
Best for yards with no tree or pergola nearby.
Buy lights and cords rated for outdoor use.
Hang them higher than the tallest guest.
Add a timer or a switch so they shut off on their own.
Stringing lights straight over the fire pit.
Using indoor lights outside.
Leaving cords across the walkway where feet will catch them.
Lidded Blanket Crate That Doubles as a Side Table
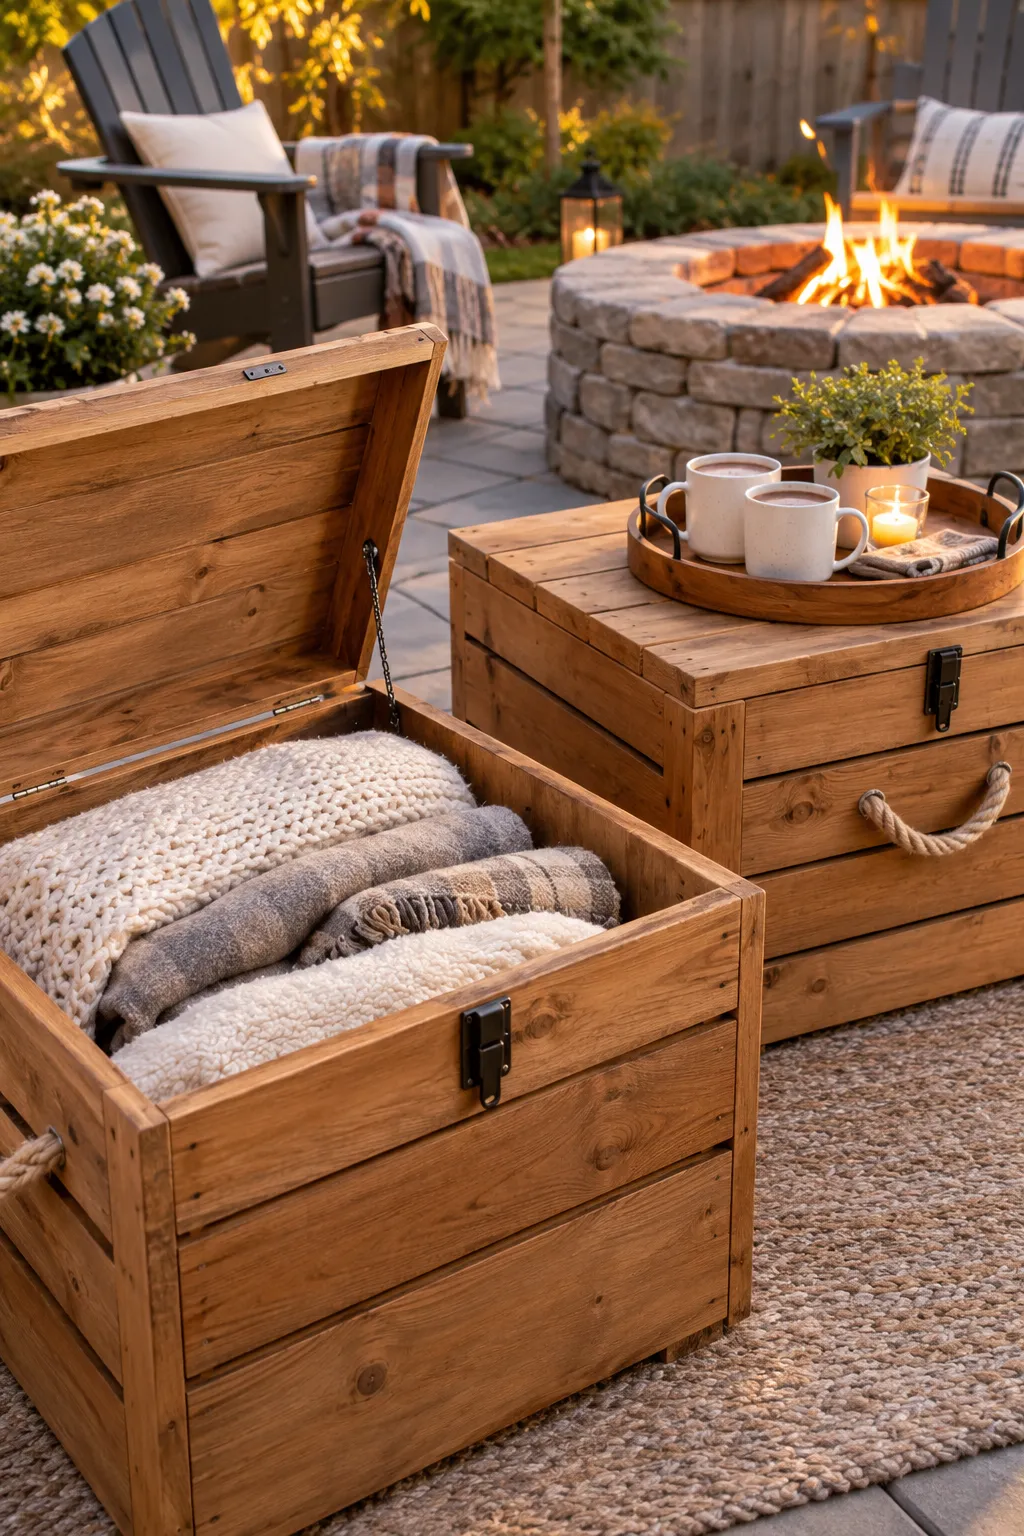
Blankets are the first thing guests ask for and the last thing anyone remembers to carry out.
A lidded crate fixes both problems. Build a simple box from cedar or pine boards, hang the lid on two outdoor hinges, and screw a rope handle to each end. Add four short feet so the base stays off wet ground, and seal the wood with an outdoor sealer.
- Set a flat tray on the lid and the crate becomes a side table for mugs.
- Park it a few feet back from the fire so the wood and the fabric stay cool.
Choose the throws you store in it with the table below.
| Throw fabric | Wool | Cotton | Fleece |
|---|---|---|---|
| Warmth | Warmest of the three | Light, feels thin by midnight | Warm and lightweight |
| Near stray sparks | Tends to handle them better, still keep it back | Can catch, keep well back | Synthetic, can melt from one spark |
| Damp evenings | Stays warm, dries slowly | Heavy and slow to dry | Dries quickly |
| Washing | Follow the care tag | Easy, machine wash | Easy, machine wash |
Fitted Pit Cover and a Ready Bucket for Easy Shutdown

Never walk away from a pit that is still warm.
Keep a metal bucket and a small shovel next to the pit, so putting the fire out is a habit and not a scramble. A fitted cover keeps rain and leaves out of the bowl, so tomorrow’s fire starts dry. Use a steel cover or a heat rated lid, and only set it down once the ashes are cold.
If your pit runs on propane, shut the valve at the tank as well.
The timeline below covers the full shutdown.
The shutdown timeline
Stop adding wood and let the logs burn down on their own.
Spread the coals out with the shovel so they cool faster.
Pour water on slowly from arm’s length, stand back from the steam, and stir the ashes.
Hold the back of your hand over the ashes. Stir again if you feel any warmth.
Once everything is cold and wet, set the cover on.
Conclusion
A good fire pit does not have to be fancy. It needs a solid base, the right materials, and enough room for people to sit without roasting. Start with the idea that fits your yard and your free weekend, then add the extras later, like the gravel ring, the string lights, and the blanket crate.
Most of these firepits backyard DIY ideas can be built in stages, so you never have to finish everything at once. Check your local fire rules before you light anything, read every product manual, and keep a bucket within reach.
Then pick a cool evening, light the first fire, and see who wanders over.
Before the first fire