

Most front yards have a path nobody planned. It started as a few steps across the grass, got worn into a muddy stripe, and now everyone who visits walks it anyway. The grass stopped growing there years ago.
A gravel pathway DIY project is one of the few yard jobs that fixes this without a contractor or a big budget. Gravel drains well, goes down in a weekend, and gives the walkway a clear shape that makes the whole front of the house look cared for.
The catch is that gravel dumped straight onto soil turns into a mess within a season. It sinks, scatters, and grows weeds. The good news is that the fixes are small, and most of them happen under and beside the gravel, not in the gravel itself.
Below are 14 ideas that cover layout, base, edging, crafts, plants and lighting. Pick two or three that suit your yard, and save the rest for your next free weekend.
1. Start Your Gravel Pathway DIY With a Garden Hose Curve
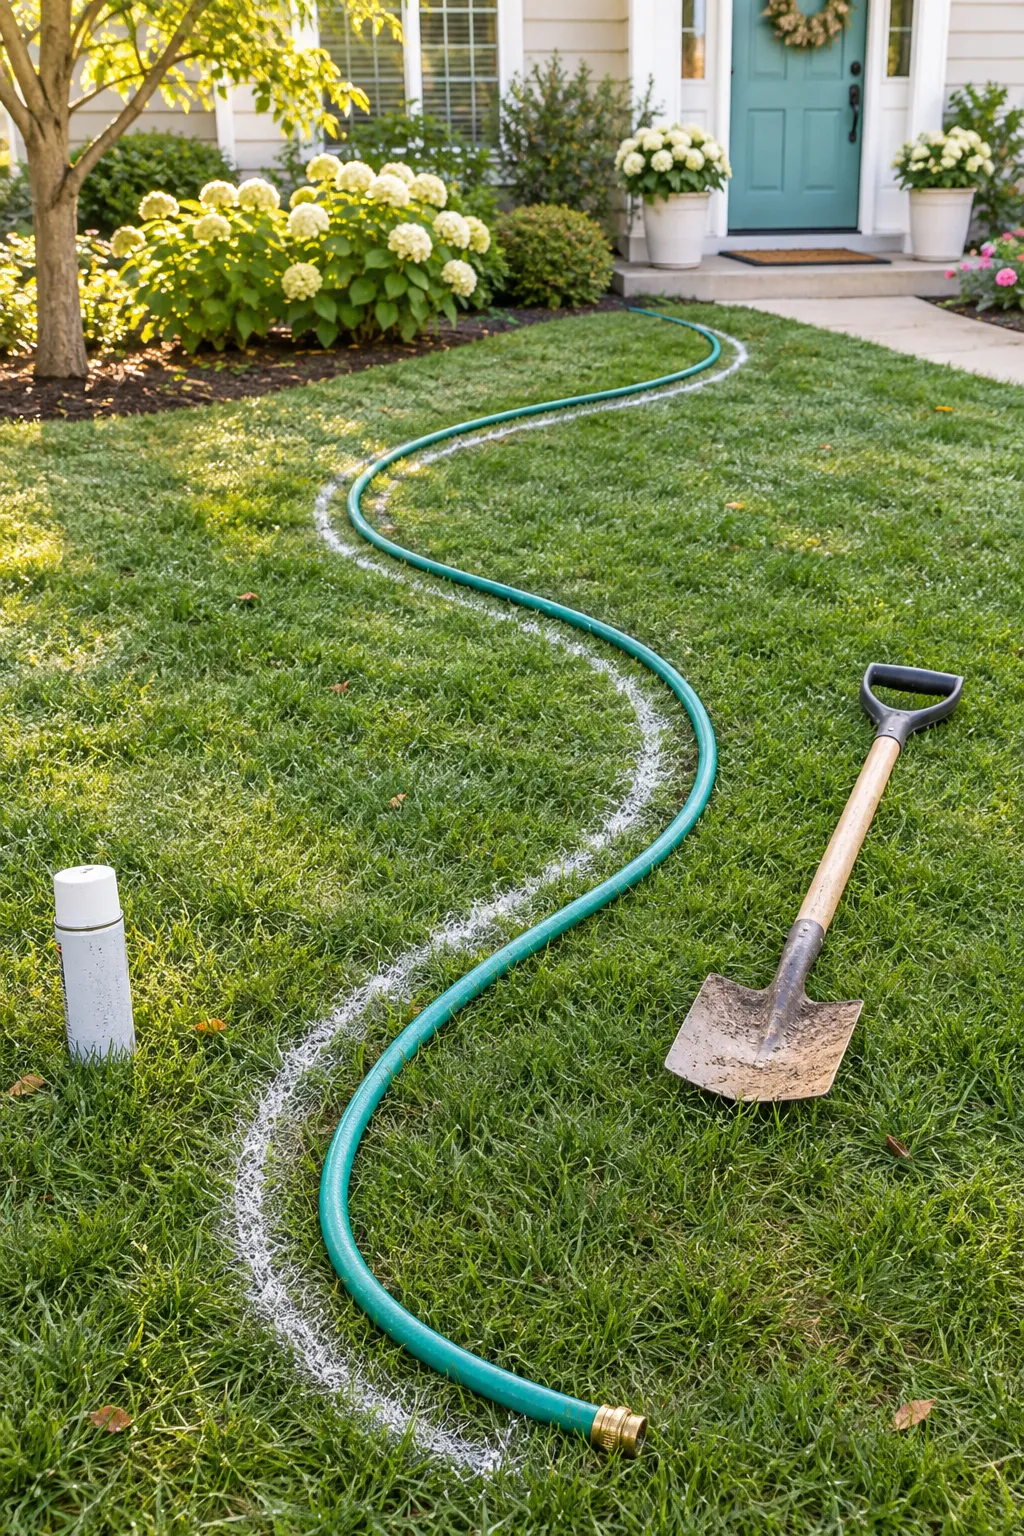
A garden hose is the cheapest design tool you own.
Lay it across the lawn from the driveway to the door and push it into a gentle S. Then walk it a few times. If you catch yourself cutting a corner, the path is in the wrong spot, so nudge the hose until the route feels natural. Straight lines look stiff, while a soft curve makes a short yard feel longer.
If the hose fights you, let it sit in the sun for ten minutes and it will relax into the curve. Pick a dry afternoon, since wet grass hides your paint lines.
Mark the path in four moves
Walk the hose line from driveway to door three times. Move it anywhere you catch yourself cutting a corner.
Spray along both sides of the hose with the can held upside down, then pull the hose away.
Check the width in a few spots. About 3 feet fits two people side by side. A garden trail can be narrower.
Slice the sod along the paint lines with a flat spade and lift it out. Keep the strips to patch bare spots elsewhere.
2. Layer Fabric and Compacted Crushed Stone Before the Pretty Gravel Goes On
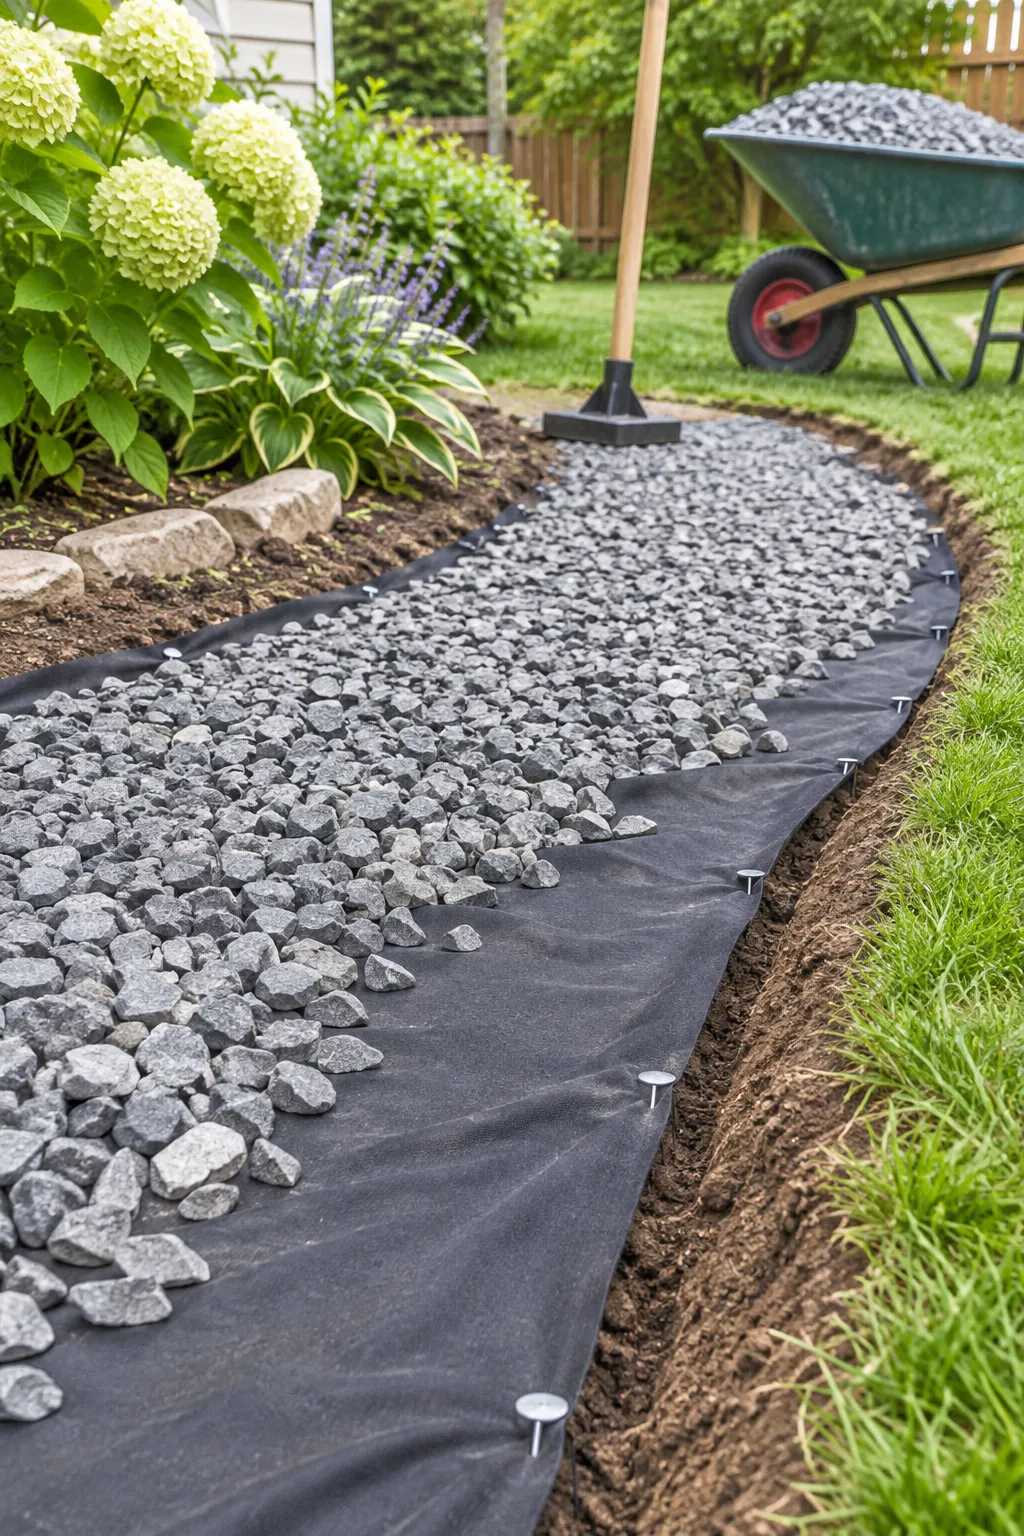
Skipping the base is the mistake behind most sad gravel paths.
Without one, three things happen:
- The gravel sinks into the soil and vanishes within a season or two.
- Weeds push up through every gap.
- Rain carves little ruts along the sides.
Dig the path out a few inches, lay landscape fabric, add crushed stone, and tamp it down hard. A hand tamper is cheap and does the job on a small path. The pretty gravel only needs to cover the base.
Thin on top, solid below.
Your path, from top to bottom
3. Match the Gravel Size to How You Actually Walk the Path
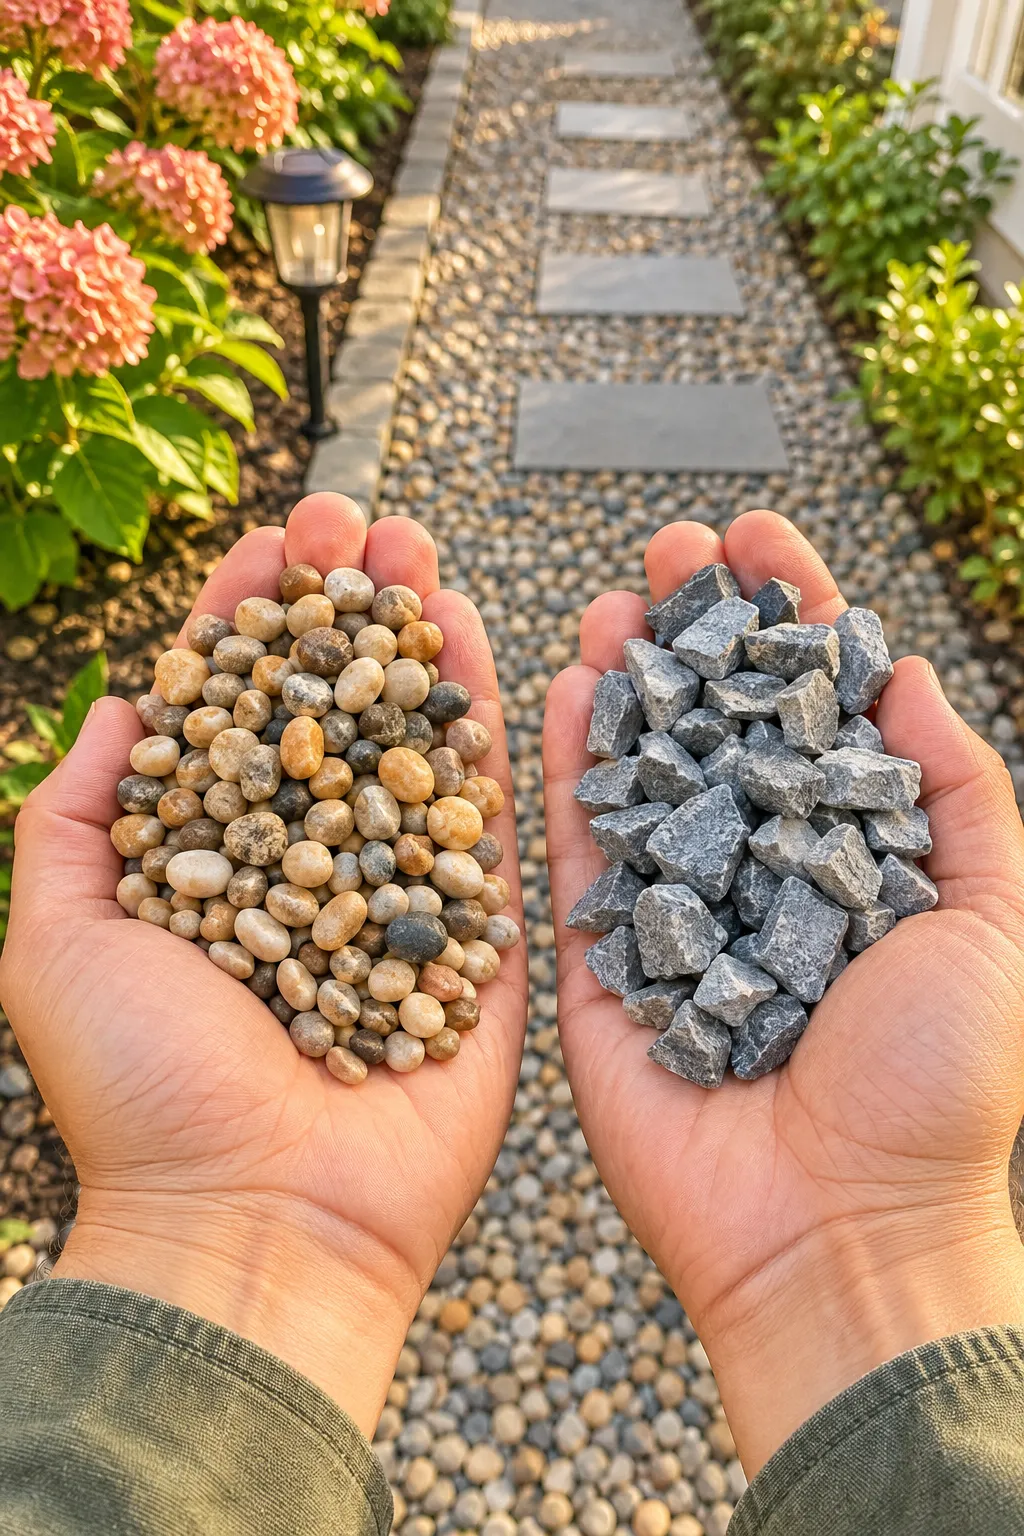
Here is a tiny rule: rounded stones roll underfoot, and angular stones lock together.
Pea gravel feels smooth and friendly on bare feet, but it shifts with every step and drags a suitcase wheel like sand. Crushed stone has sharp edges that grip each other once packed, so it holds a firm surface.
Think about who really uses your path. Delivery drivers, kids on scooters and anyone with a stroller will do better on crushed stone. A side garden trail that only you walk can handle pea gravel just fine.
| At a glance | Pea gravel | Crushed stone |
|---|---|---|
| Underfoot | Smooth and loose | Firm and a little sharp |
| Stays put | Scatters, needs raking | Packs down and holds |
| Wheels | Hard to roll through | Rolls much easier |
| Best spot | Garden trails, bare feet | Front entry paths |
4. Pin Down Black Steel Edging for a Crisp, Clean Line

Gravel loves to wander. A few months in, it creeps into the lawn, and then the mower flicks stones at your shins.
Steel edging fixes that. It is a thin strip of metal set on its edge along both sides of the path and held with stakes. It bends around curves, takes up almost no room, and the black finish disappears into the yard so the gravel stays the focus. Set the top just above the gravel so stones cannot hop over it.
It costs more than plastic edging, and it tends to hold its line better.
Tap stakes in with a rubber mallet and a scrap of wood on top.
Bend curves a little at a time along the length.
Leave the top edge just above the gravel.
Hammering straight on the steel, which bends the top.
Setting it flush with the soil, where gravel crawls over.
Forcing a tight curve in one go, which kinks it.
5. Press Flat Stepping Stones Into Pea Gravel for an Easy Walking Rhythm
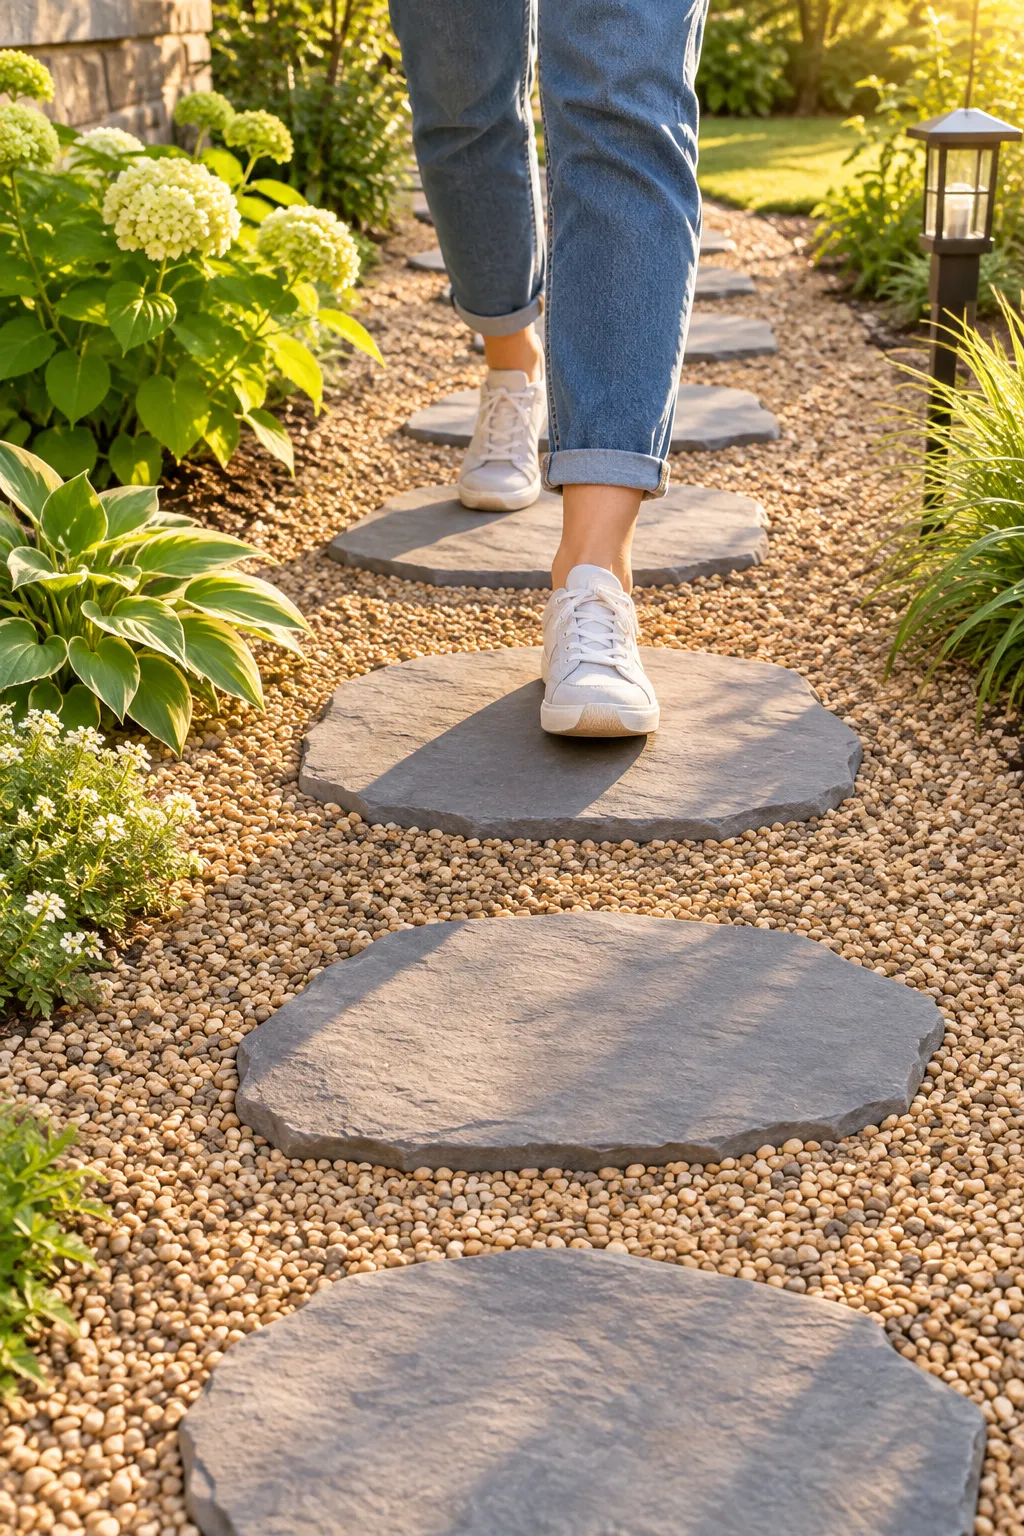
Big flat stones sitting in a sea of small gravel look like they have always belonged there.
Set each stone about one step from the next. Two feet center to center works for many adults, but walk it in your everyday shoes before you commit, since stride length varies. Dig each hole so the stone sits just above the gravel, tap it level, then pour the pea gravel around it.
Kids in the house? Space them closer together.
Gather before you set the stones
6. Set Reclaimed Bricks at an Angle for a Sawtooth Edge
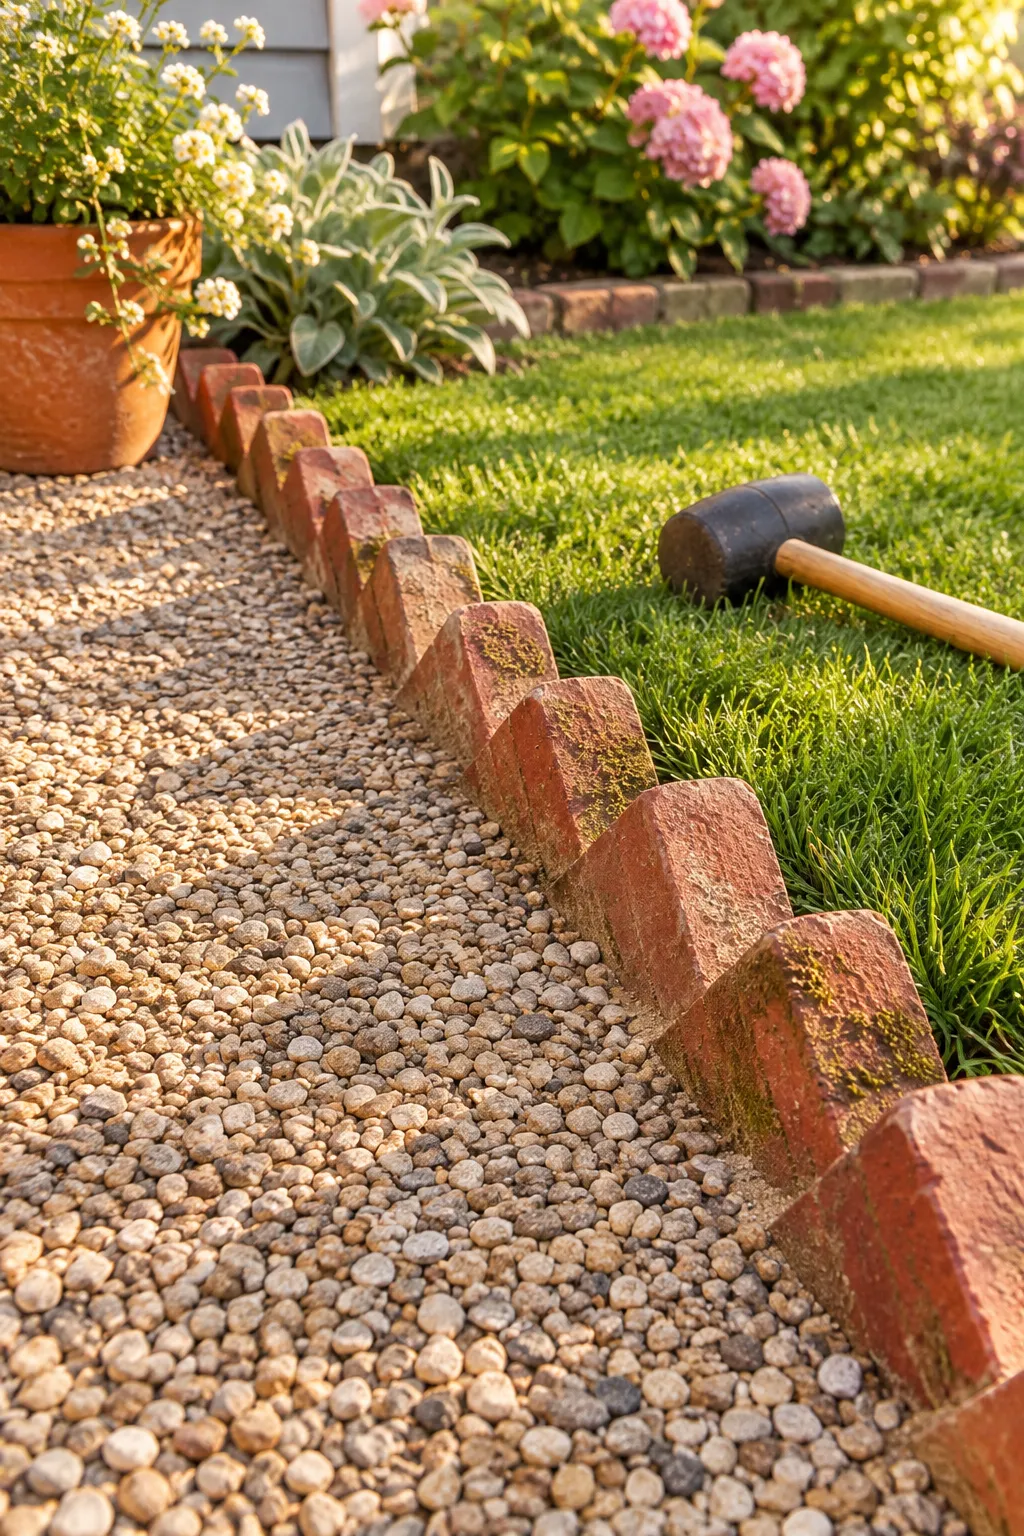
A straight row of bricks reads as a border. Tilt the same bricks and it reads as a pattern.
Set reclaimed bricks on a corner at roughly 45 degrees, so each one points up like a tooth. Dig a narrow trench, add an inch or so of sand, and push the bricks in tight with about half of each one buried. A rubber mallet gets them level.
Two quick notes on the bricks themselves:
- Ask neighbors who are redoing a patio, or check local resale groups.
- Toss any that flake when you rub them, since those crumble after a few freezes.
Gravel drifts into the grass, the edge looks fuzzy, and the mower flicks stones across the lawn.
A sharp toothed line that holds the gravel back. Each brick locks against the next in a bed of sand.
7. Cast Leaf Print Concrete Stepping Stones in a Weekend

Store bought pavers work fine. A stone you cast yourself comes with a leaf print nobody else has.
A cake pan or a plastic plant saucer makes a good mold. Big leaves with strong veins, like hosta or rhubarb, leave the deepest print. Check the forecast first, because fresh concrete does not like rain.
Pour one stone as a test before you commit to a dozen. Wear gloves while you work, since wet concrete is rough on bare skin.
Cast one stone in four steps
Spray the mold with cooking oil. Lay the leaf in the bottom, vein side up, and press it flat.
Mix quick setting concrete with water as the bag directs. Wear gloves and a dust mask. Pour it over the leaf and tap the sides to release air bubbles.
Smooth the top with a trowel or a scrap of wood. Leave it on a flat surface, out of the rain.
Once it is firm, check the bag for timing, then flip it out, peel off the leaf and scrub away any green bits with a stiff brush.
8. Mix Two Gravel Colors for a Simple Striped Border

Gravel does not have to come in one color.
Run a darker stone along both edges, about a hand wide, and fill the middle with a lighter one. The stripe makes a plain path look planned, and you only need a small bag of the second shade.
To keep the line clean:
- Slide a strip of cardboard along the stripe line while you pour.
- Fill both sides, then pull the cardboard out slowly.
- Rake gently away from the line, never across it.
Keep it to two colors. A third starts to look like a mistake.
Three easy pairings
9. Tuck Creeping Thyme Into the Gaps for a Soft Green Edge

Creeping thyme struggles in one spot more than any other, right down the middle of the path.
Plant it where feet rarely land instead:
- In the soil strip along the edge, so it spills onto the gravel
- In pockets between stepping stones
- Around a bend, where the path curves wide
Thyme gives off a light herb smell when brushed, and it likes the sharp drainage gravel provides. Buy small plugs, since seed is slow to fill in. It works best on sunny paths, and shady ones leave it thin and leggy.
💡 Quick Tip
Water new plugs regularly for the first few weeks until they root, then let the soil dry out between drinks. Thyme likes lean, sunny soil, and too much water or rich compost makes it rot.
10. Hold the Gravel Back With a Row of Large River Rocks
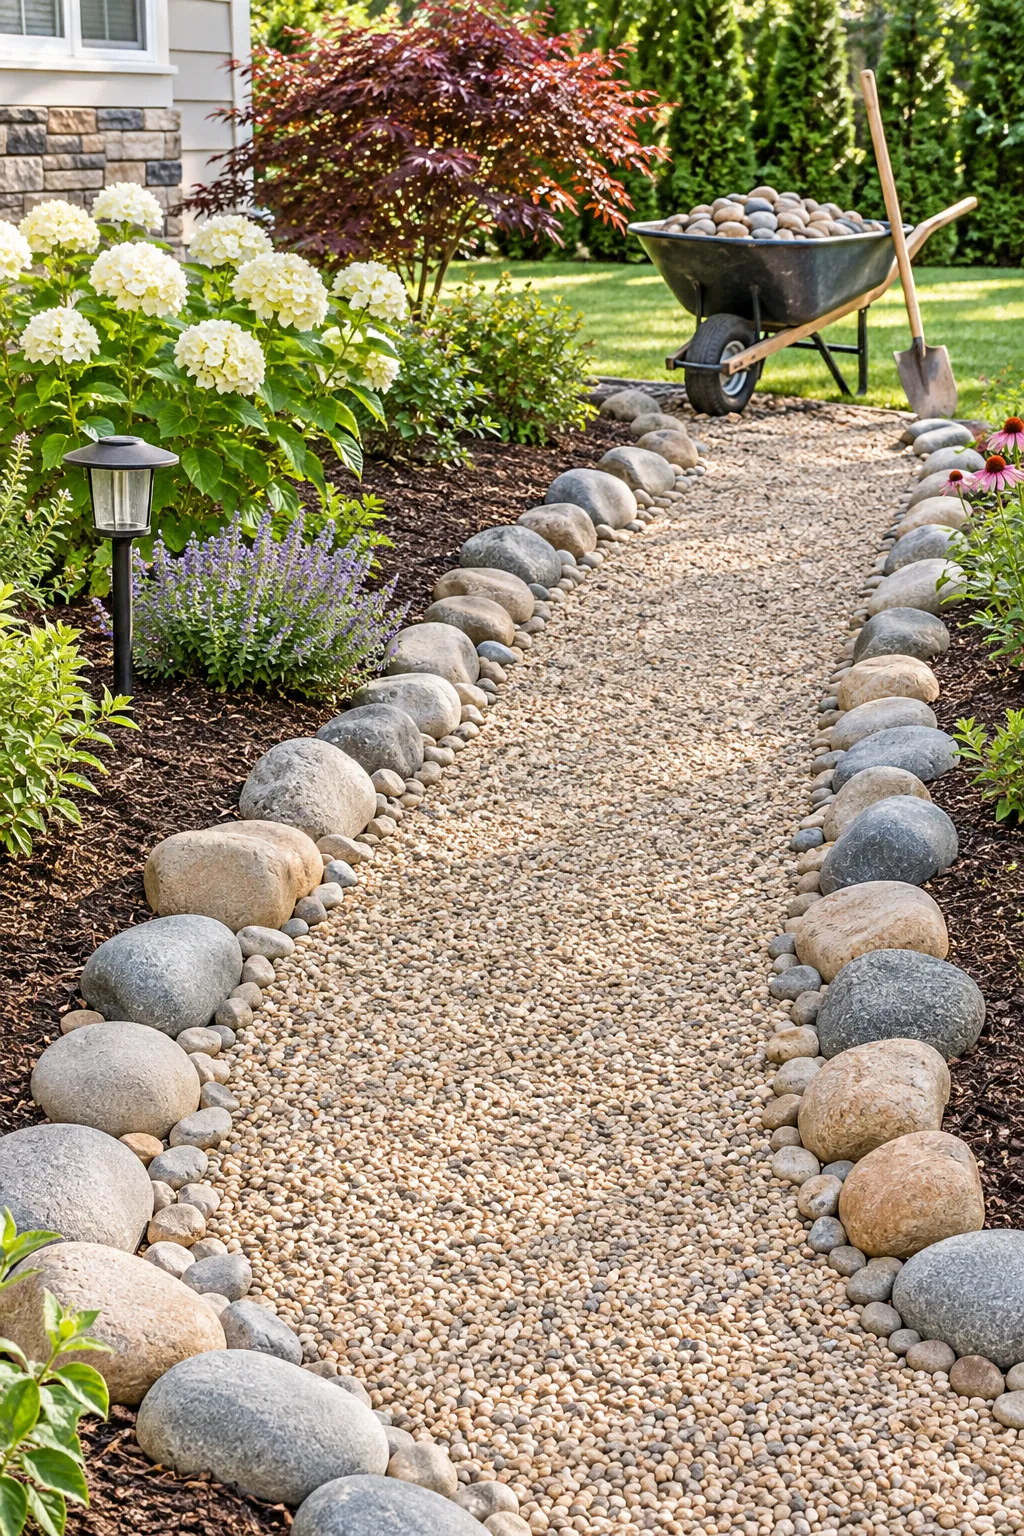
A row of big river rocks holds gravel back with almost no upkeep once it is set.
Pick rocks roughly the size of a loaf of bread or bigger, so a mower wheel does not shove them around. Sink each one about a third into the ground and set them side by side with small gaps. Mix a few sizes so the line looks natural and not like a fence.
Fill the gaps with fist sized stones, and the gravel has nowhere to escape.
Haul them in a wheelbarrow, not your arms. A single rock can weigh more than you expect.
11. Widen the Path Into a Small Gravel Landing at the Front Door
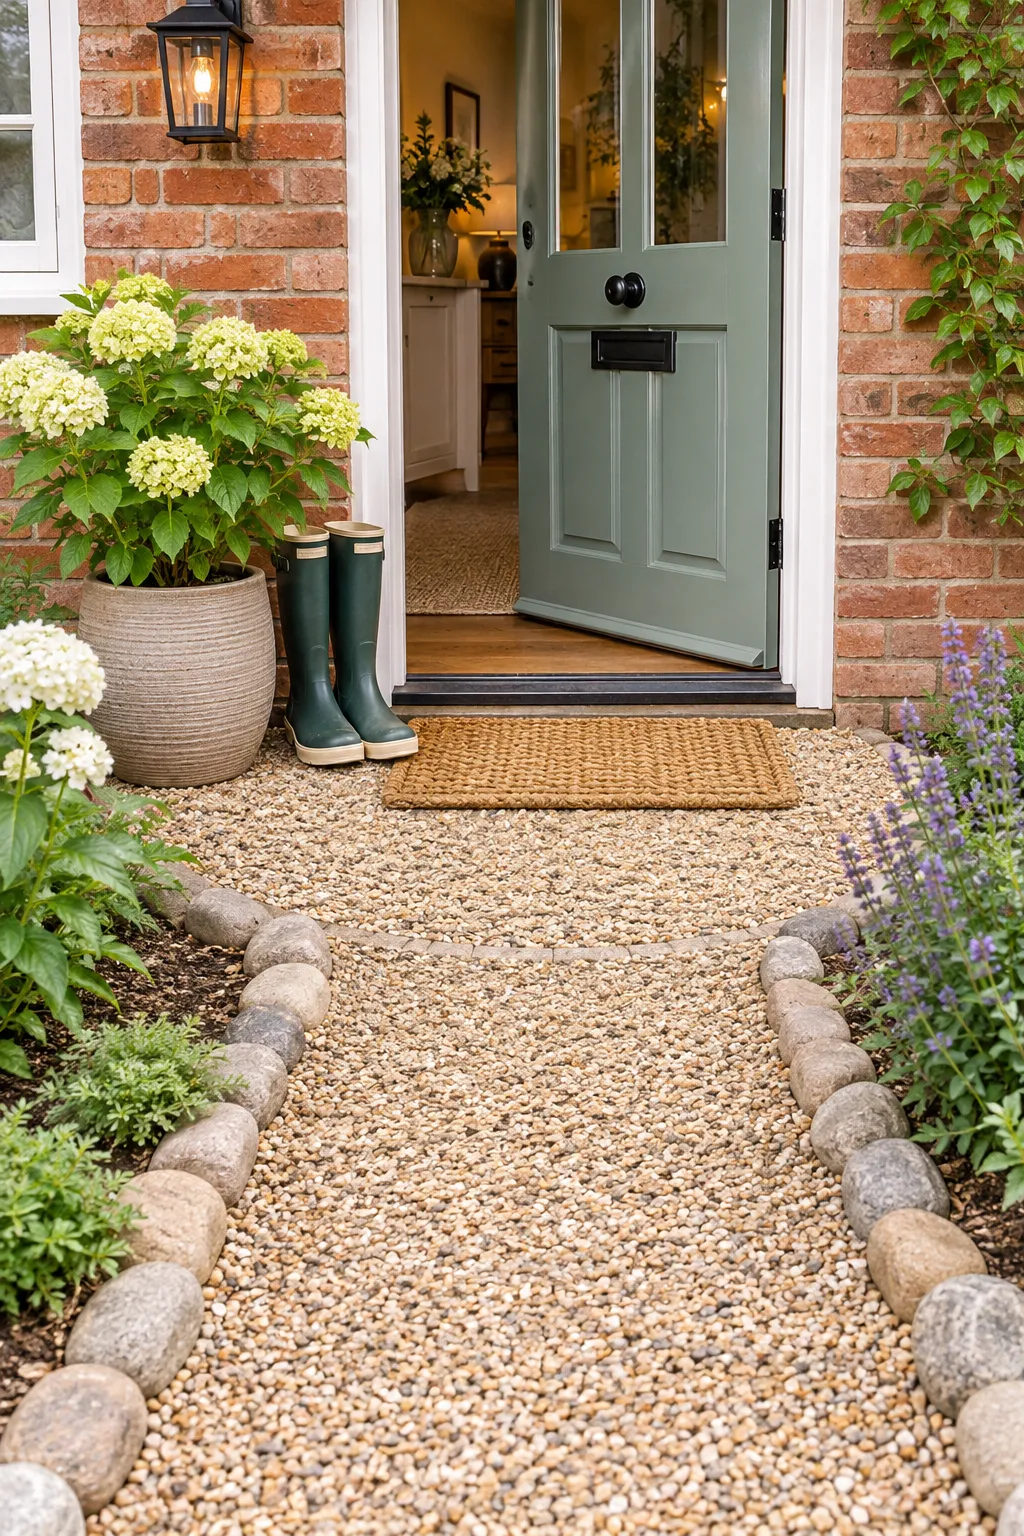
Guests reach the front door and bunch up on a strip about as wide as a shoebox, while someone tries to open a door that swings the wrong way.
A small gravel landing fixes that. Widen the last few feet of the path into a square or a half circle right at the door, so people have somewhere to stand.
To size it:
- Open the door fully and mark where it swings.
- Leave room for two people to stand side by side.
- Save a corner for a doormat and a pair of muddy boots.
It suits entry paths that now end in a skinny step.
⚠️ Watch Out
Keep the gravel a few inches below the door threshold, and slope the surface gently away from the house. That keeps stones out of the entry and sends rain away from the foundation. Never pile gravel up against siding.
12. Line the Path With Solar Stake Lights Spaced Farther Apart Than You Think
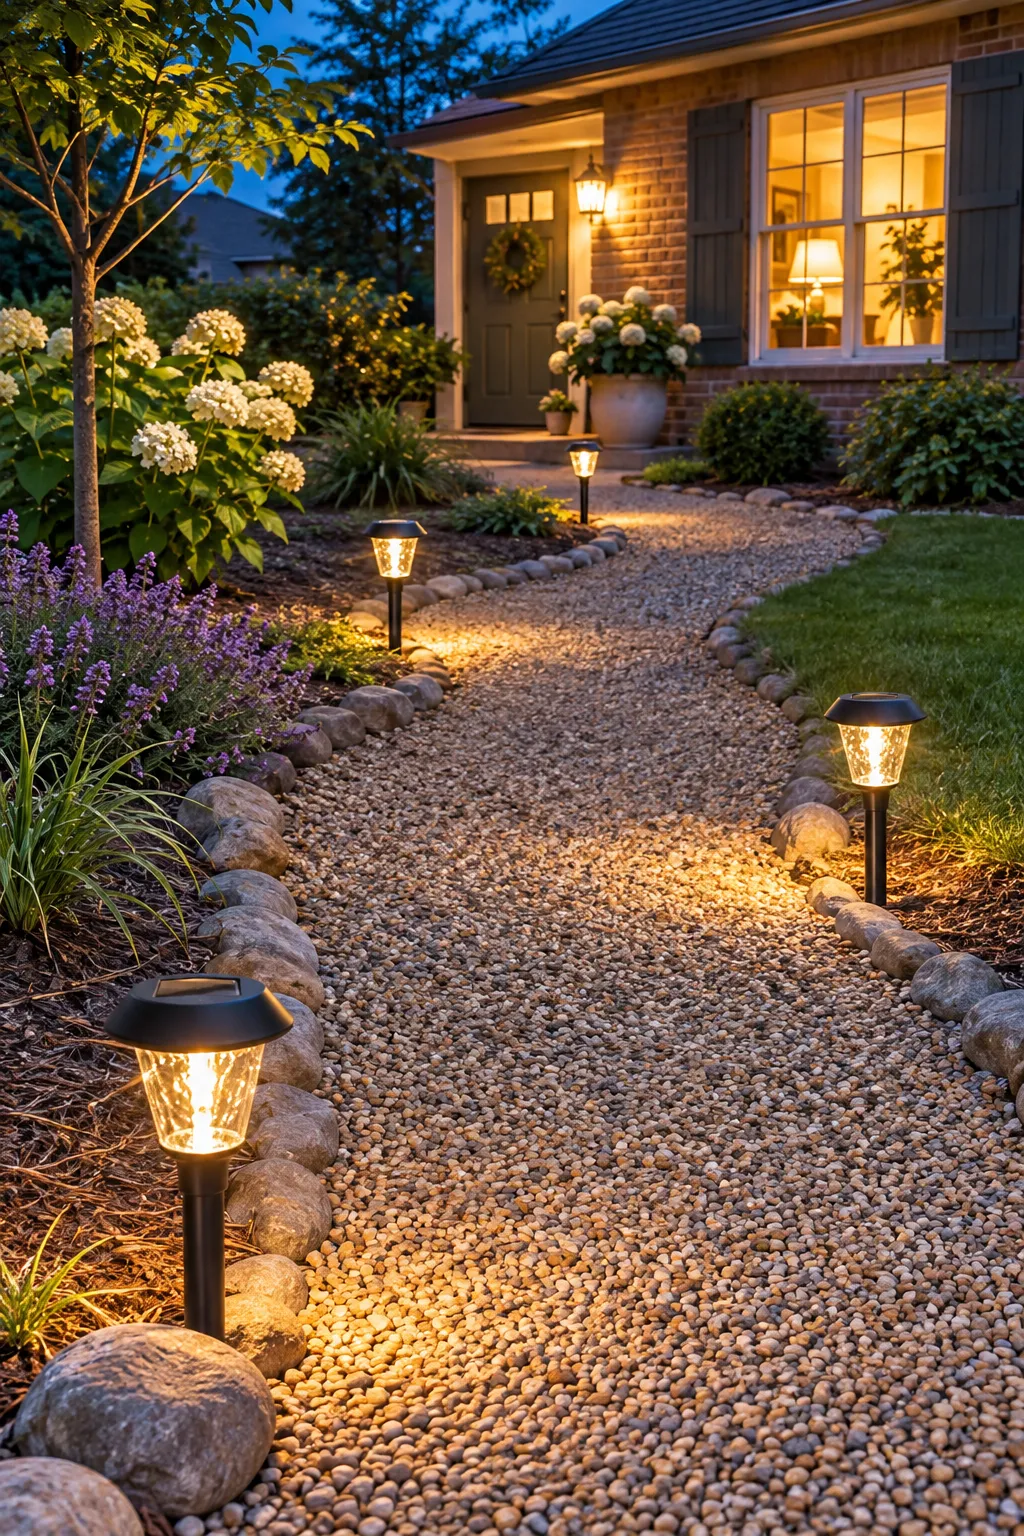
Lining every foot of a path with lights makes it look like a tiny airport runway.
Solar stakes work better when you give them room. Put one at each bend and one at each step, then leave a few strides of dark in between. Switch sides as you go, so the glow zigzags down the path instead of marching in a straight row.
Two small things save a lot of frustration:
- Push stakes into the soil strip beside the edging, because loose gravel will not hold them upright.
- Choose spots that get real daytime sun, not the shade under the porch roof.
Test them at dusk before you tuck them in for good.
Each light should just be visible from the next one. If you can see three at once, pull one out and move it to a bend.
13. Plant a Three Layer Border of Grasses and Lavender Along Both Sides
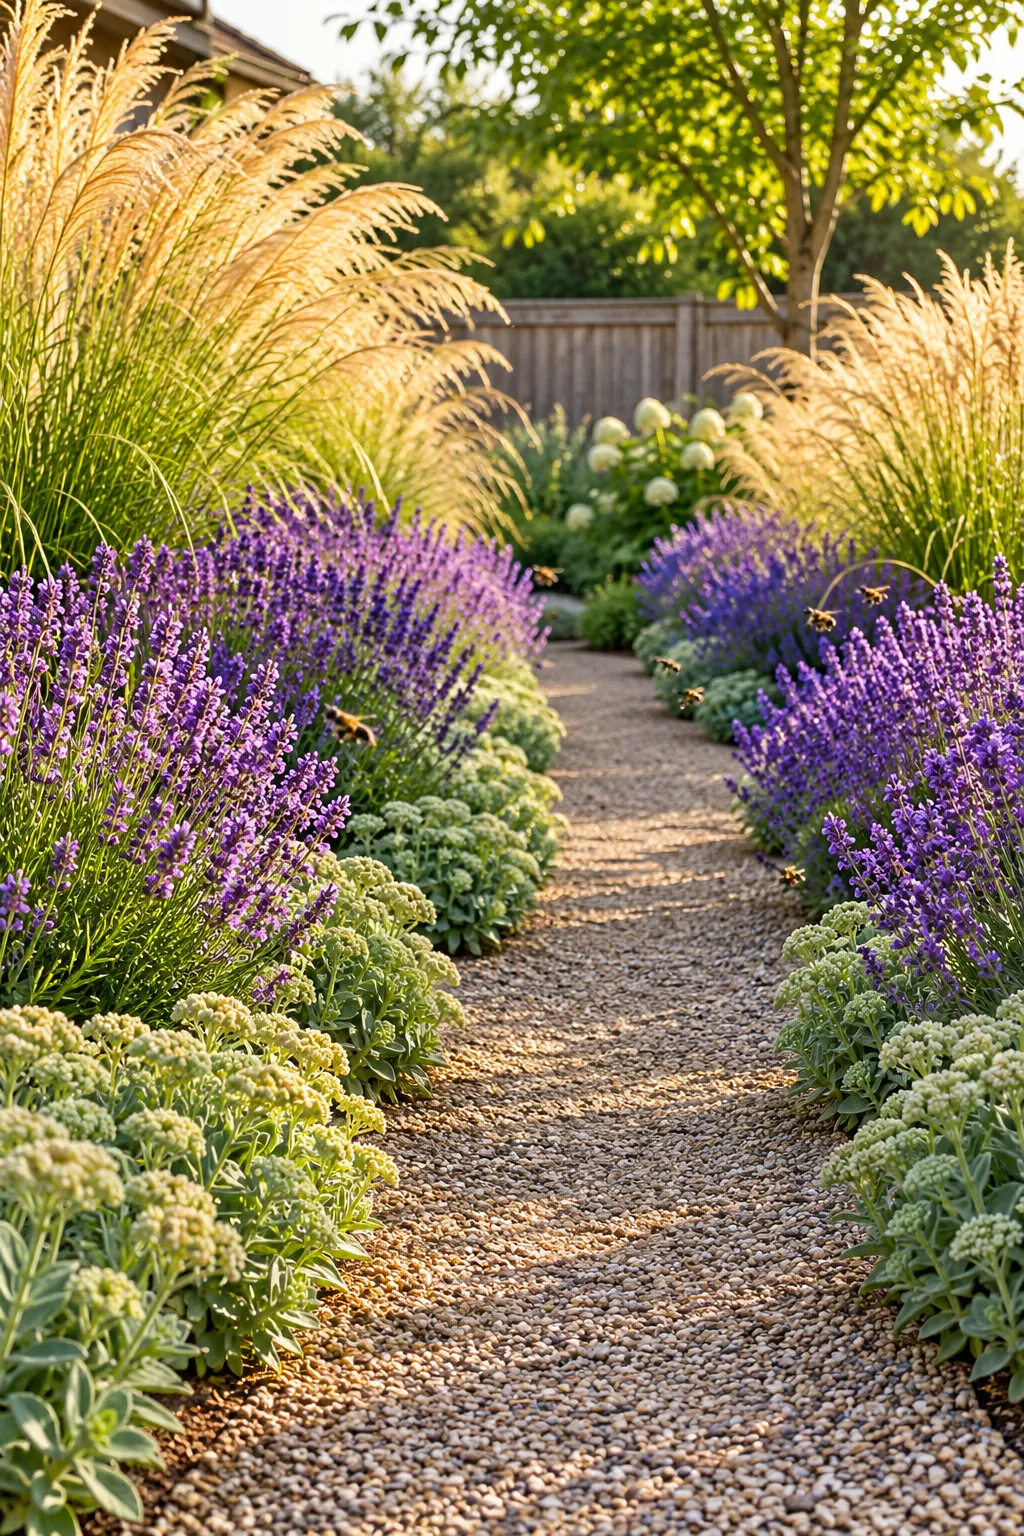
Tall grass at the back, lavender in the middle, a low carpet in front. That order is the whole trick.
Plant it on both sides and the gravel looks like it runs through a garden, not past a bare strip of dirt. Set everything about a foot back from the edging, since lavender and grasses flop forward once they fill out.
Both enjoy sun and sharp drainage, so a gravel path suits them. Check each plant tag for your growing zone before you buy.
Repeat the same grass on both sides so the path feels like a matched set.
| Layer | Try | Its job |
|---|---|---|
| Back | Feather reed grass, little bluestem | Height and movement |
| Middle | Lavender, catmint | Scent and flowers |
| Front | Creeping thyme, low sedum | Softens the edge |
14. Rake, Top Up and Weed on a Four Season Schedule

Gravel is low upkeep, not no upkeep.
A quick check each season keeps the path looking fresh. Keep a leftover bag of gravel by the shed, so you can patch a thin spot the day you notice it.
Three jobs cover most of it:
- Rake the surface smooth after heavy rain.
- Pull weeds while they are small and the roots are loose.
- Top up gravel wherever the fabric starts to show.
A little often beats a big rescue later.
One small job per season
Conclusion
A good path does not need a big budget or a landscaper. It needs a clear route, a solid base underneath, and an edge that keeps the stones where you put them. Everything else is a small extra you can add one weekend at a time.
If you only do three things, mark the route with a hose, build the base properly, and pick an edging you will not fight with. Your first gravel pathway DIY will look finished with just those. The leaf stones, the thyme and the lights can wait until you see how the path gets used.
Your first weekend, in order