
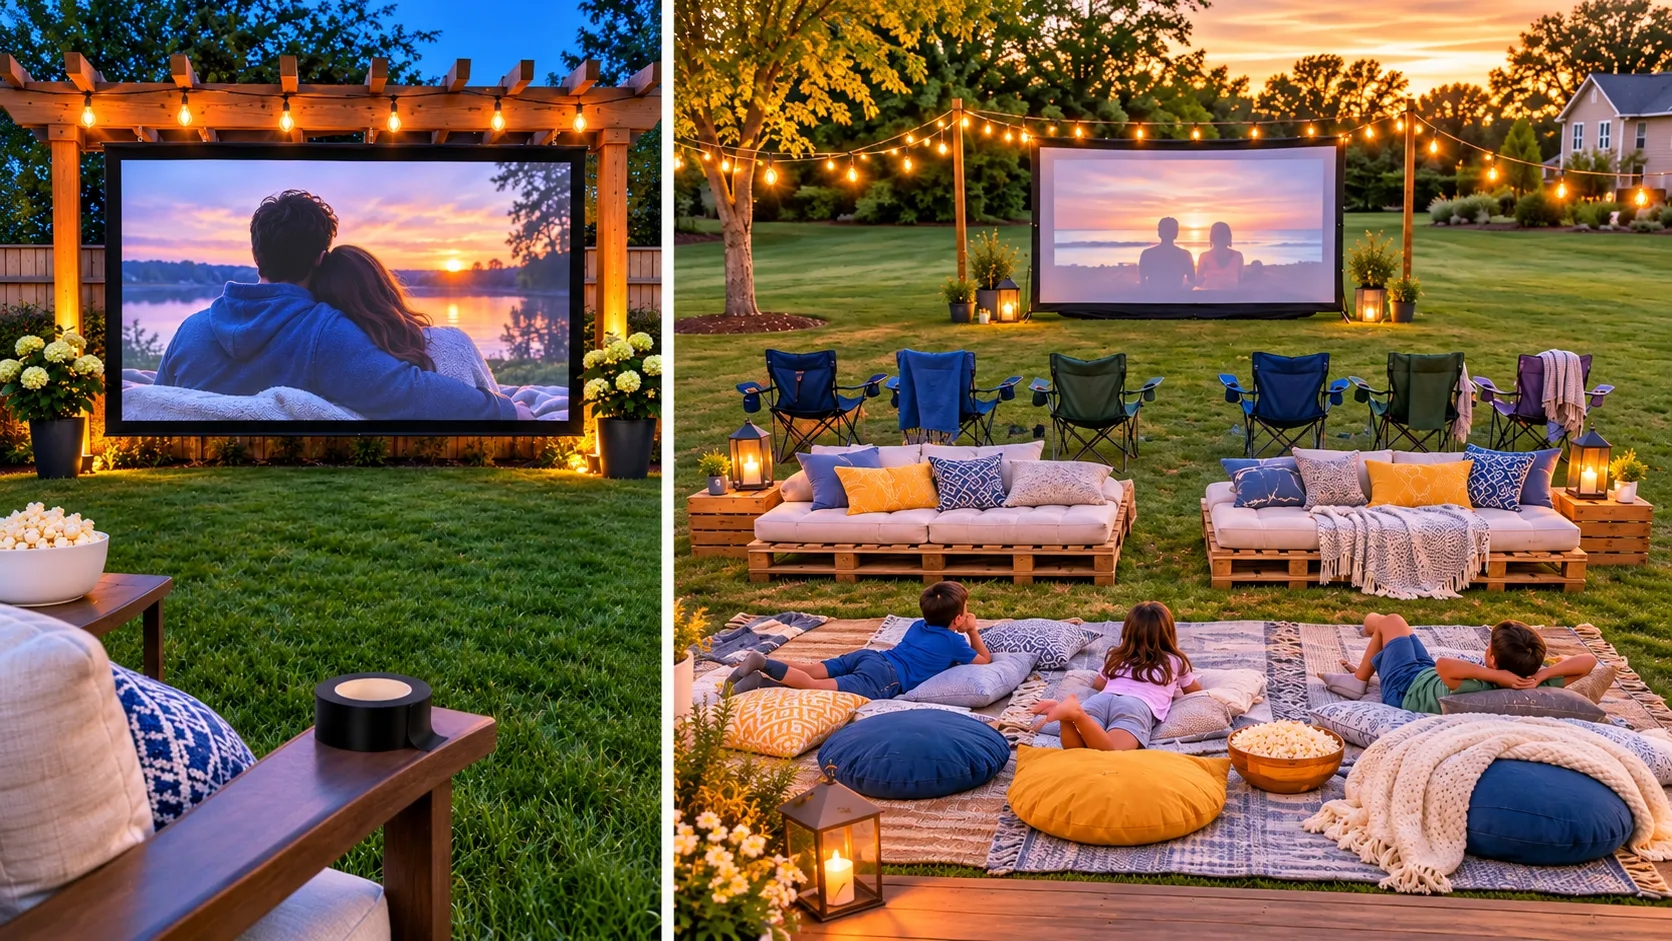
A bedsheet clipped to a clothesline works for exactly one movie night. Then the wind picks up, the sheet billows like a sail, and everyone watches the lead actor’s face ripple.
Most backyard movie setups fail for boring reasons. The screen is wrinkled, the picture looks washed out, or the whole thing blows over during the big scene. None of that needs expensive gear to fix.
A good backyard movie screen diy project comes down to three things: a flat surface, a frame that stays put, and a plan for light. You can get all three with PVC pipe, a few boards, a can of paint, or a fabric you already own.
This list starts with the builds, including a frame that folds into a closet and a painted fence panel. Later ideas cover the extras that make the night feel finished, like sound, seating, and snacks. Pick one build this weekend, and you will have a real screen by Saturday.
Build a PVC Pipe Frame That Folds Down to Fit in a Closet
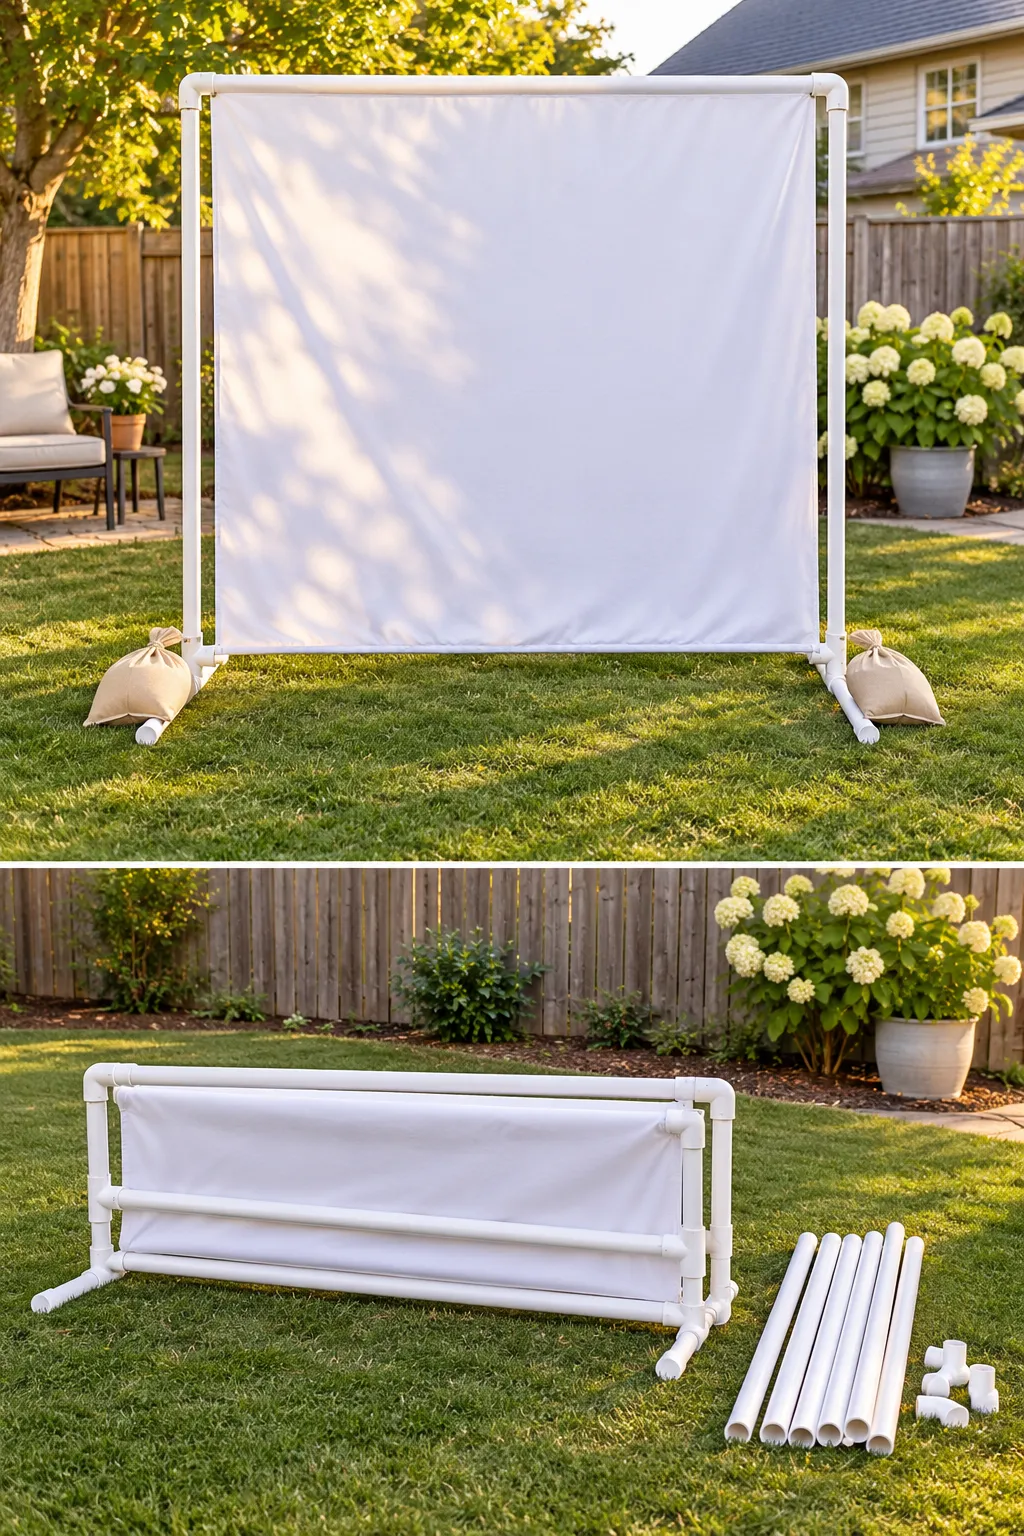
A screen that lives in a closet is a screen you will actually set up.
PVC pipe is light, cheap, and cuts with a basic hand saw. Cut two lengths around six feet and two around four feet, then join them with four corner connectors. Leave the joints dry, with no glue, so the frame pulls apart in a minute.
Two small additions keep it steady:
- Add a T connector at the bottom of each side and slide in a short foot piece.
- Set a sandbag or a gallon jug of water across each foot.
Best for renters and anyone short on garage space.
Stretch Blackout Fabric Over a 2×4 Wood Frame for a Tight, Wrinkle Free Picture

Screw four 2×4 boards into a rectangle, with a metal corner bracket at each joint so it stays square.
Blackout fabric earns its spot here. The white face takes the picture well, and the backing stops stray light from washing it out. It is also stiff enough to lie flat without sagging.
Check the finished screen in daylight before the party. A ripple you can see at noon will stand out once the movie starts.
Lay the fabric face down on a clean floor and center the frame on top.
Staple the middle of the top edge, then pull firmly and staple the middle of the bottom edge.
Repeat on the left and right sides, then work toward each corner in small stretches.
Trim the extra fabric and fold the corners flat before you stand the frame up.
Paint a Fence Panel or Garage Door With Matte White Paint

No room to store a frame? Skip it and use a wall you already own.
A smooth fence panel, a shed side, or a garage door all work. Wash it, let it dry, and roll on a coat of primer. Then add two coats of matte white paint.
Here is why the finish matters:
- Glossy paint throws back glare and bright spots.
- A short nap roller covers wood grain better than a brush.
- A slightly warm white looks softer than stark white.
Let each coat dry fully. Rushed paint shows streaks the moment the screen lights up. If you rent, ask first.
A faded fence with dark wood grain, patchy weathering, and gaps that break up the picture.
A flat, even white surface that shows the picture clearly and never needs setting up.
Pick Your Fabric: Bedsheet, Blackout Cloth, or Shower Curtain

A bedsheet, a blackout cloth, and a shower curtain will all hold a projected picture. They just behave very differently.
A sheet is free, but thin ones let light pass straight through and the image goes dim. Doubling it over helps. Blackout cloth costs more and gives the brightest result. A vinyl shower curtain lands in the middle on price and shrugs off dew, though it can pick up some shine.
Whatever you choose, stay with white or off white. Colored fabric tints every scene.
| Check | Bedsheet | Blackout cloth | Shower curtain |
|---|---|---|---|
| Picture | Soft, can look dim | Bright and even | Bright, slight shine |
| Light passes through | Yes | Very little | Some |
| Cost | Free if you own one | Medium | Low |
| Wrinkles | Needs steaming | Stays flat | Hangs out with weight |
| Best for | A one time test run | Regular movie nights | Damp or dewy evenings |
Hang the Screen From a Pergola With a Curtain Rod and Binder Clips
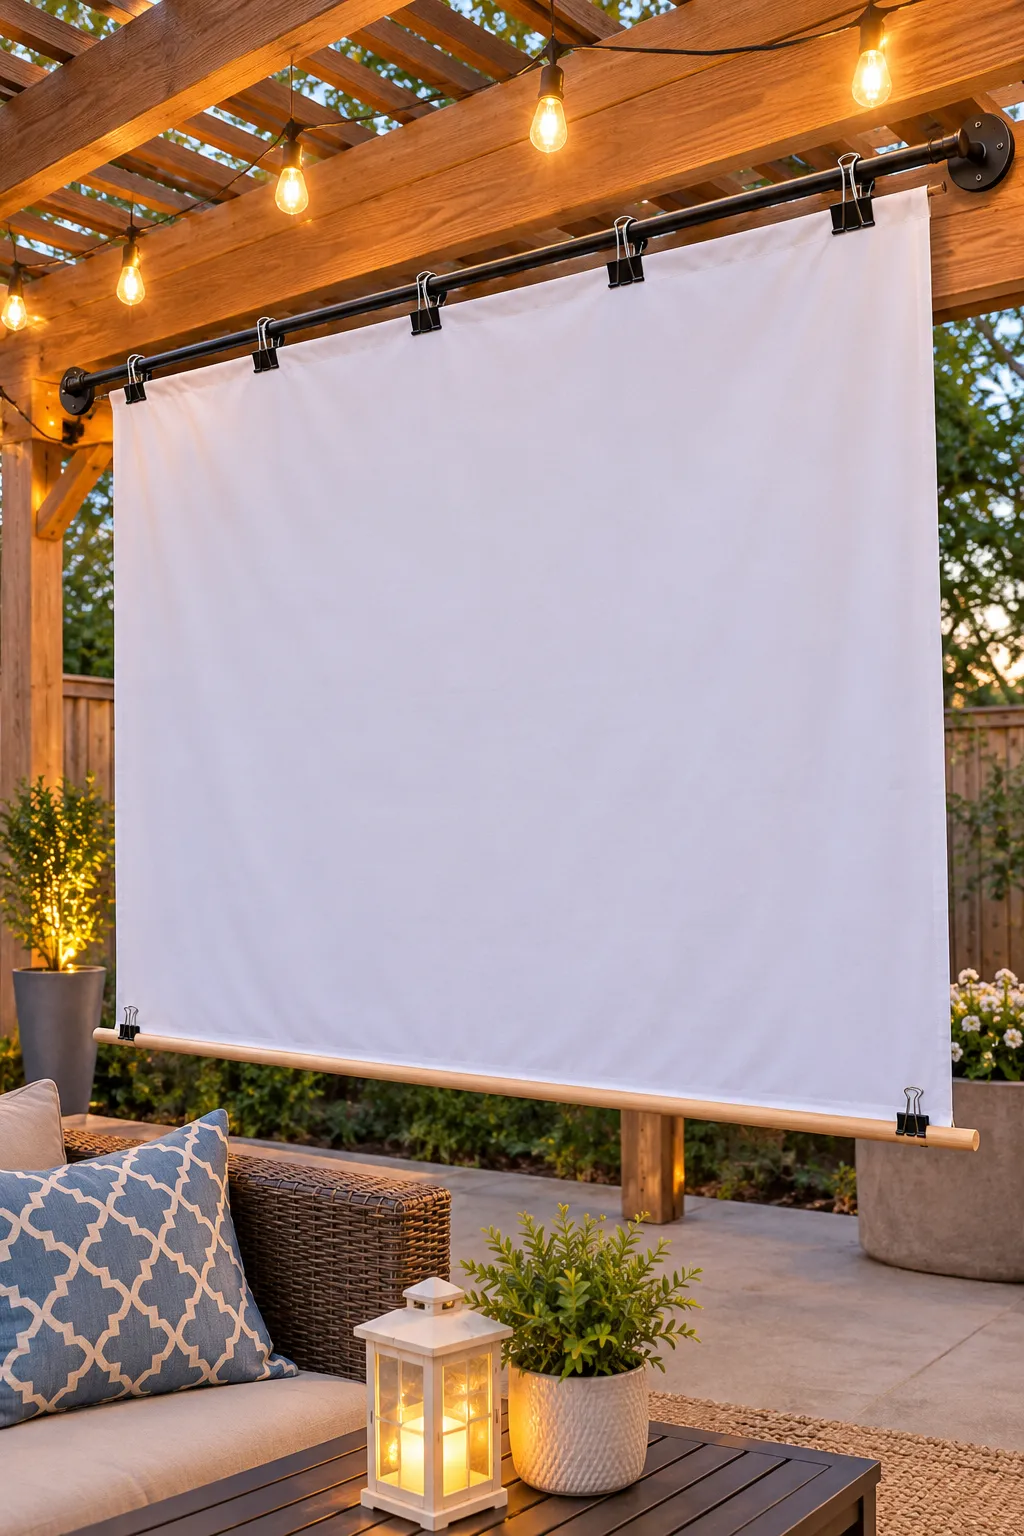
Look up at your pergola. That beam is already strong, level, and tall enough.
Screw two cup hooks into it and rest a café curtain rod across them. Clamp the fabric with large binder clips, then slide the wire handles onto the rod. Leave a little fabric above the clips so the picture area stays clear.
Clip a wooden dowel along the bottom edge too. The extra weight pulls the fabric flat and keeps it from flapping.
Skip any beam that feels soft or crumbly.
Steam Out the Wrinkles the Day Before, Then Pull the Edges Taut
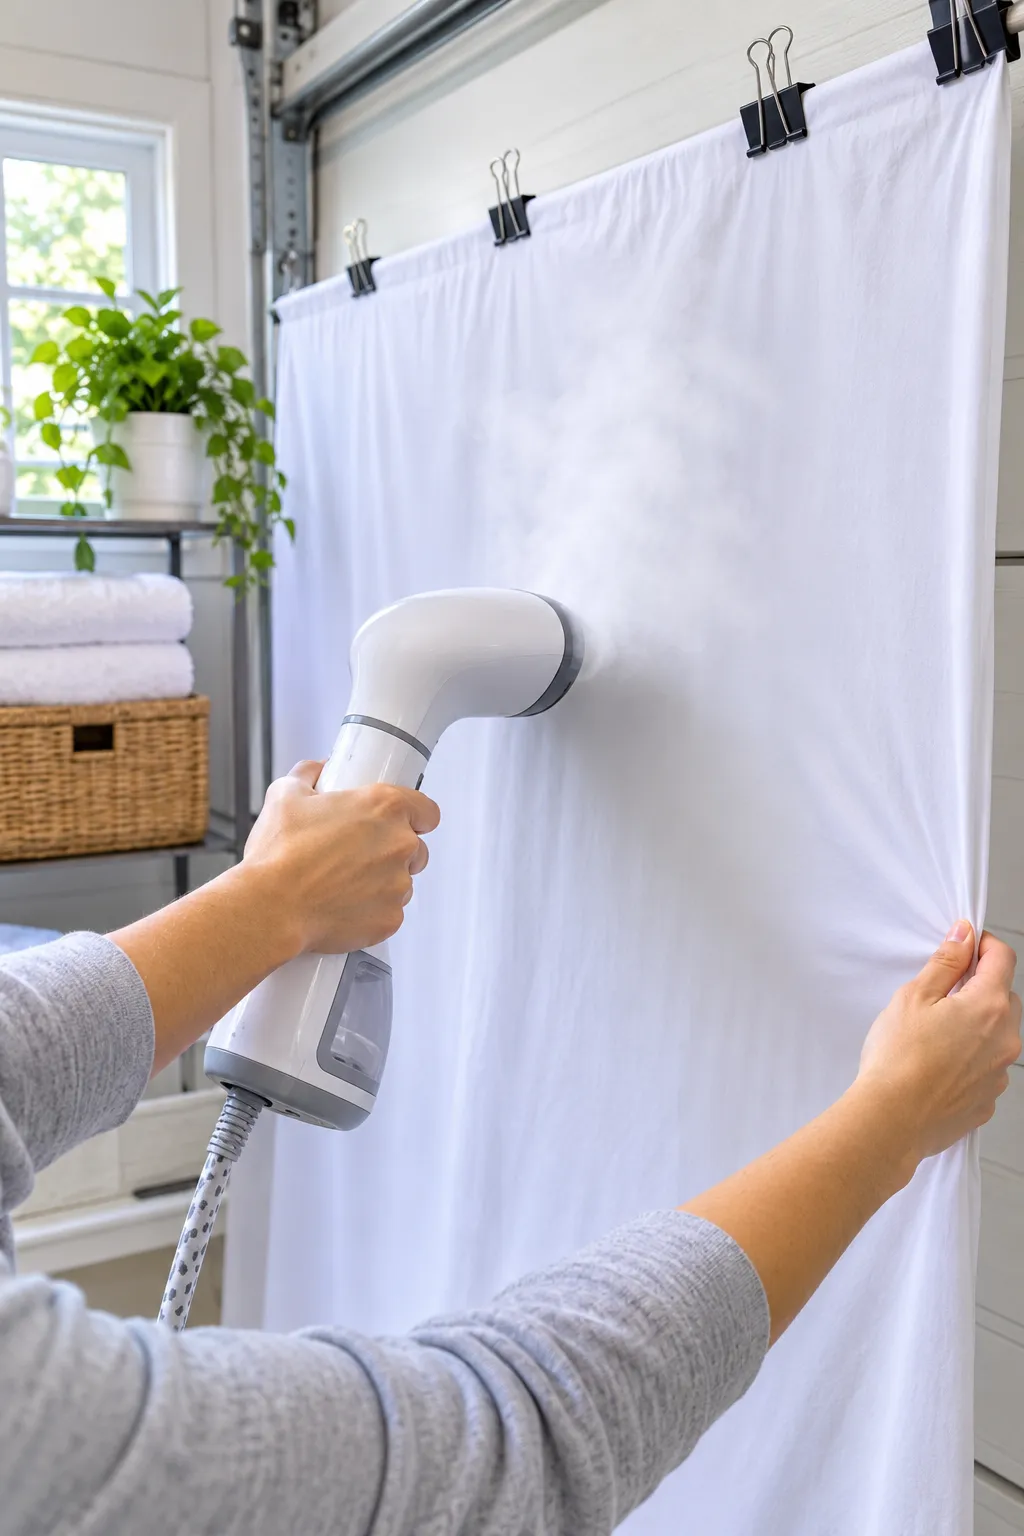
Fix the wrinkles the day before, not an hour before guests show up.
A handheld steamer works best. Hold it a few inches from the fabric and move slowly from the top down. No steamer? Hang the cloth in the bathroom while a hot shower runs, then smooth it with your hands. Creases that look small up close turn into dark lines once the projector hits them.
💡 Quick Tip
Steam a hidden corner first. Cotton sheets handle a warm iron, but vinyl and some polyester can warp or turn shiny when they get too hot, and that damage stays.
Frame the Picture With Black Felt or Tape to Sharpen the Edges

Most homemade screens look like they are floating, and a black border fixes that.
Dark edges give the eye a hard stop. The picture looks sharper, and the white fabric around it stops glowing. Make the border a few inches wide on all four sides. Black felt strips stapled to the frame work well, and so does matte black fabric tape.
Square the corners with a ruler. Crooked lines are the first thing people notice.
Keep the border the same width on every side.
Choose felt or matte tape so the border soaks up light.
Glossy electrical tape, which bounces light back at the audience.
A border that creeps into the area where the picture lands.
Raise the Projector on Stacked Crates or a Step Ladder

Set a projector on the grass and your movie plays on the treetops.
Lift it with sturdy crates or a step ladder so the beam clears the heads of seated guests. Otherwise every bathroom trip casts a shadow across the screen. Lay a flat board on top so the projector does not slide. If the picture lands too low, a folded towel under the front feet tilts it up.
Before you press play
Hide a Bluetooth Speaker in a Planter Beside the Screen
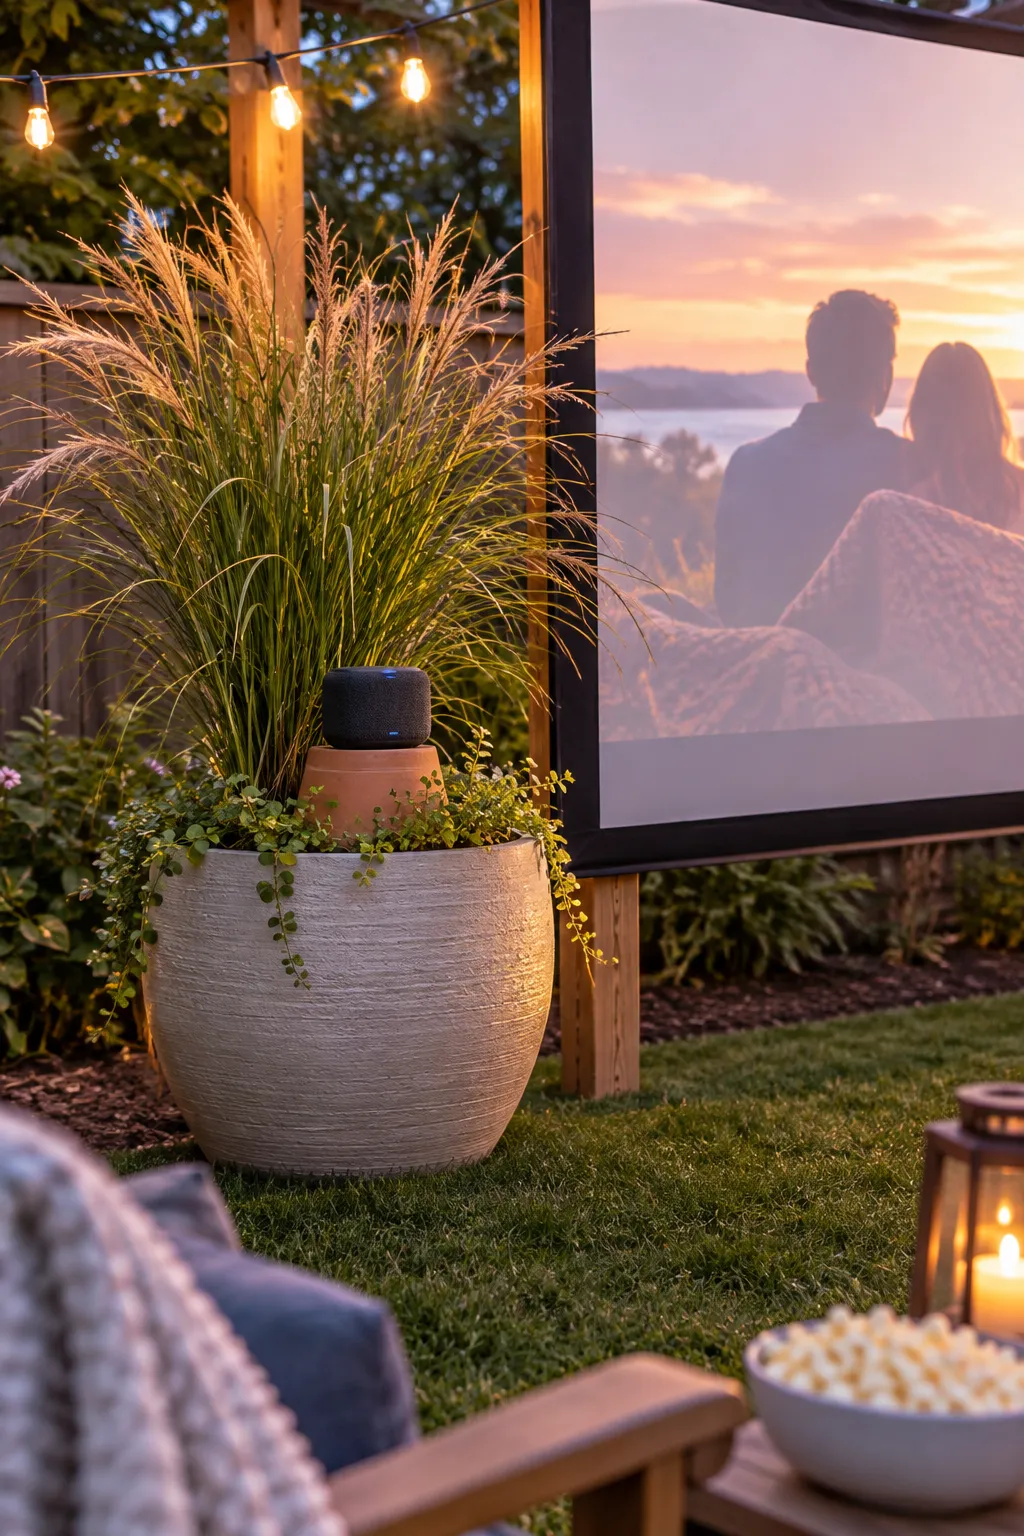
Good sound does half the work of a good screen.
A wide planter beside the screen hides the speaker and keeps the voices coming from the same spot as the action. Set a fake fern or a tall grass in front, and leave the speaker grille open.
A few details that save the night:
- Prop the speaker on an upside down pot so sound clears the leaves.
- Keep it out of loose soil and away from sprinklers.
- Pair it and test the volume before anyone arrives.
Put the speaker next to the screen, not behind the audience. When sound and picture come from the same spot, guests follow the story without thinking about it.
Line the Walkway With Mason Jar Lanterns That Stay Off the Screen
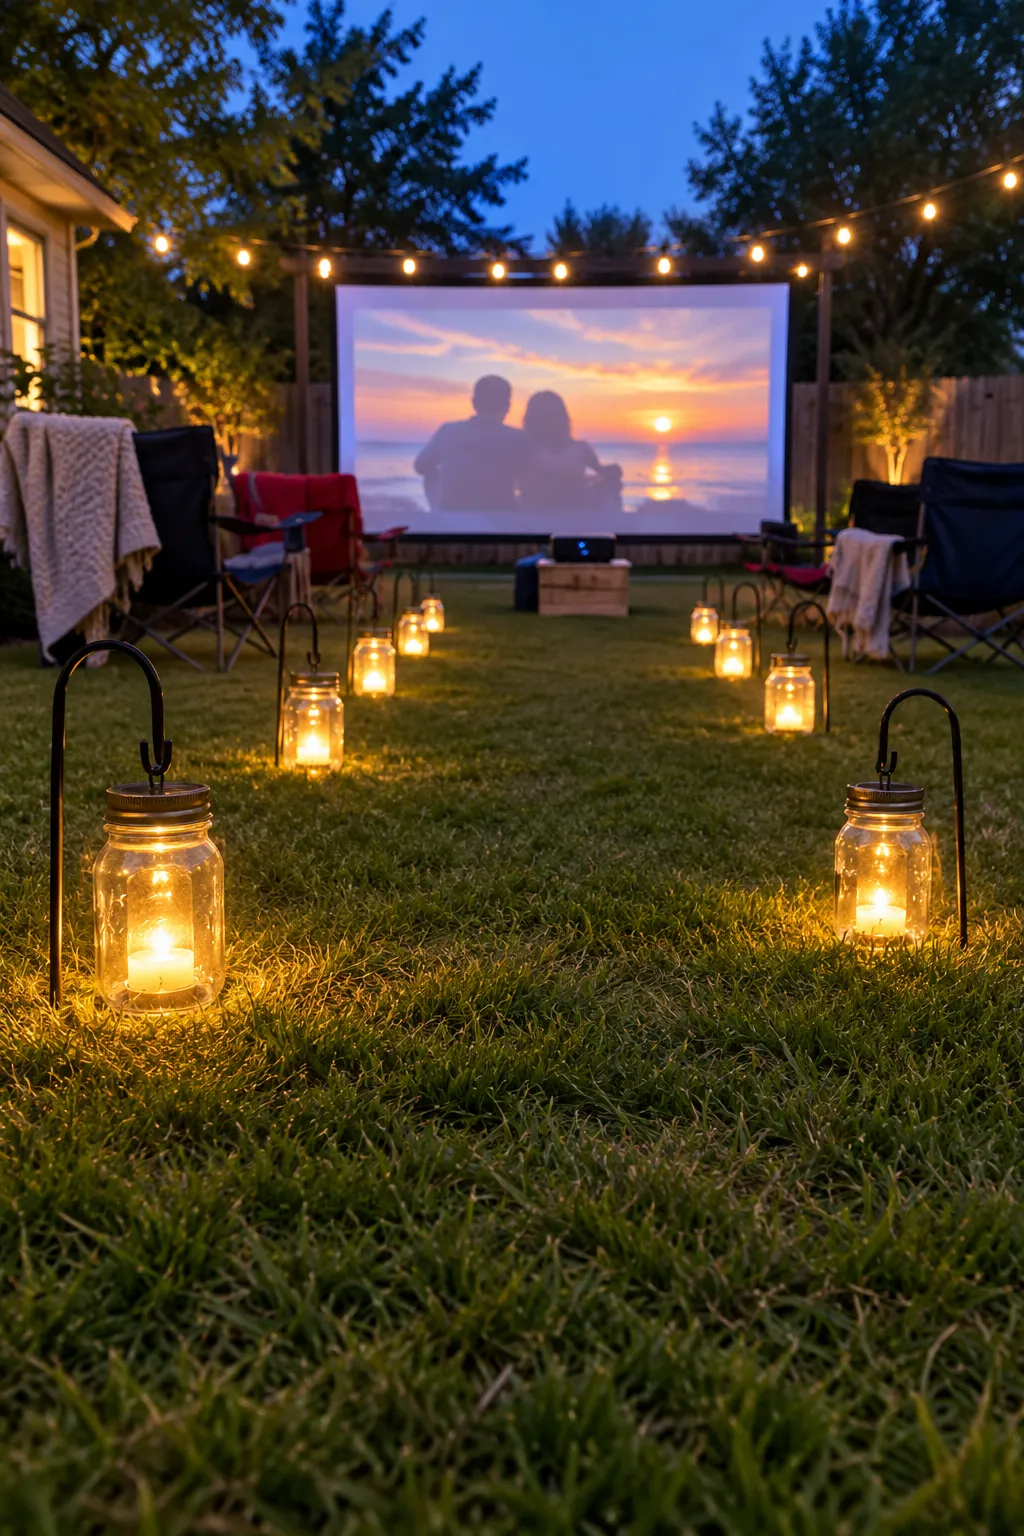
A row of small warm lights along the ground does two jobs. It shows guests where to step, and it stays low enough to leave the picture alone.
Drop a flameless tea light into each mason jar and set one every few steps on both sides of the path. Real candles and dry grass are a bad mix, so battery lights are the safer pick, especially with kids running around.
- ▸Choose warm white bulbs. Cool white looks harsh and spills onto the screen.
- ▸Keep every jar on the ground, never up on posts facing the picture.
- ▸End the row a few steps before the screen so the light never reaches it.
- ▸Switch them on at sunset so the path is lit before it gets dark.
Set Up Three Seating Zones With Pallet Lounges, Chairs, and Floor Cushions

Low seats up front, tall seats in back. That one rule keeps every head out of everyone else’s view.
Put floor cushions and blankets in the first row, where kids will sprawl anyway. Make the middle row from pallet lounges. Two stacked pallets with a thick cushion on top turn into a daybed, but sand the rough edges first, since splinters ruin a good seat. Fill the back with regular camp chairs, which sit higher and look over everyone.
Leave one clear aisle down the side so people can reach snacks without stepping over anyone.
Seating map, from screen to back
↕ Keep one aisle open along the side
Turn a Folding Table Into a Self Serve Popcorn Station
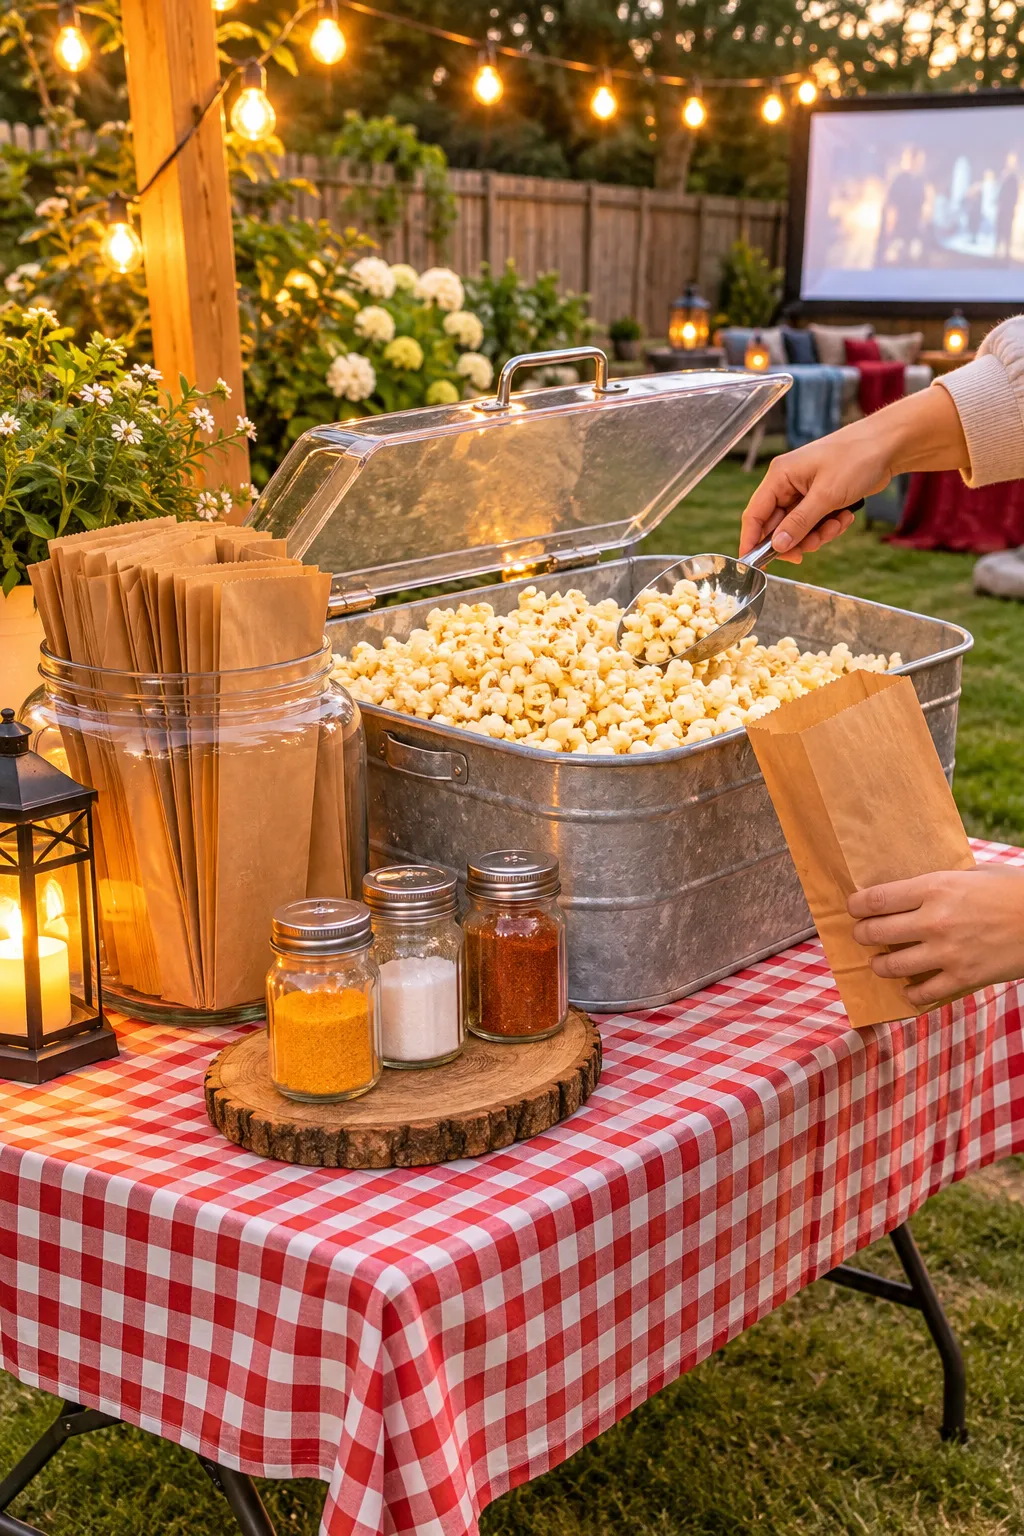
Self serve keeps the host off popcorn duty and in a seat.
Set the table off to one side, away from the screen, so the line never blocks the picture. Pop a big batch before the movie and keep it in a lidded bin so it stays crisp. Small paper bags work better than one shared bowl, since nobody reaches in with a hand that just held a drink. Put one trash can at the table and a second near the exit.
What to set out on the table
Make a Cardboard Marquee Sign and Ticket Stubs for Guests

Cardboard from an appliance box makes a sign big enough to read from the driveway.
Cut a wide rectangle, paint it black, and write the movie title in white paint pen. Then finish it off:
- Tape a battery string light around the edge so it glows after dark.
- Lean it on the fence or a pair of chairs near the entrance.
- Cut cardstock tickets and hand one to each guest at the gate.
Kids treat a paper ticket like the real thing. Some keep theirs for weeks.
Plan a Rainy Night Backup With a Tarp and a Dry Gear Box

Nothing ends a movie night faster than a sudden shower over an open projector.
A cheap tarp and a plastic tote give you a backup plan. Rig the tarp over the seating area with one end higher than the other, so water runs off instead of pooling. Then line a lidded tote with towels and make it the home for the projector, cords, and remotes whenever the sky turns gray.
Keep a second spot ready too, like the garage, in case the whole night needs to move.
⚠️ Watch Out
Water and electricity do not mix. At the first drops, unplug everything before you touch it, and never leave cords sitting in puddles. Keep the projector’s vents uncovered if it runs under shelter, and move everyone indoors at the first sound of thunder.
Time the Night Around Sunset With a Simple Countdown Schedule
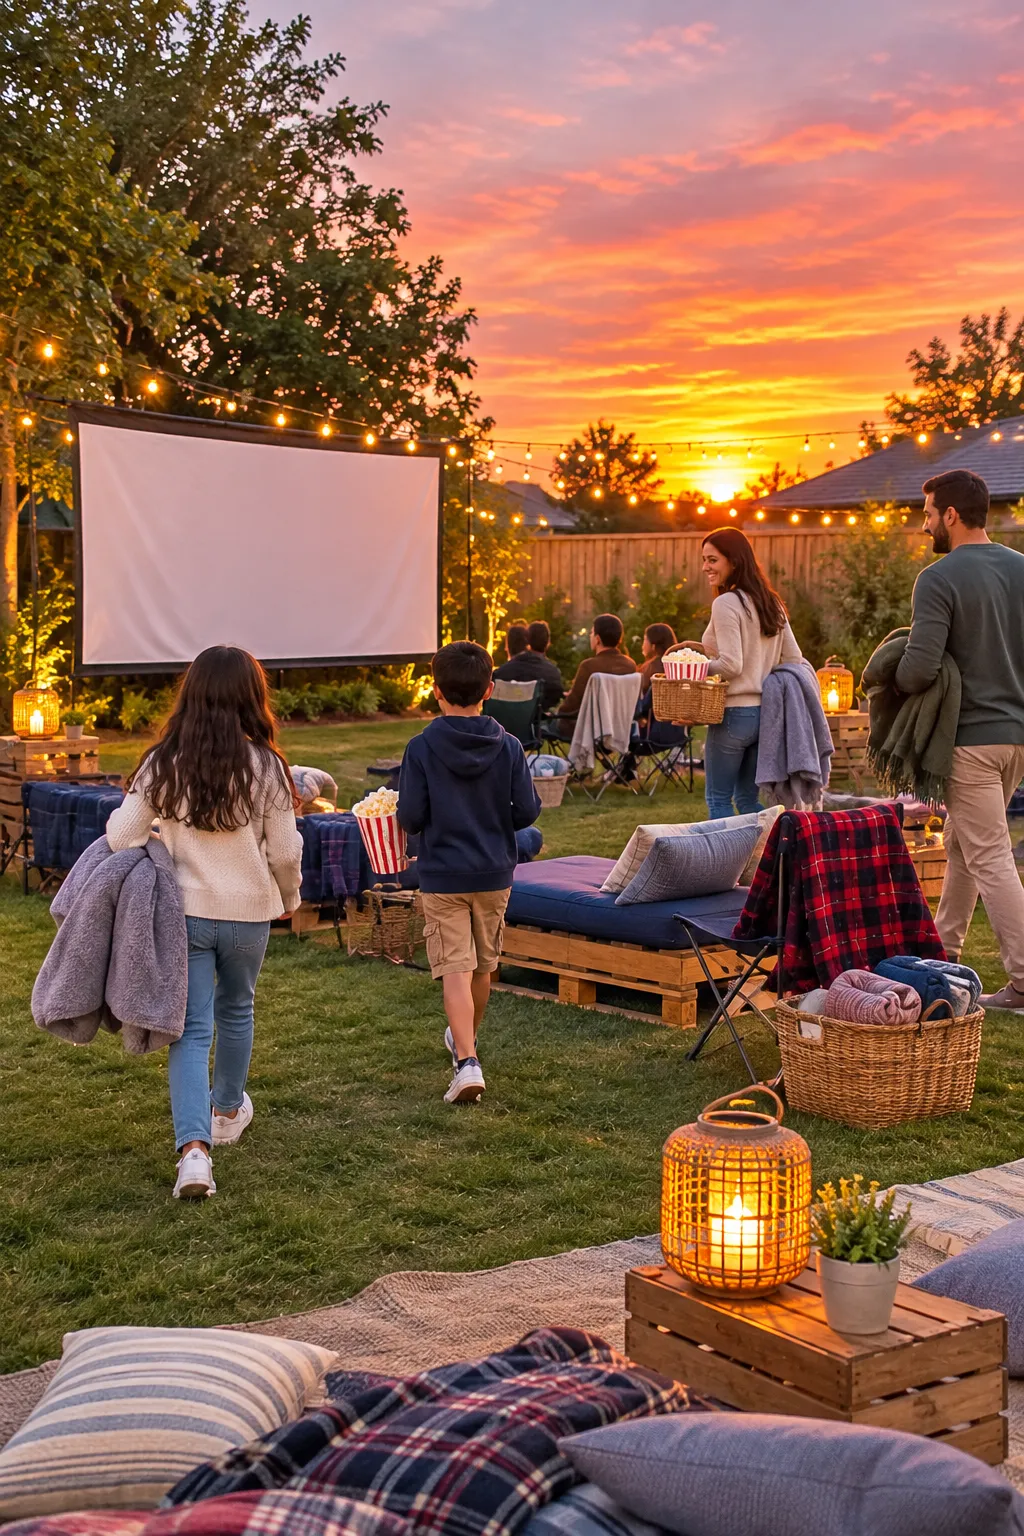
Start the movie when the sky is dark, not when the clock says so.
Look up sunset for your date in a weather app, then work backward from it. A projected picture looks faint until the last of the light fades, and that takes a while after the sun goes down. Start too early and everyone squints at a ghost of the movie.
Use the waiting time well. Guests arrive, grab snacks, and settle in while the sky does its thing.
Your movie night countdown
Pick One Build and Start This Weekend
You do not need a big budget or a garage full of tools to get a good picture on a warm night. A flat white surface, a frame that stays put, and a little attention to light and sound do most of the work. Pick one build from this list, finish it on Saturday morning, and test it before the sun goes down.
Once the screen is up, the small touches fall into place. Cushions, a popcorn table, and a few low lanterns turn a backyard movie screen diy project into the spot your neighbors ask about next week.
Your quick start list