
Air dry clay has a reputation problem. It gets sold as the easiest craft in the world, something anyone can knock out in an afternoon, but most first attempts come out lumpy, cracked, or just kind of sad looking next to the smooth pieces all over Pinterest. The truth is the clay isn’t the issue. It’s usually the shape, the texture, and the paint choice that separate a homemade coaster from something that looks like it came from a small batch pottery shop.
That gap is closable, and it doesn’t take a kiln or years of practice to close it. A few small moves, rolling thinner than feels natural, pressing real leaves or carved stamps into wet clay, painting in muted tones instead of bright craft store colors, do most of the heavy lifting.
This list of 17 air dry clay projects walks through pieces that lean on those small details, from wall art to jewelry to things that just make a kitchen counter look a little more put together. None of them need tools you don’t already have in a drawer somewhere.
A Tiny Arched Wall Niche With a Whole Miniature Room Inside
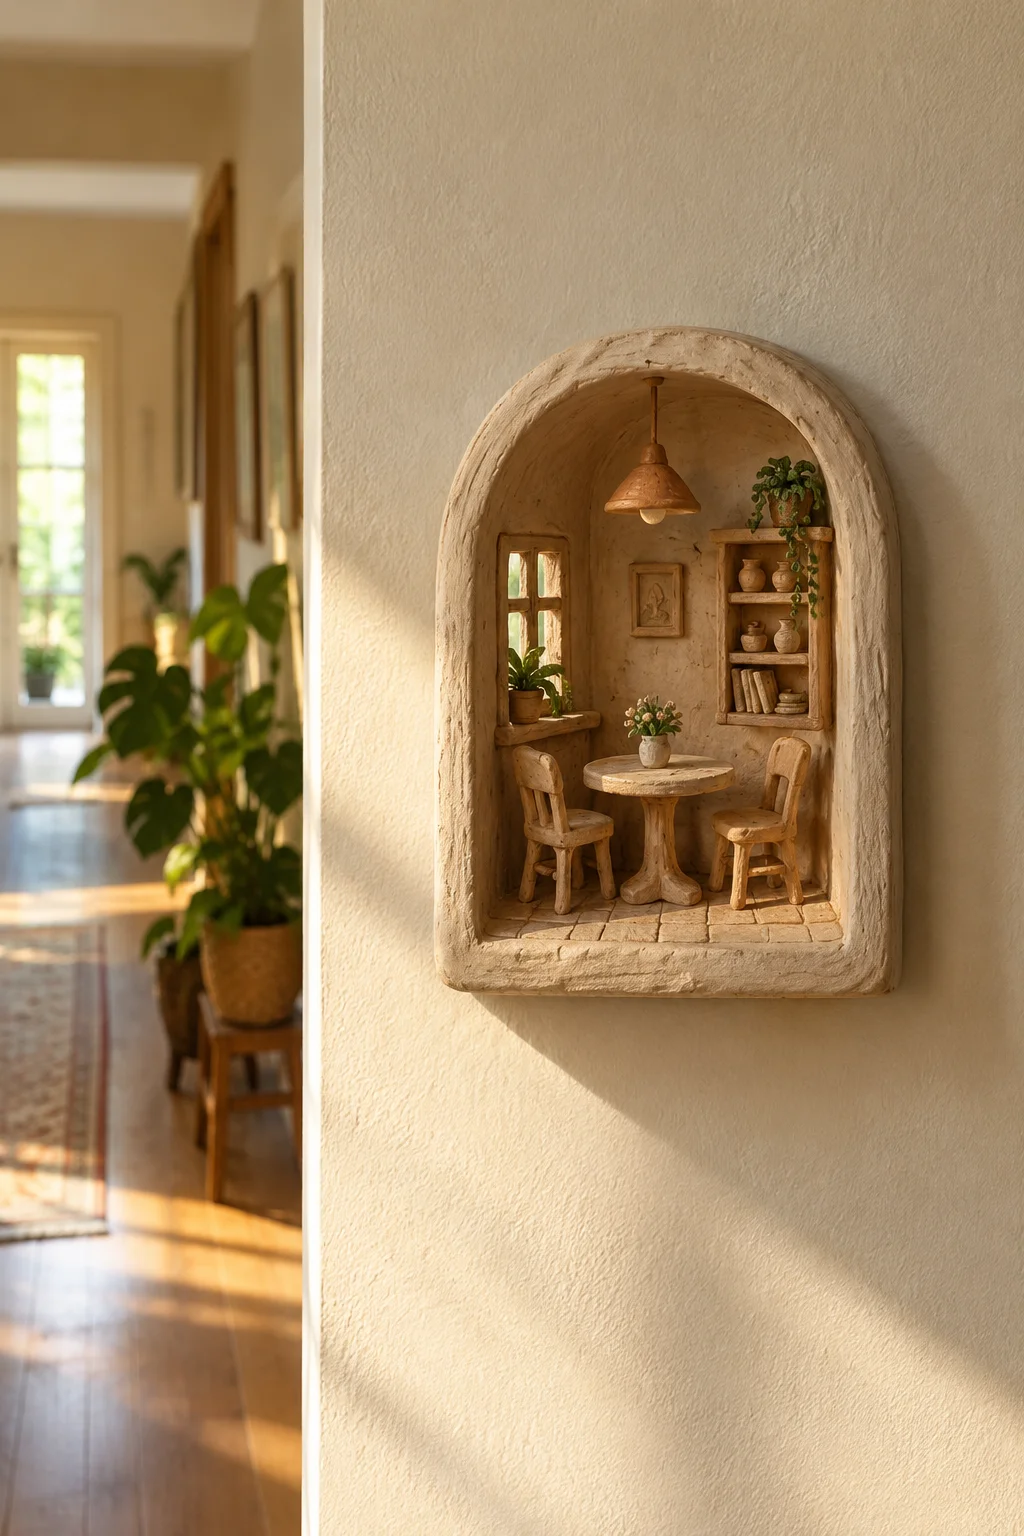
An arched shape reads as intentional right away, more like something from a ceramics studio than a kitchen table project. A few things keep it from cracking or looking flat:
- Carve the arch first and let it firm up before adding any details
- Build the scene in shallow relief, under half an inch, so it dries evenly
- Add the smallest touches, a lamp, a window pane, last, once everything else holds its shape
Two coats of muted acrylic and a flat sealer keep the whole thing looking like plaster instead of a toy.
A Multi-Stem Flower Frog That Makes Any Jam Jar Look Like a Proper Vase
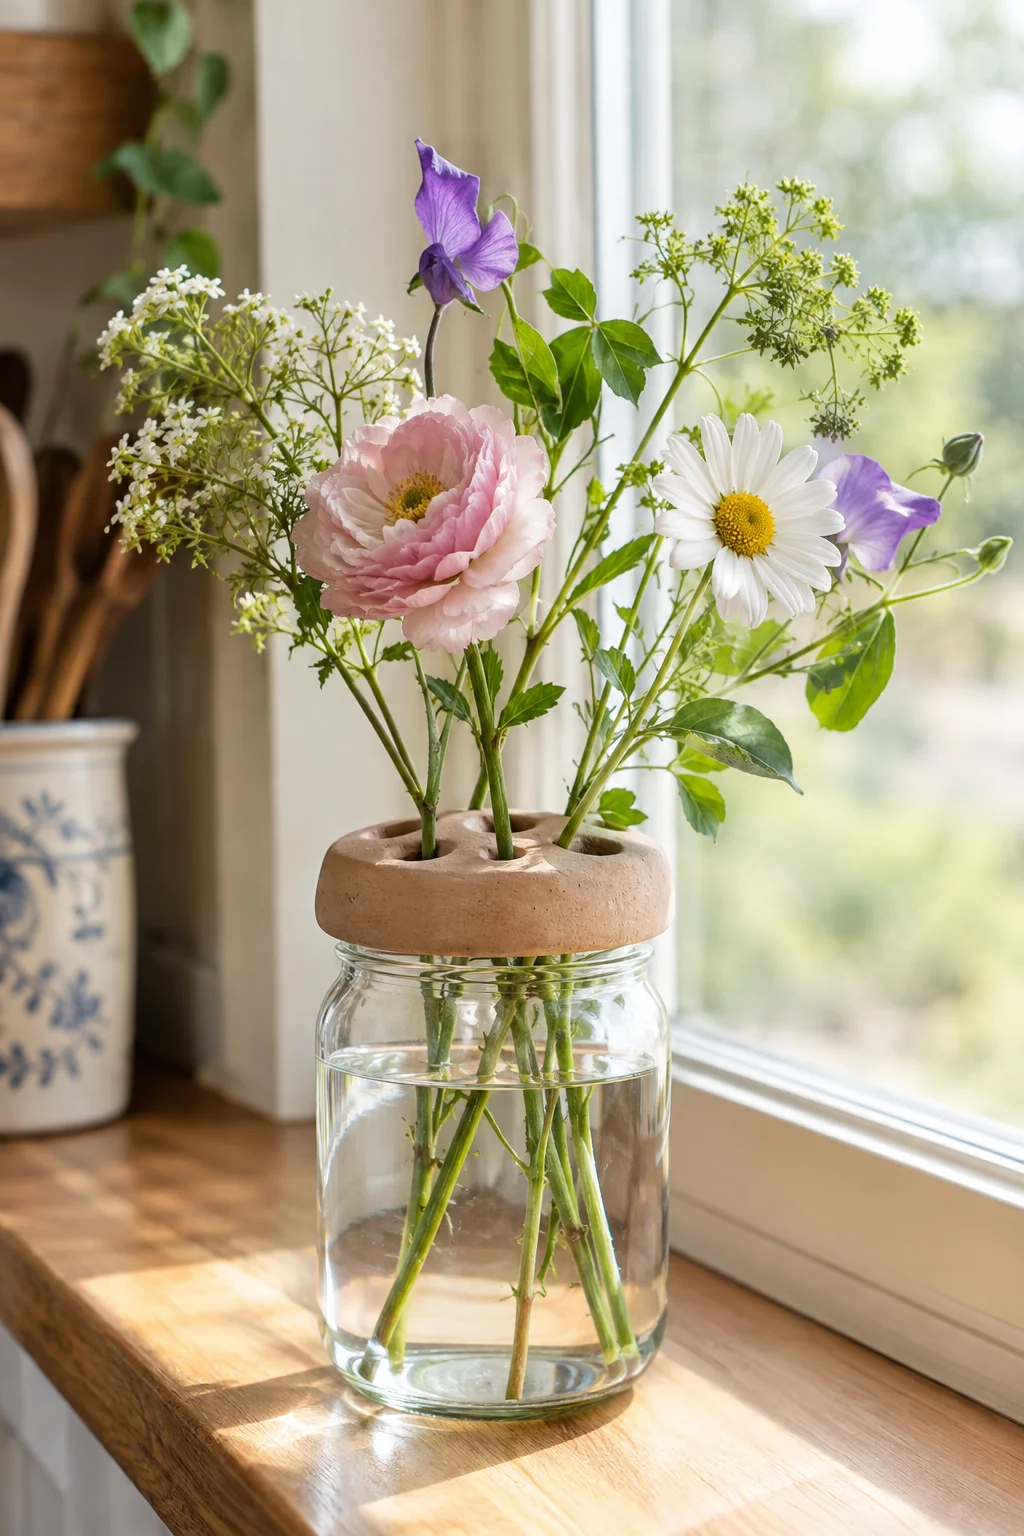
Roll a slab about a quarter inch thick, then cut it into a circle or soft scallop shape sized to fit the mouth of a jar or drinking glass you already own. While it’s still soft, poke five or six holes with a straw, spacing them out so stems won’t crowd each other.
That’s the whole trick behind flower frog toppers that look like a proper florist accessory instead of a lid with holes in it. Let it dry completely flat, then set it over water and drop in whatever you cut from the yard that afternoon.
Roll a slab about a quarter inch thick and cut it to fit your jar or glass.
Poke five or six holes with a straw while the clay is still soft.
Let it dry flat, then set it over water and add your stems.
Leaf-Stamped Clay Discs Strung Into a Wall Garland
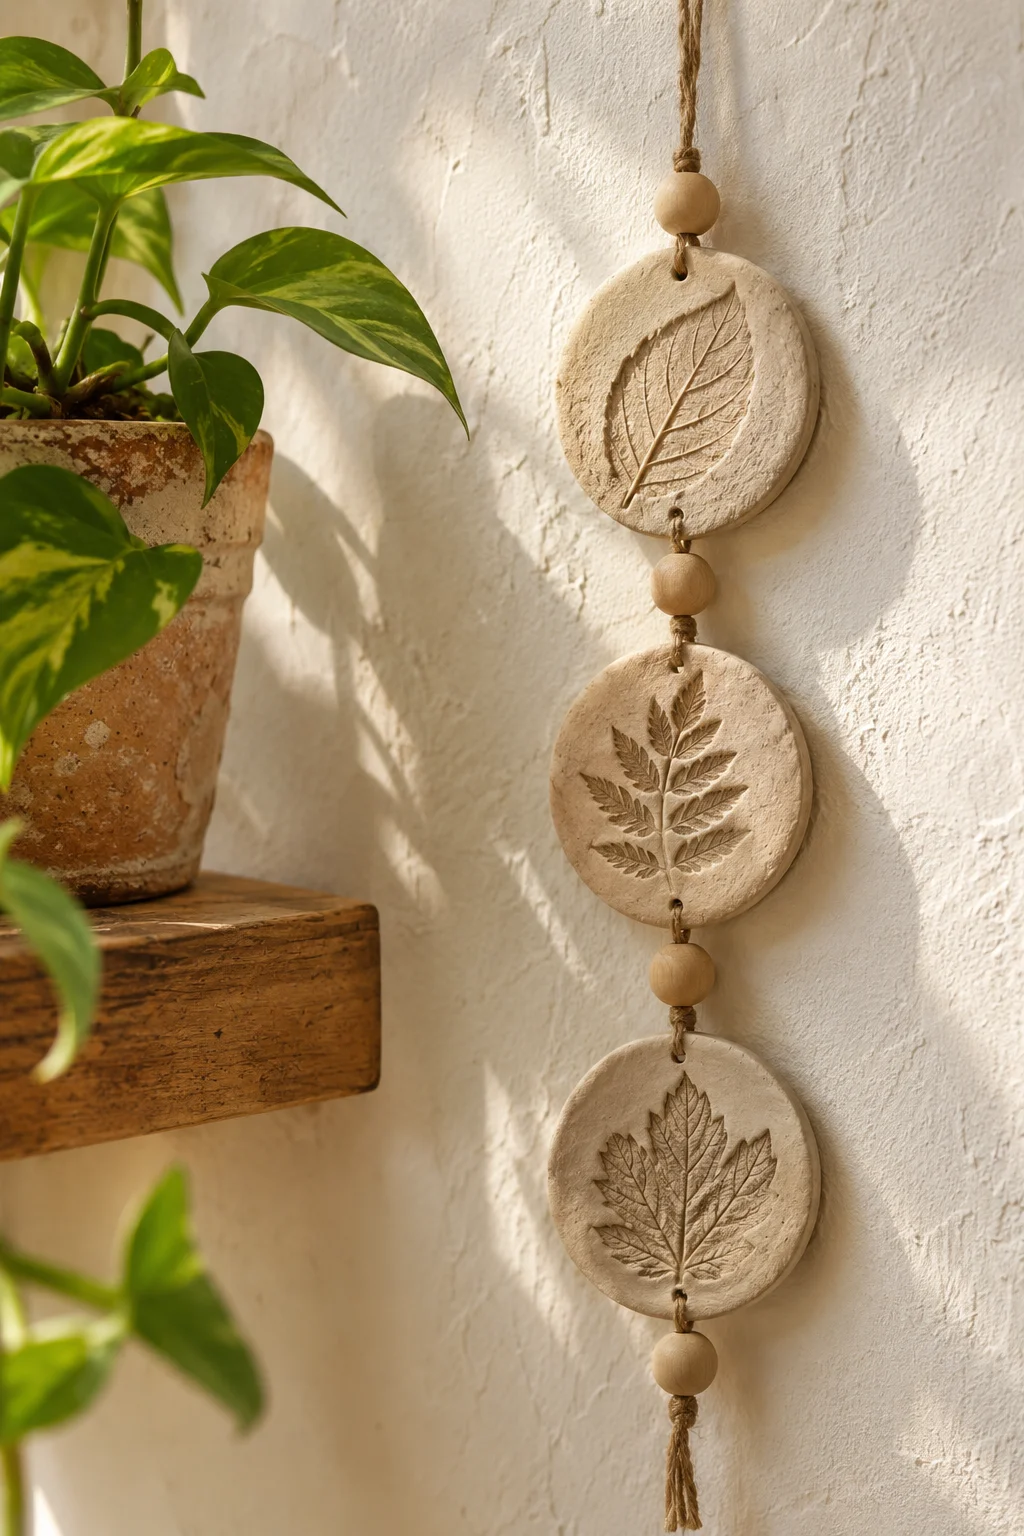
The flowers on a strung clay garland don’t come from a stamp kit. Real leaves and petals pressed straight into soft clay leave veins and edges no carved stamp fully copies. Roll the slab a bit thicker than you think you need, about a third of an inch, so the impression has room to sit deep instead of barely showing.
Punch a hole near the top before it dries, string a few discs on jute with wooden beads between them, and hang it somewhere it catches side light. That’s what makes the texture show up instead of disappearing into a flat white circle.
Press real leaves or flowers into the clay while it is still soft.
Roll the slab a bit thicker so the impression sits deep.
Pressing leaves in after the clay starts to firm up.
Rolling the slab too thin, which flattens the texture out.
Carved Wreath Ornaments That Look Hand-Cut, Not Cookie-Cutter

One rule keeps a wreath ornament from looking mass produced: carve the leaf or holly detail after cutting the ring shape, not before. Cutting first keeps the edges crisp, since carving into a soft ring tends to warp it out of round.
Use a toothpick or a real needle tool to score individual leaves rather than one continuous swirl. Uneven, slightly different leaves are what make it read as hand carved instead of stamped from a mold.
💡 Quick Tip
Seal with a matte varnish before tying on the twine. Painted details soak up finish unevenly once the string is already through the hole.
A Ring Dish With an Edge You Never Have to Trim
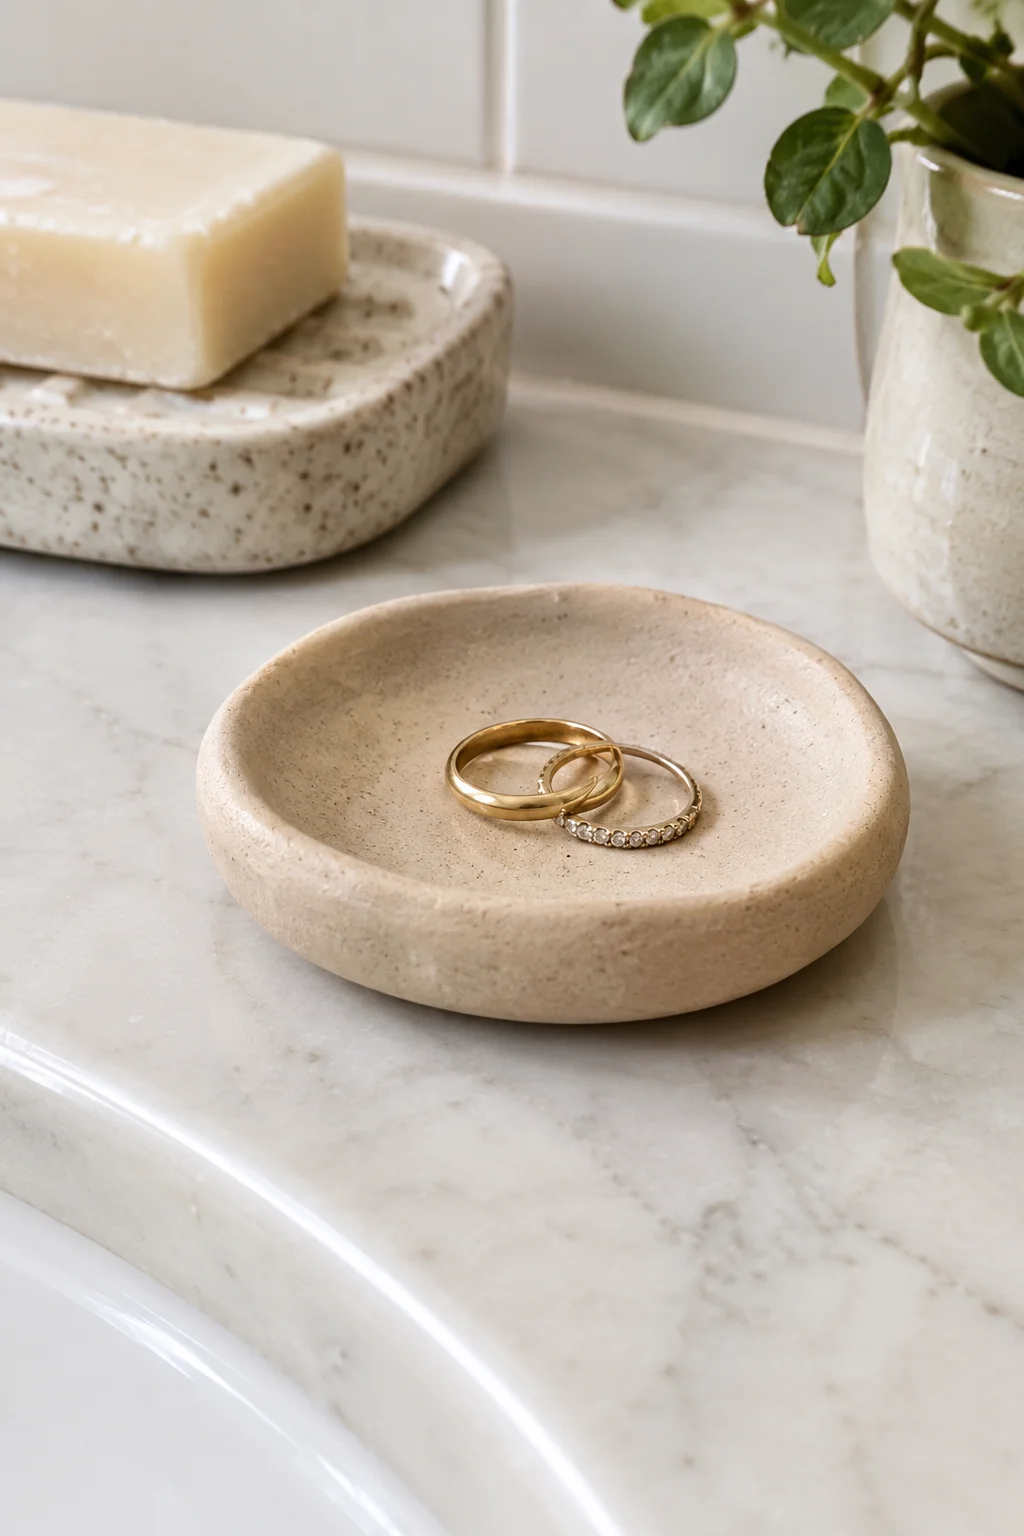
Trimming a dried ring dish is where most first attempts fall apart. Dried clay chips instead of slicing clean, and the edge ends up rougher than when you started. Skip the problem completely by pressing the slab into a shallow bowl or the lid of a jar while it’s still wet, so the rim forms on its own instead of needing a knife later.
Smooth the inside curve with a wet finger before it firms up. That’s the only trimming this piece needs.
Shape the rim while the clay is wet, in a mold or bowl, so there’s nothing left to trim once it dries.
Speckled Terrazzo Coasters Without Buying a Single Chip of Real Stone
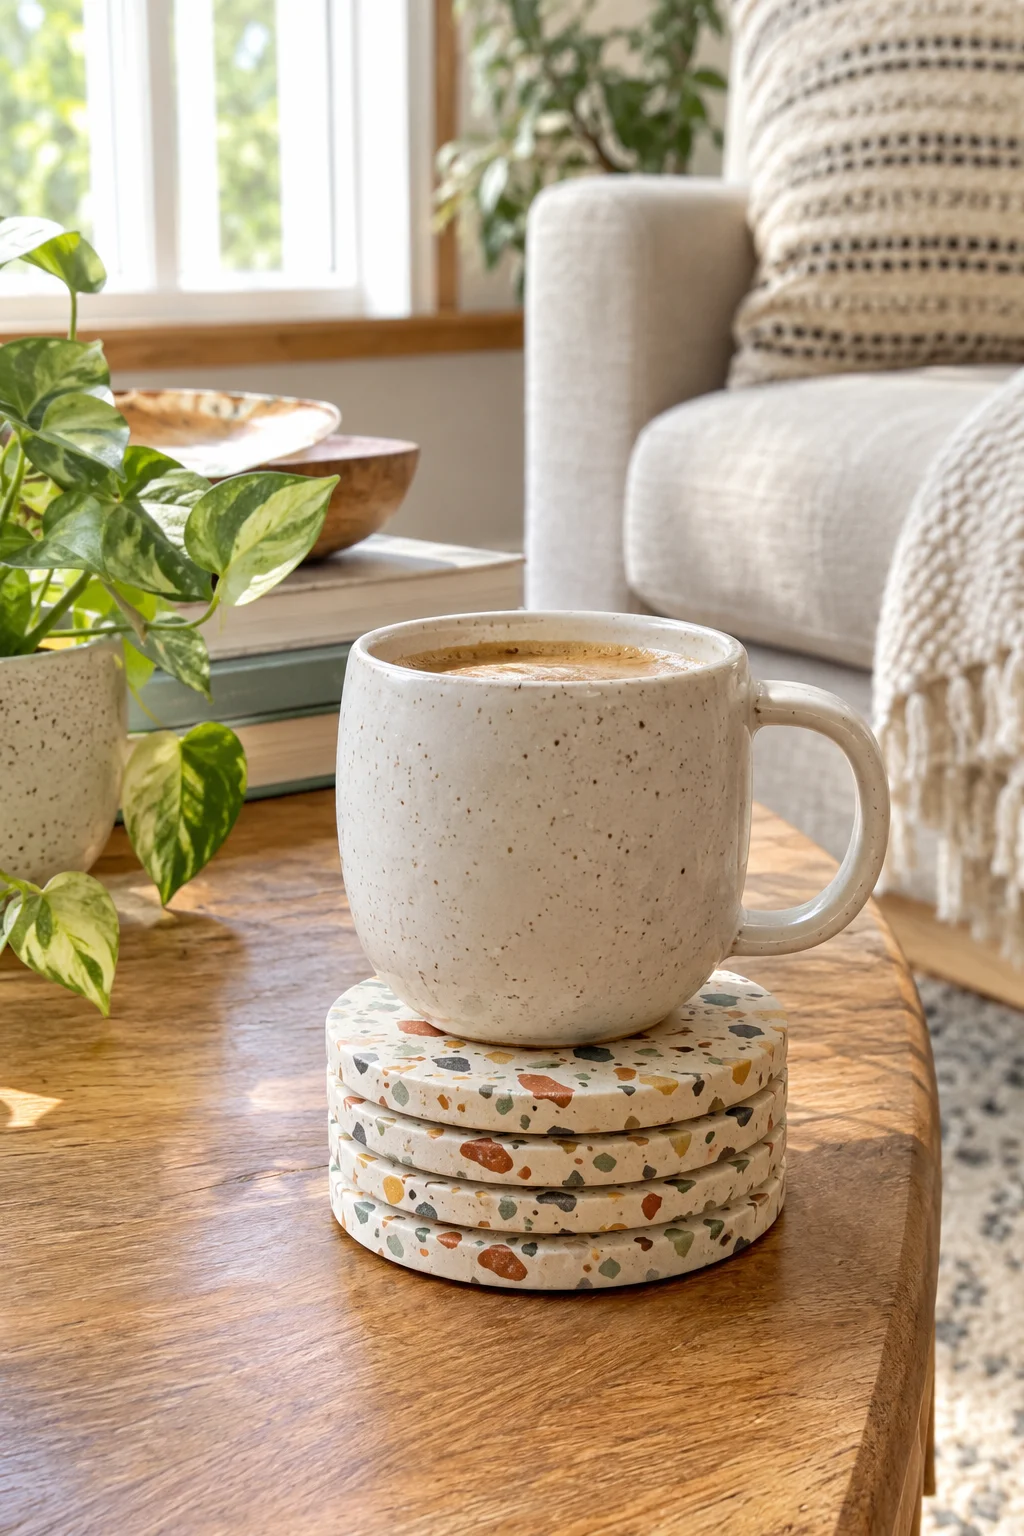
Terrazzo looks like it needs actual stone fragments mixed into the clay. It doesn’t. The speckled effect comes from tiny bits of dried, tinted clay pressed into a fresh slab and rolled flat, so the color sits inside the surface instead of on top of it.
Mix a few small batches of clay with different acrylic paint tints, let them dry fully, then break them into rough crumbs. Press the crumbs into a wet base slab and run a rolling pin over the whole thing once to set them flush.
| Tinted Clay Crumbs | Paint Flecking |
|---|---|
| Color sits inside the surface, won’t wear off | Color sits on top, can chip with use |
| Takes an extra drying step first | Ready to do in one sitting |
A Fluted Bud Vase for the One Stem You Cut From the Yard
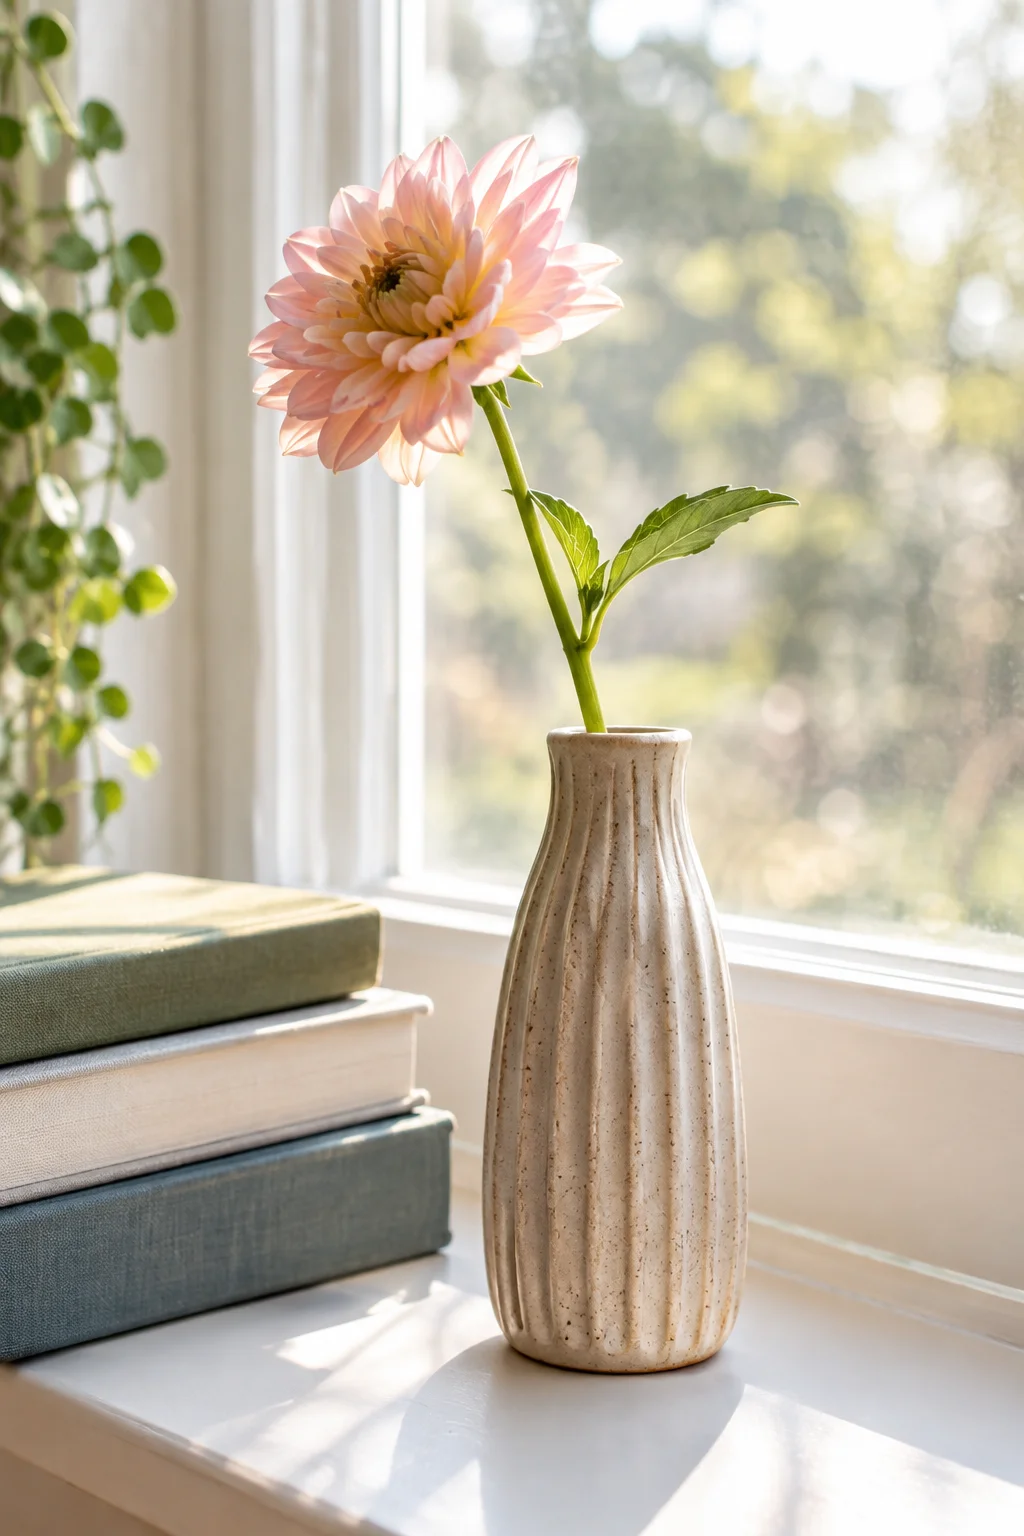
That single hellebore or sprig of herb that gets cut and then just sits in a water glass on the counter deserves better than that. Wrap a slab of clay around a small plastic bottle or a spice jar for the base shape, then run a dull pencil down the sides at even intervals to press in the flutes before it dries.
The bottle inside holds the shape while it firms up, and you slide it back out once the clay is stable enough to stand on its own.
One cut stem propped in a plain water glass on the counter.
A fluted little vase that gives that single stem an actual home.
Drawer Pulls That Cost Pennies but Look Custom Ordered

Custom knob shops charge a lot for shapes you can press out yourself in an evening. Roll small balls or short cylinders, flatten one side slightly so they sit flush against a drawer front, and push a screw straight through the wet clay so the hole forms in exactly the right spot instead of getting drilled off center later.
What to gather before you start:
- Clay, enough for one knob per drawer plus a couple extras in case one cracks
- Screws sized to your existing drawer hardware, pushed in while the clay is wet
- Fine sandpaper for smoothing the base once dry
- A small brush for sealant, since drawer pulls get handled constantly
What to grab first
Textured Napkin Rings That Turn a Weeknight Table Into a Dinner Party
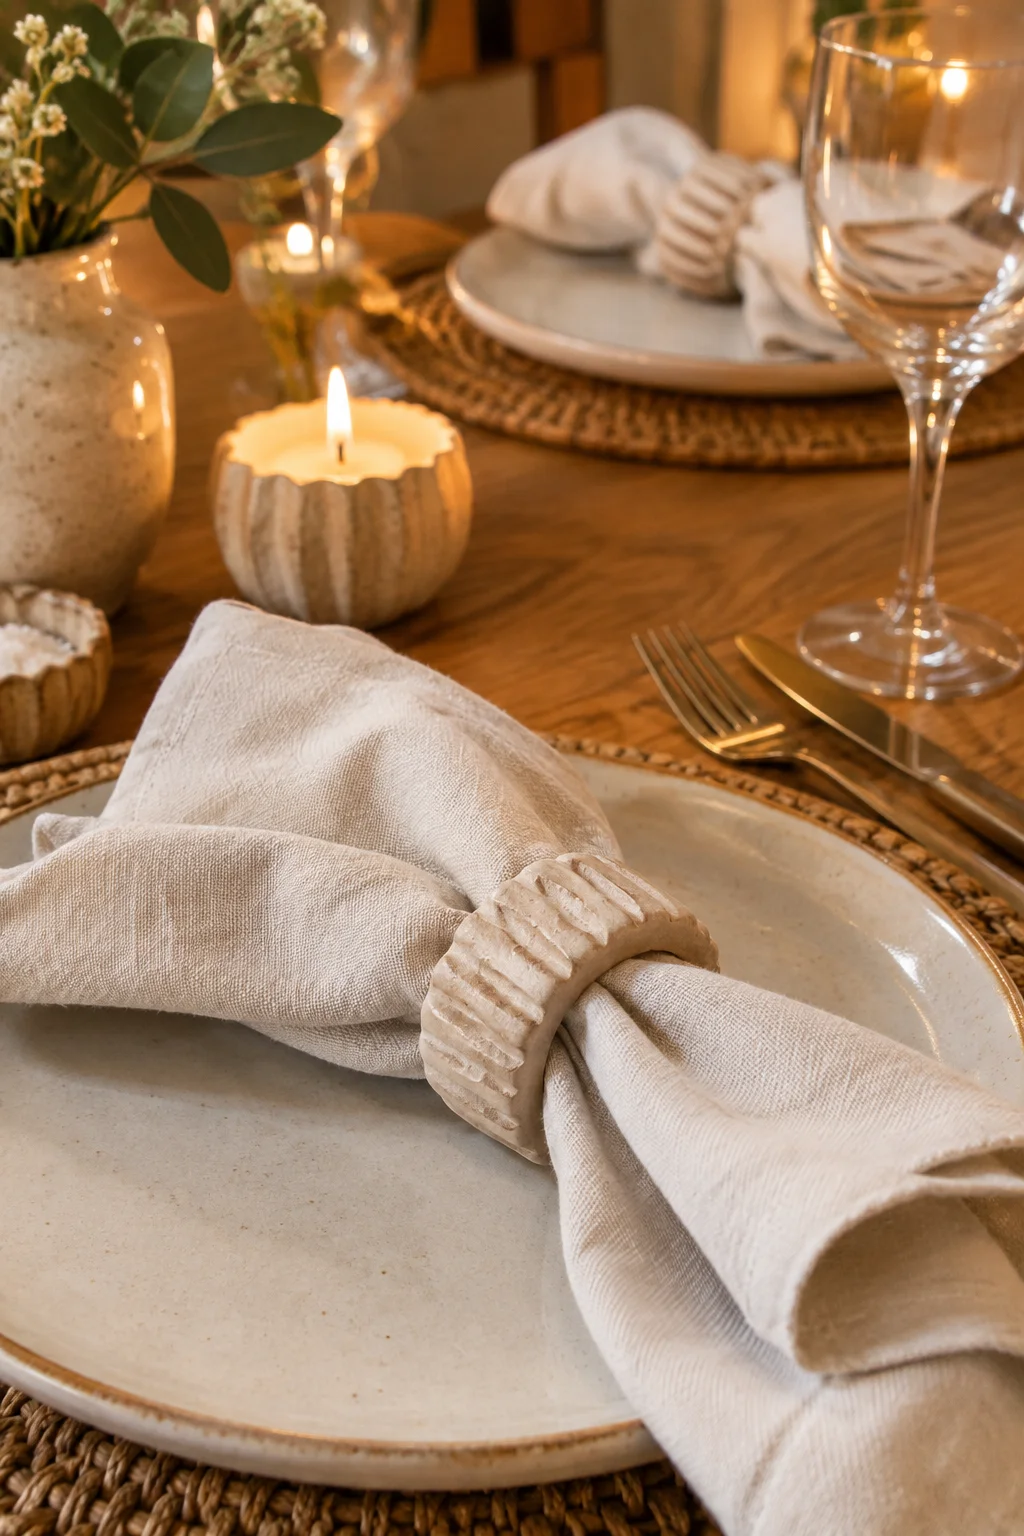
Wrap a thin clay strip around a paper towel tube cut down to size, press a texture into it with lace, burlap, or the back of a knife, and let it dry right there on the tube so it holds a perfect circle. Six of these on a Tuesday table changes the whole feel of dinner without anyone having to say why.
Standing Place Cards That Do Double Duty as Party Favors

Paper place cards get tossed the second the meal ends. A small clay tag with a slit cut in the base to hold a card, or a name written straight on with a fine paint pen, gives guests something worth taking home instead of throwing away.
- Cut a slit while the clay is soft, deep enough to grip a folded card without wobbling
- Keep the shape simple, an oval or a rounded rectangle holds up better than thin points
- Write names after sealing, not before, so ink doesn’t bleed into the raw clay
- ▸Cut the card slit while the clay is still soft
- ▸Stick to simple shapes so they stand without tipping
- ▸Write names after sealing, never on raw clay
A Carved-Edge Trinket Tray for the Stuff That Piles Up by the Sink

Rings, a hair tie, loose change, the small stuff that collects on a bathroom counter needs somewhere to land besides a puddle by the faucet. Drape a slab over an upside down bowl for the curve, then trim the edge with a wavy pastry wheel instead of a straight knife while it’s still soft. That one swap is the difference between a tray that looks poured in a mold and one that looks handmade on purpose.
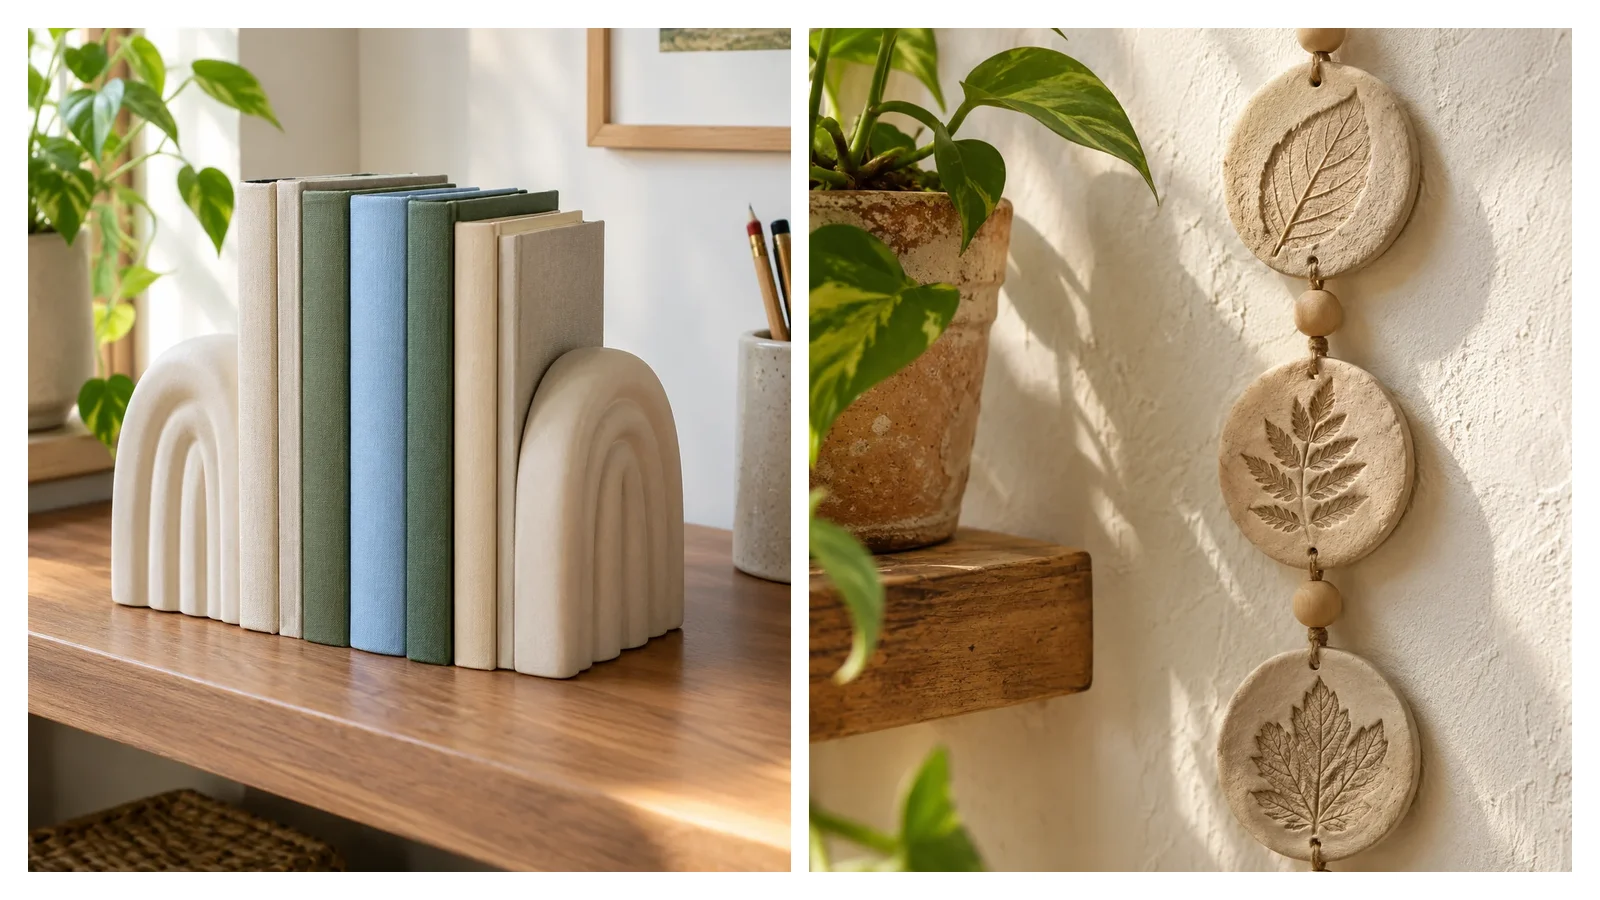
Abstract Arch Bookends That Actually Hold Books Up
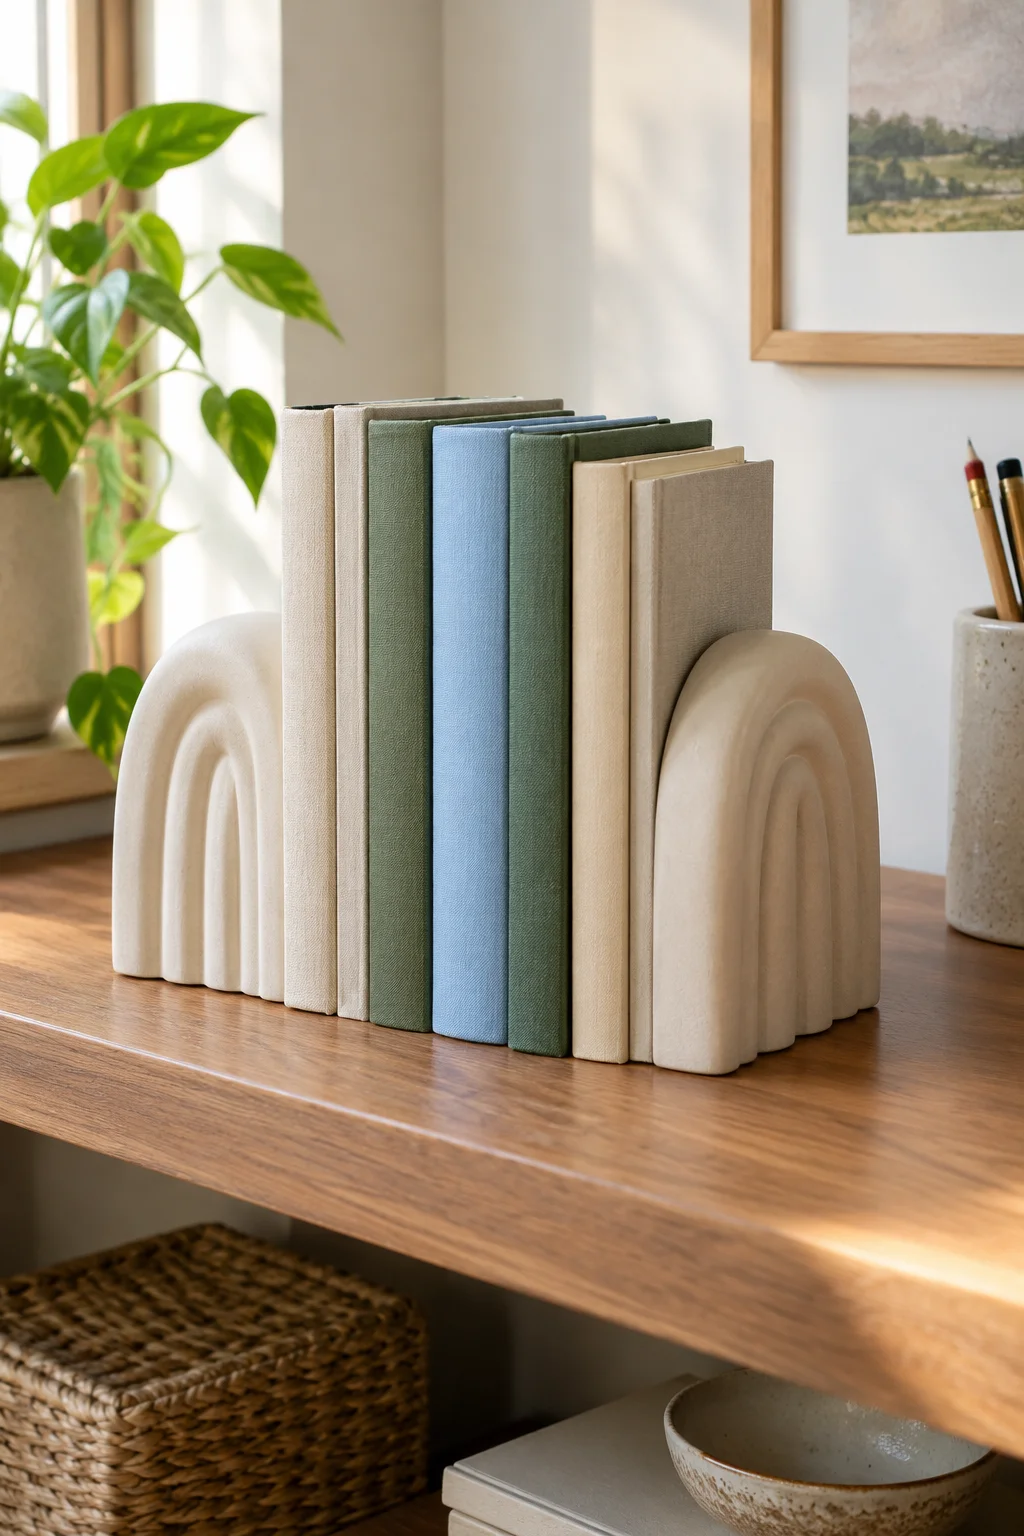
Most clay bookends fail at one job: they’re too light to actually stop books from sliding. Build the base thick, at least an inch, and pack a layer of clean pebbles or sand into a hollow you leave in the center before sealing the bottom over with a final slab of clay. The extra weight sits low, so the piece won’t tip even under a full shelf of hardcovers leaning into it.
💡 Quick Tip
Let the weighted base dry for a full extra day before use. A thick, packed center takes longer to cure all the way through than the thin outer shell suggests.
Stamped Plant Markers So You Stop Guessing What’s Growing Where
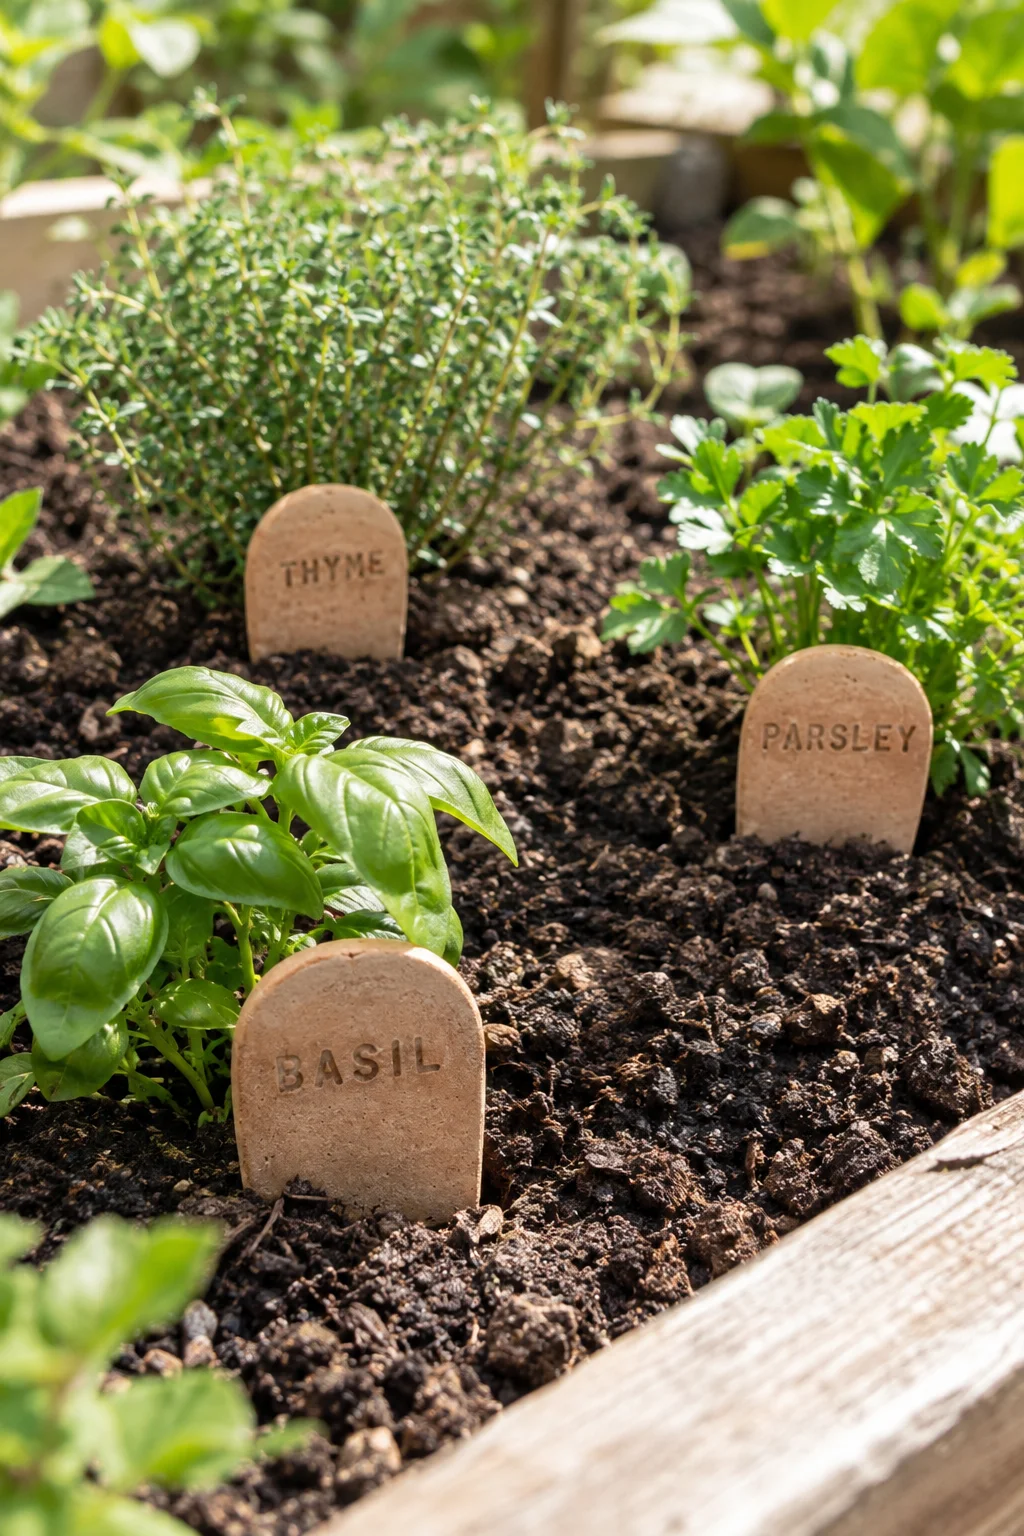
By July, every seedling in a garden bed looks the same, and the paper tags that came with the seeds have long since faded or blown away. Letter stamps pressed into a small clay stake before it dries solve that for good, since the impression doesn’t wash off or fade in the sun the way ink on paper does.
Stamp letters into damp clay before it starts to firm.
Seal both sides so ground moisture doesn’t soften the stake.
Writing with a pen on dried, unsealed clay.
Leaving the base thin, since it snaps easily in soil.
A Faux-Marble Pendant That Looks Like It Came From a Jewelry Case
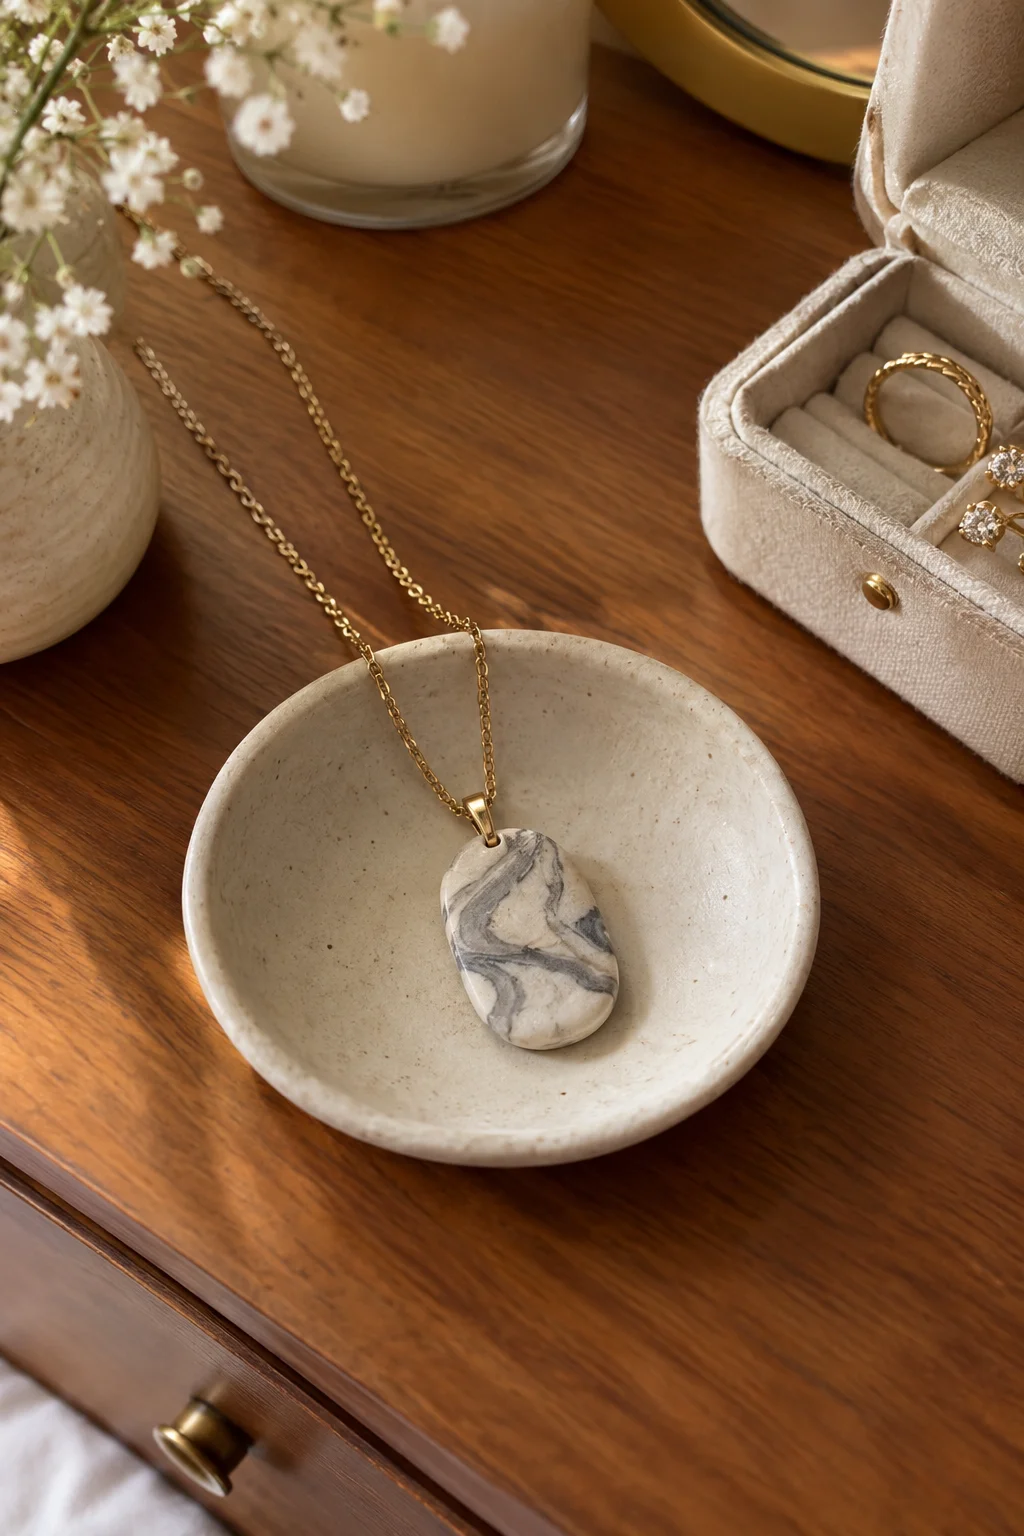
That marbled look on jewelry from small maker shops comes from barely mixing two clay colors together, not from anything technical. Under mixing is actually the whole trick here.
- Twist a light and dark clay together just three or four turns, no more
- Roll gently so the veins stretch out instead of blending into one flat color
- Cut the pendant shape after marbling, never before, so the pattern isn’t distorted by cutting
Thread it on a simple cord once fully dry and sealed with a glossy finish for real depth.
Twist light and dark clay together just three or four turns.
Roll gently so the veins stretch instead of blending flat.
Cut the pendant shape after marbling, not before.
A Carved Taper Candle Holder for a Table That Needs One Good Centerpiece
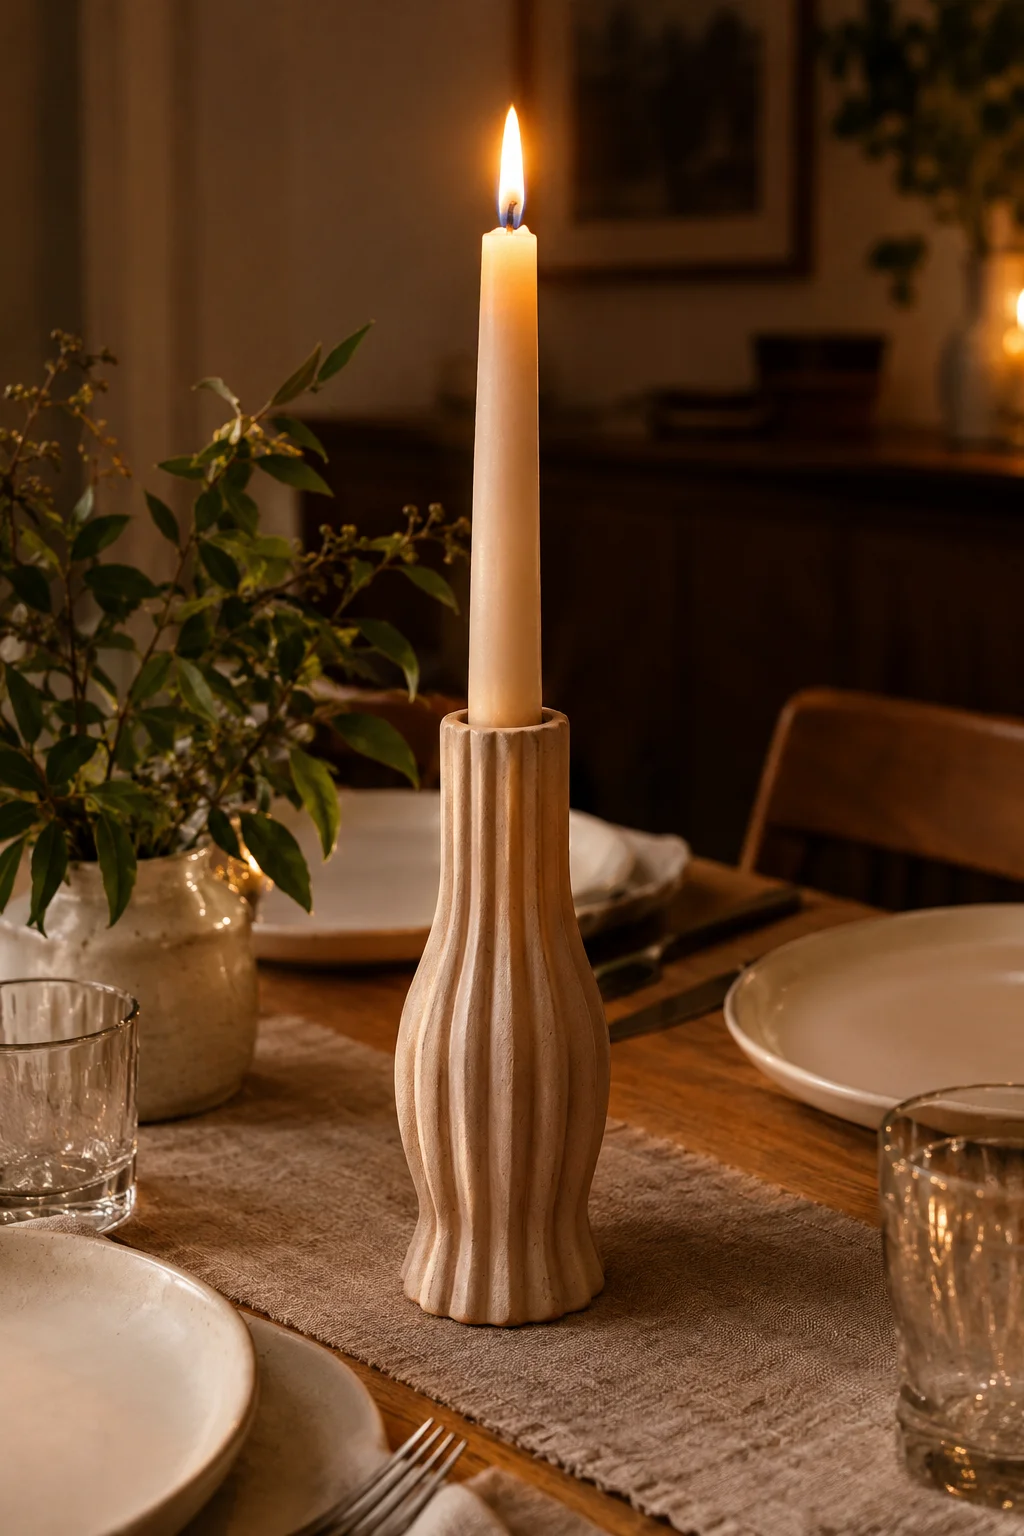
A dinner table with just food on it feels unfinished in a way that’s hard to name until a candle fixes it. Shape a block of clay around the base of an actual taper candle to get the hole sized right, remove the candle, then let the clay firm up before carving grooves down the sides with a dull knife.
Shape the candle hole around the real candle, not by guessing the width, or the fit will be too loose or too tight once it dries.
Small Arch Wall Hooks for Keys, Leashes, and the Stuff by the Door
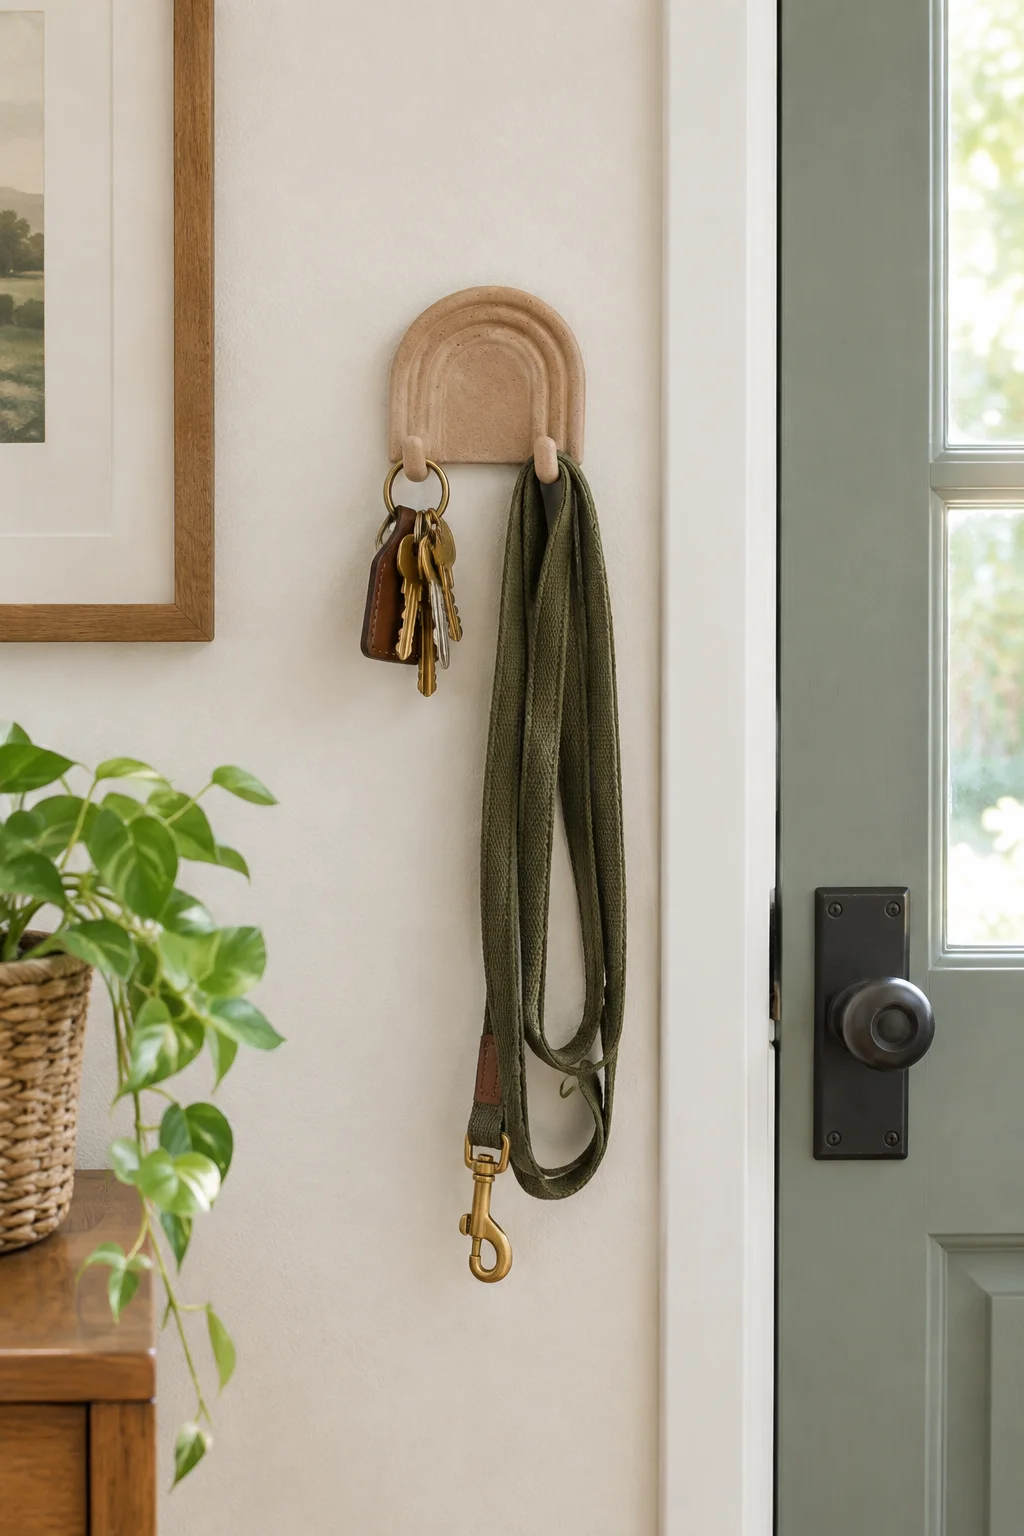
The spot by the front door is where keys, a leash, and a jacket all fight for the same nail. An arch shaped hook base, built the same way as the wall niche earlier in this list, gives that clutter an actual home instead of a hook screwed straight into bare drywall.
Press a wooden peg or a metal screw hook into the wet clay near the bottom before it dries, angled slightly downward so whatever hangs there doesn’t slide off. Size matters more than people expect here.
| Small Arch (3 to 4 in) | Large Arch (6 in plus) |
|---|---|
| Good for keys, a single leash, light bags | Holds a jacket or a heavier tote |
| Dries fully in about a day | Needs a full extra day to cure through |
A Pinch Pot Jewelry Bowl With a Gold-Painted Rim
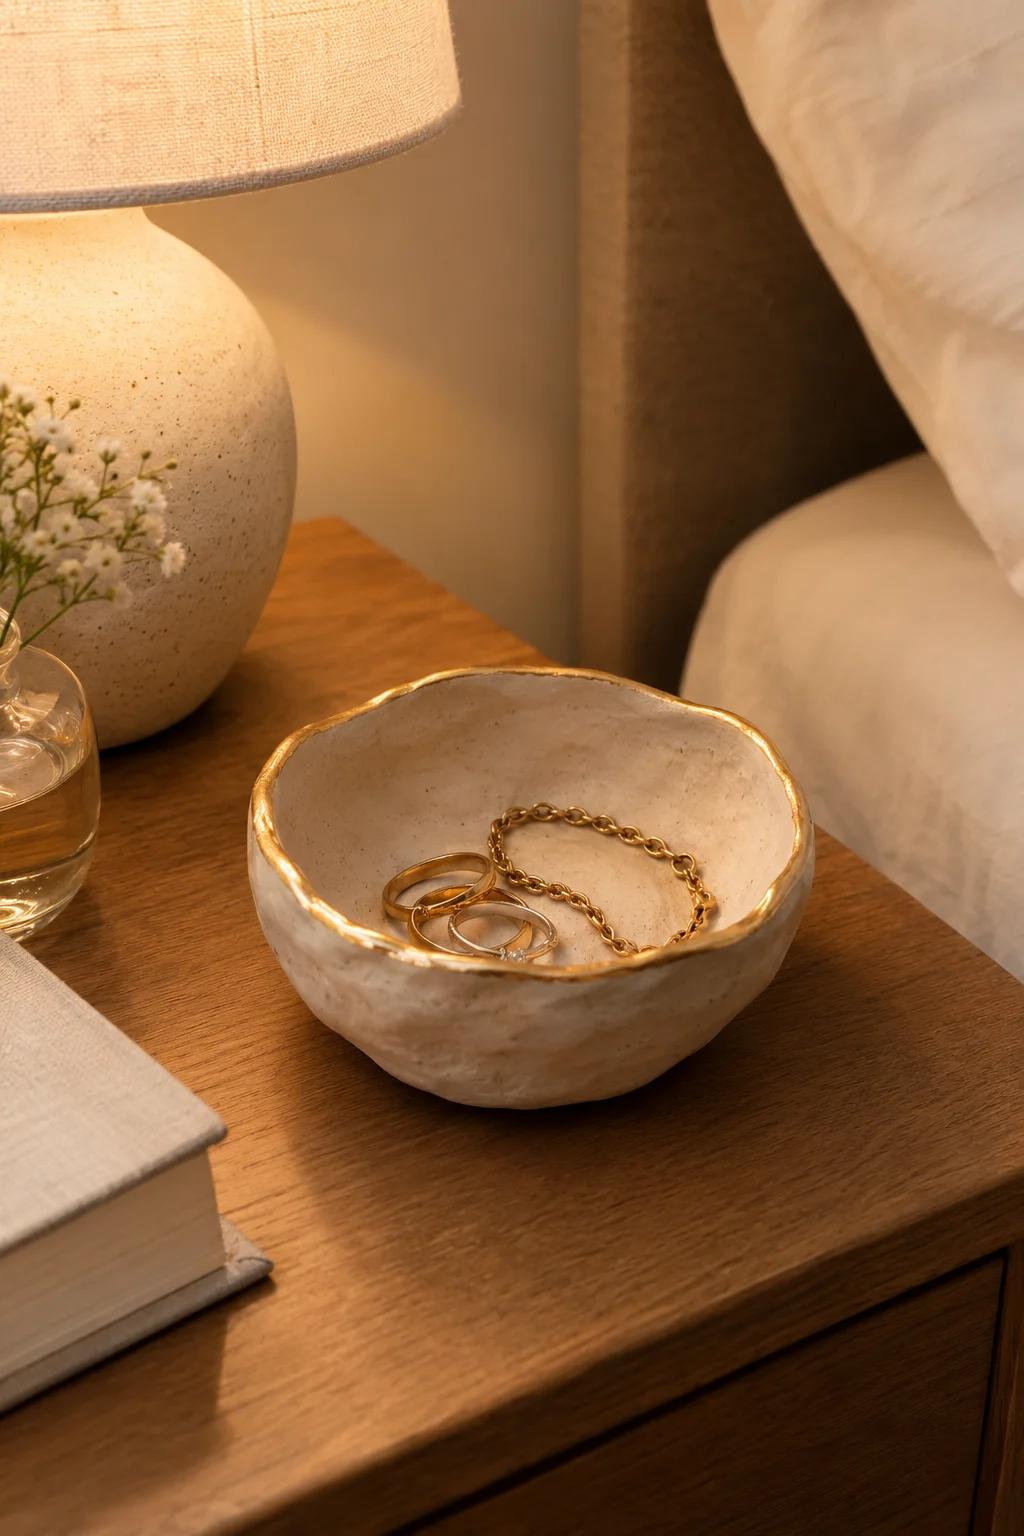
A plain pinch pot, just a ball of clay pushed into shape with your thumbs, looks like a kid’s craft project until one detail changes everything. Paint only the top rim with a fine gold liner brush once the piece is fully dry and sealed, leaving the rest of the bowl in its natural matte tone.
That single gold line is what moves it from homemade to the kind of small dish people buy at boutique home stores for far more than clay actually costs.
A plain, uneven pinch pot in one flat matte color.
A small dish with a hand painted gold rim that reads as boutique made.
One Last Thing Before You Start
None of these air dry clay projects need a kiln, a wheel, or years of practice. What they need is patience with the small stuff, letting a shape firm up before carving into it, rolling a slab a little thicker than feels natural, painting in muted tones instead of straight from the bottle. That’s really the whole difference between a project that looks handmade in a good way and one that looks rushed.
Start with whichever idea matches something you already have lying around, a jam jar for the flower frog, a paper towel tube for the napkin rings, and build from there. Save this list of air dry clay projects for a slower weekend when you’re ready to try a few.